Hola a tod@s
En esta oportunidad vengo a mostrarles la implementación inicial del appliance virtual de la compañía Object First. También veremos cómo acceder el portal Web de manejo.
Este dispositivo de OOTBI ofrece almacenamiento seguro para la aplicación de resguardo de la compañía Veeam Backup & Replication. Aquí les dejo el enlace Web de Object First:
Según Object First el OOTBI ofrece:
Un almacenamiento a prueba de ransomware e inmutable desde el primer momento,
OOTBIofrece un almacenamiento de copias de seguridad seguro, sencillo y potente.
Beneficios:
- Un almacenamiento 100% desarrollado para Veeam.
- Arquitectura tipo
Zero Trust Data Resilience (ZTDR). - Bloqueo de objetos nativo de S3. Seguro, resiliente y diseñado específicamente: los datos están aislados y son intocables.
- Los sistemas basados en objetos anticipan la escalabilidad horizontal, que nunca sacrifica el rendimiento por la capacidad.
- Los errores, peculiaridades o limitaciones de un sistema de archivos tradicional están ausentes en las arquitecturas basadas en objetos.
- Copia de datos segura y directa de las instalaciones a la nube en formato S3 sin sobrecarga.
- El protocolo S3 garantiza la entrega de datos (a diferencia de SMB o NFS), por lo que las empresas obtienen fiabilidad de datos de extremo a extremo.
- Soluciona de forma nativa muchas de las necesidades de disponibilidad que las organizaciones tienen en cuenta a la hora de implementar el almacenamiento de backup y la regla de las backup 3-2-1.
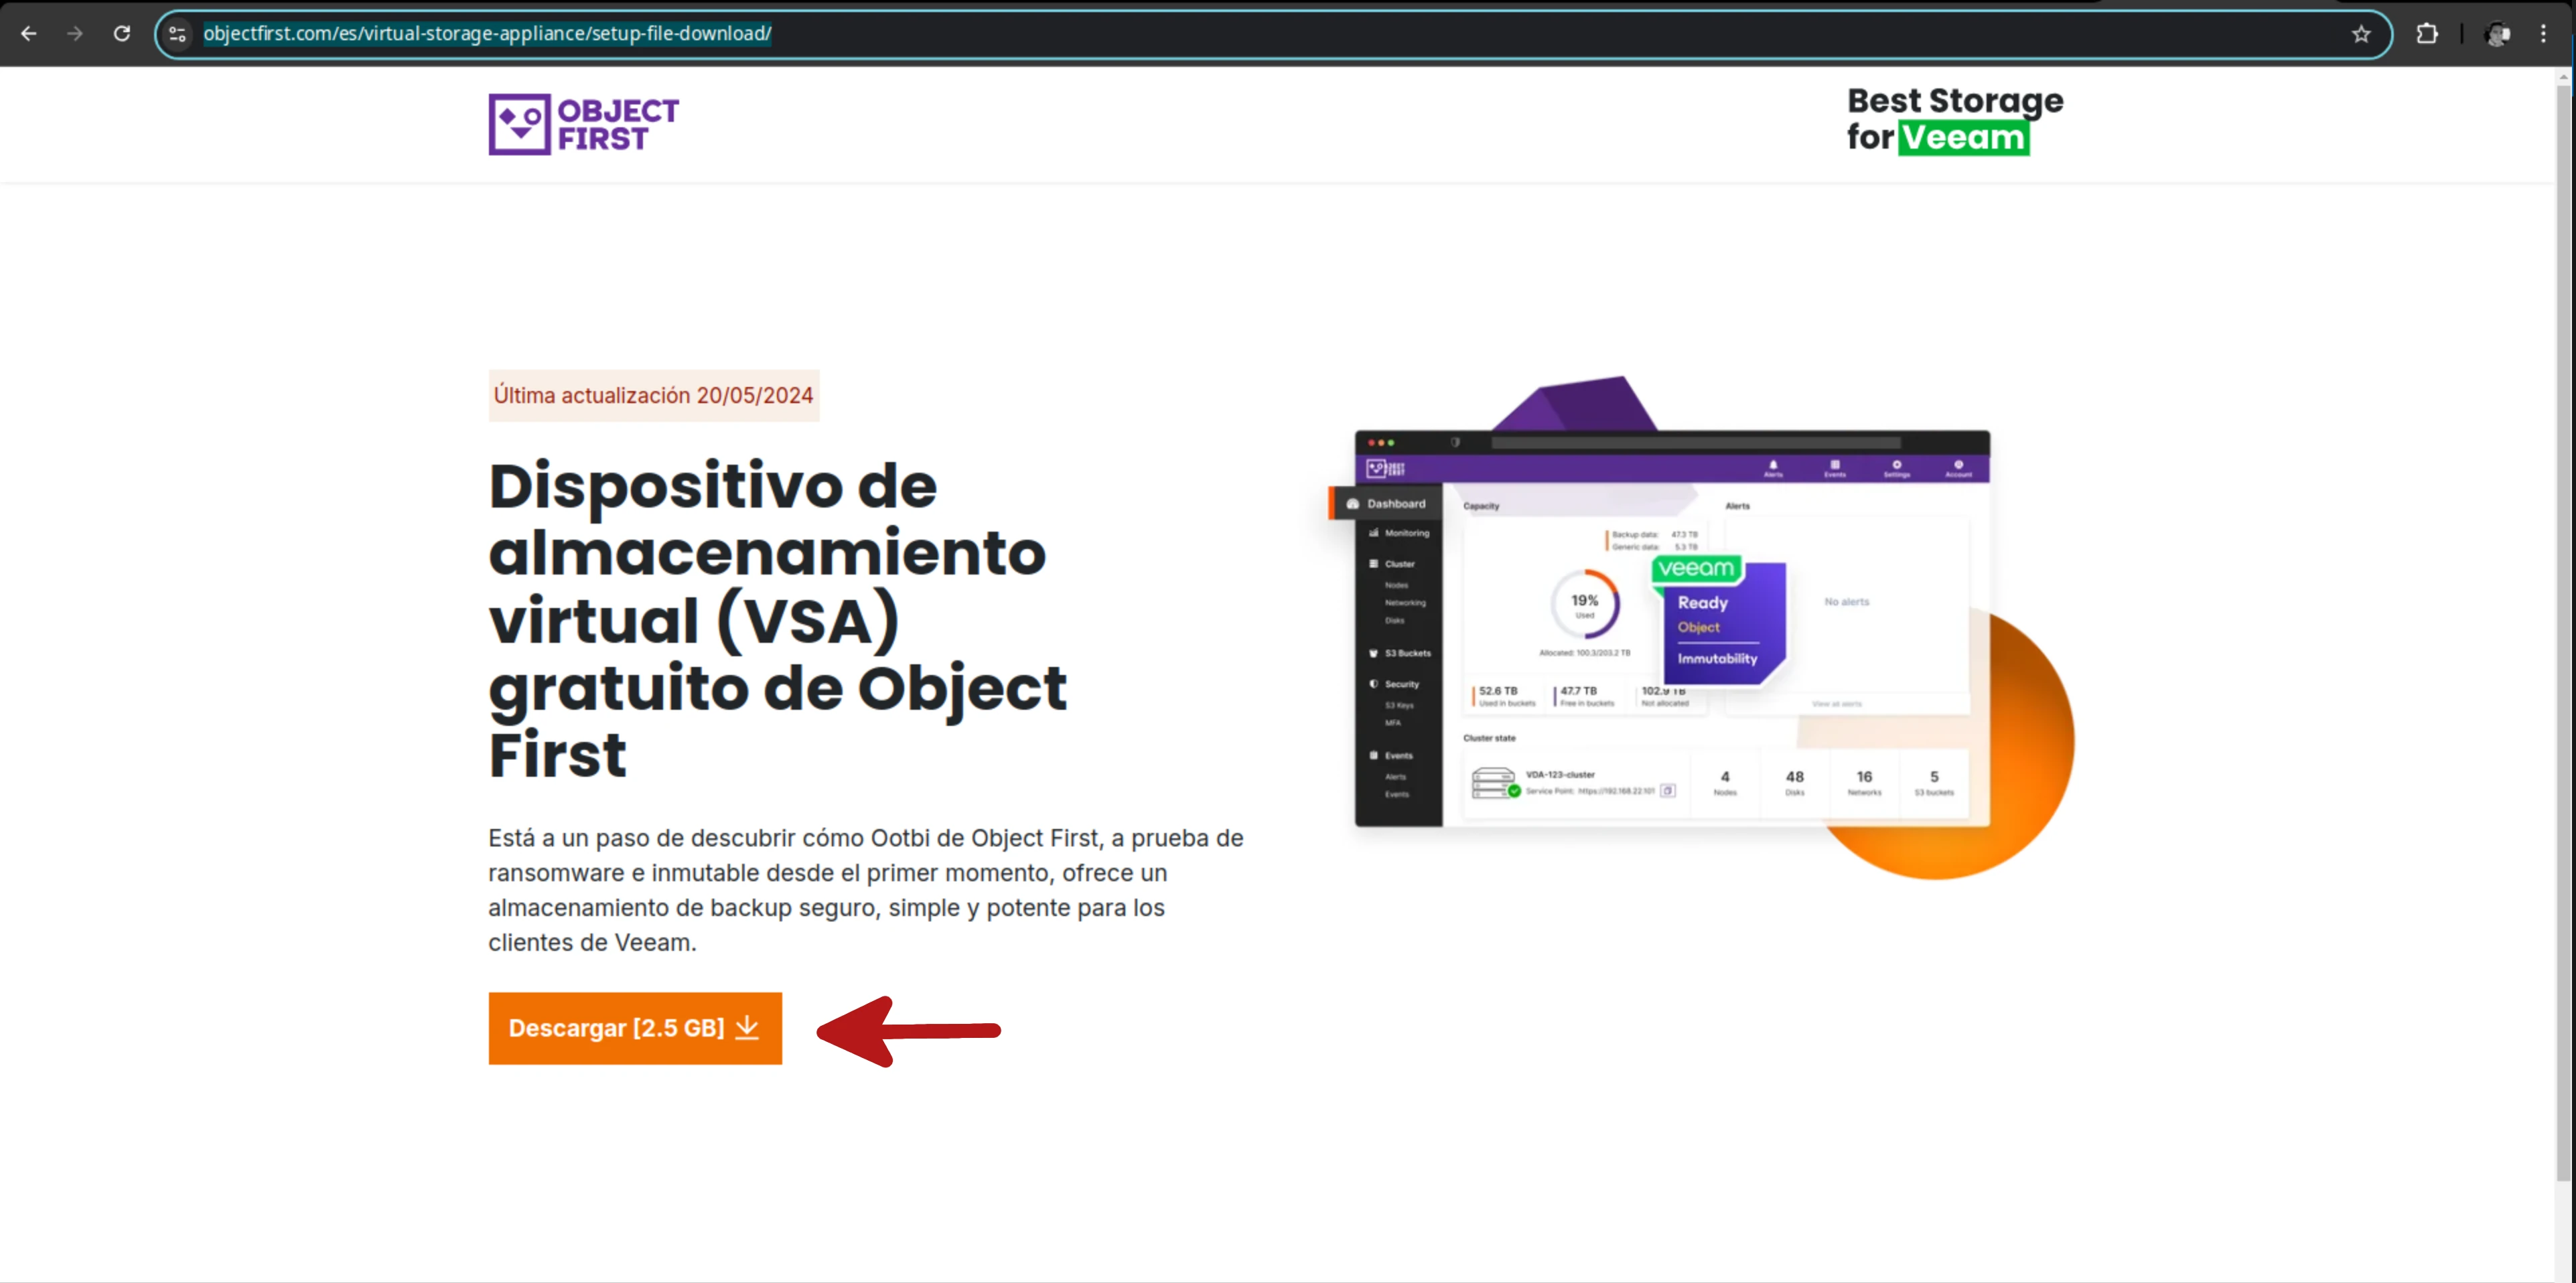
Para comenzar debemos de acceder el siguiente enlace donde podemos descargar el archivo tipo OVA que permite gestionar la creación de la maquina virtual donde corren los servicios de OOTBI.
Una vez accedemos al portal de Object First nos ubicamos al área donde podemos descargar el archivo con la extensión OVA.
A continuación les incluyo el proceso de crear la VM utilizando el template que bajamos en el formato OVA.
Instalando OOTBI a través de VMware vCenter
En esta sección estaré creando el récord de DNS que se utilizara para hacer resolución de nombre del appliance.
Creación de récord A en DNS con Powershell
Windows PowerShell
Copyright (C) Microsoft Corporation. All rights reserved.

PS C:\Users\Administrator> Add-DnsServerResourceRecordA -Name veeam-ootbi-00v -IPv4Address 192.168.5.51 -ZoneName pharmax.local -CreatePtr -AllowUpdateAny

PS C:\Users\Administrator> Get-DnsServerResourceRecord -Name veeam-ootbi-00v -ZoneName pharmax.local

HostName                  RecordType Type       Timestamp            TimeToLive      RecordData
--------                  ---------- ----       ---------            ----------      ----------
veeam-ootbi-00v           A          1          0                    01:00:00        192.168.5.50

PS C:\Users\Administrator> Add-DnsServerResourceRecordA -Name veeam-ootbi-01v -IPv4Address 192.168.5.51 -ZoneName pharmax.local -CreatePtr -AllowUpdateAny

PS C:\Users\Administrator> Get-DnsServerResourceRecord -Name veeam-ootbi-01v -ZoneName pharmax.local

HostName                  RecordType Type       Timestamp            TimeToLive      RecordData
--------                  ---------- ----       ---------            ----------      ----------
veeam-ootbi-01v           A          1          0                    01:00:00        192.168.5.51

PS C:\Users\Administrator>
Validación de récord A en DNS con PowerShell
Windows PowerShell
Copyright (C) Microsoft Corporation. All rights reserved.

Try the new cross-platform PowerShell https://aka.ms/pscore6

PS C:\Users\jocolon> Resolve-DnsName -Name 192.168.5.50

Name                           Type   TTL   Section    NameHost
----                           ----   ---   -------    --------
50.5.168.192.in-addr.arpa      PTR    3600  Answer     VEEAM-OOTBI-00V.pharmax.local


PS C:\Users\jocolon> Resolve-DnsName -Name 192.168.5.51

Name                           Type   TTL   Section    NameHost
----                           ----   ---   -------    --------
51.5.168.192.in-addr.arpa      PTR    3600  Answer     VEEAM-OOTBI-01V.pharmax.local


PS C:\Users\jocolon>
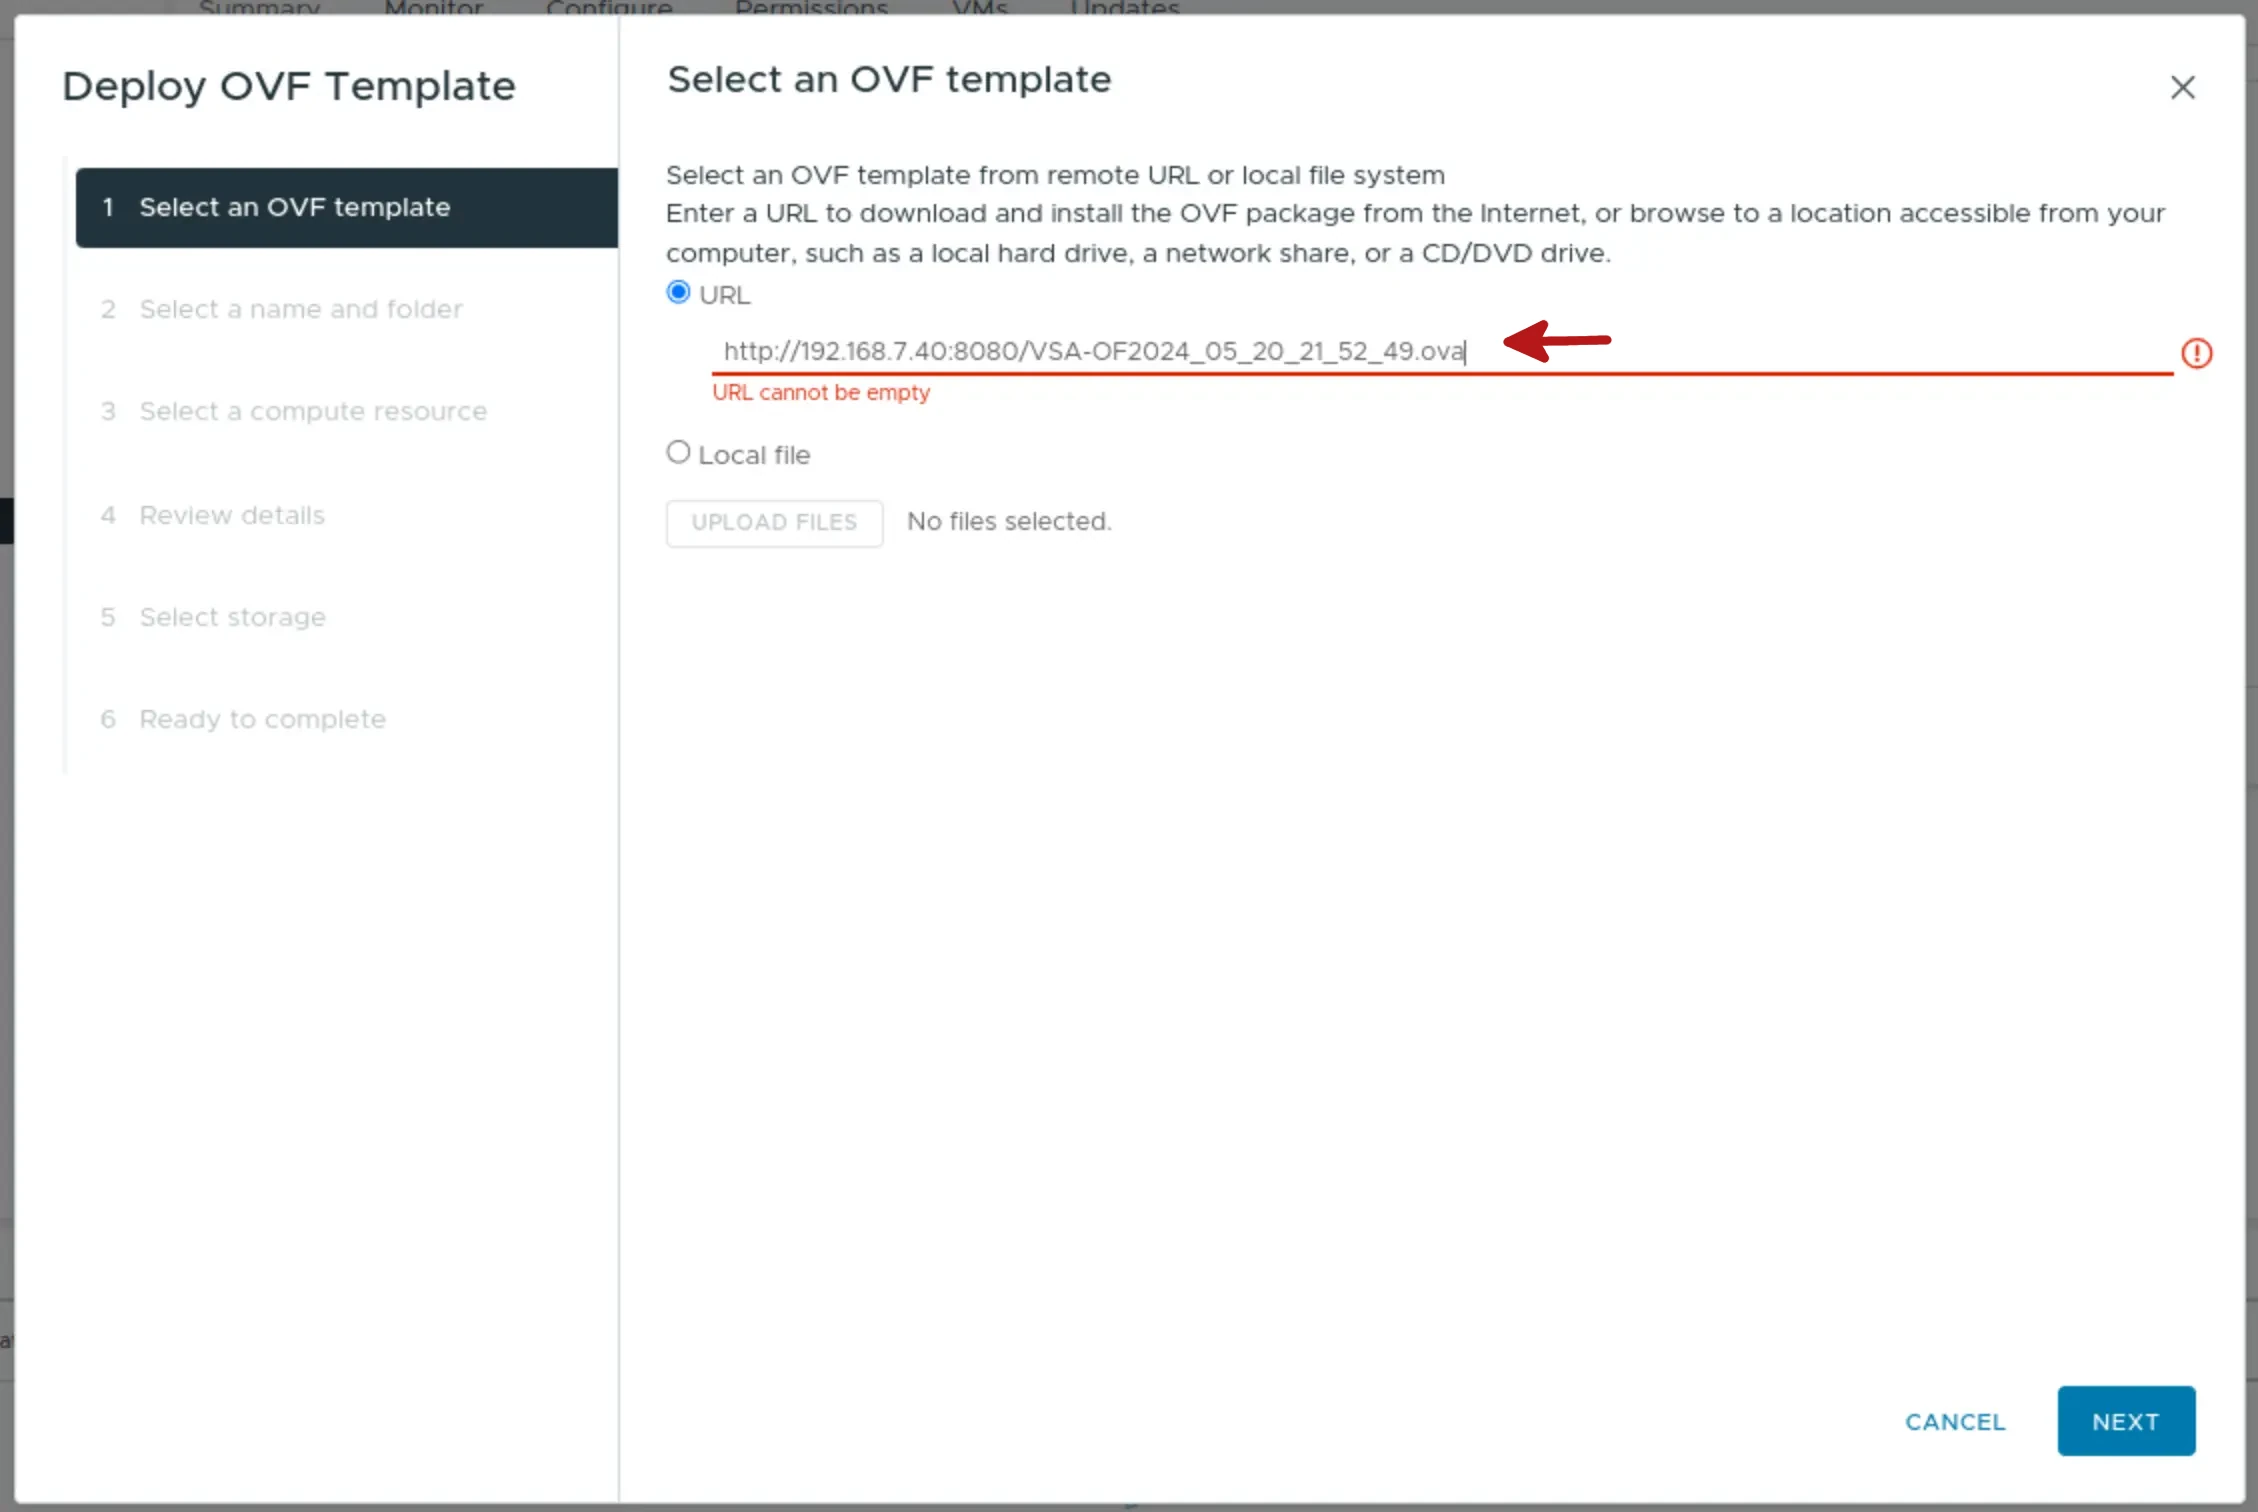
Ya que tenemos la parte del nombre de DNS realizado podemos pasar a realizar el despliegue del appliance. En este caso accedemos el vCenter para hacer el despliegue del archivo tipo OVA.
Paso 1: Despliegue de plantilla OVF

Paso 2: Seleccionar archivo OVA
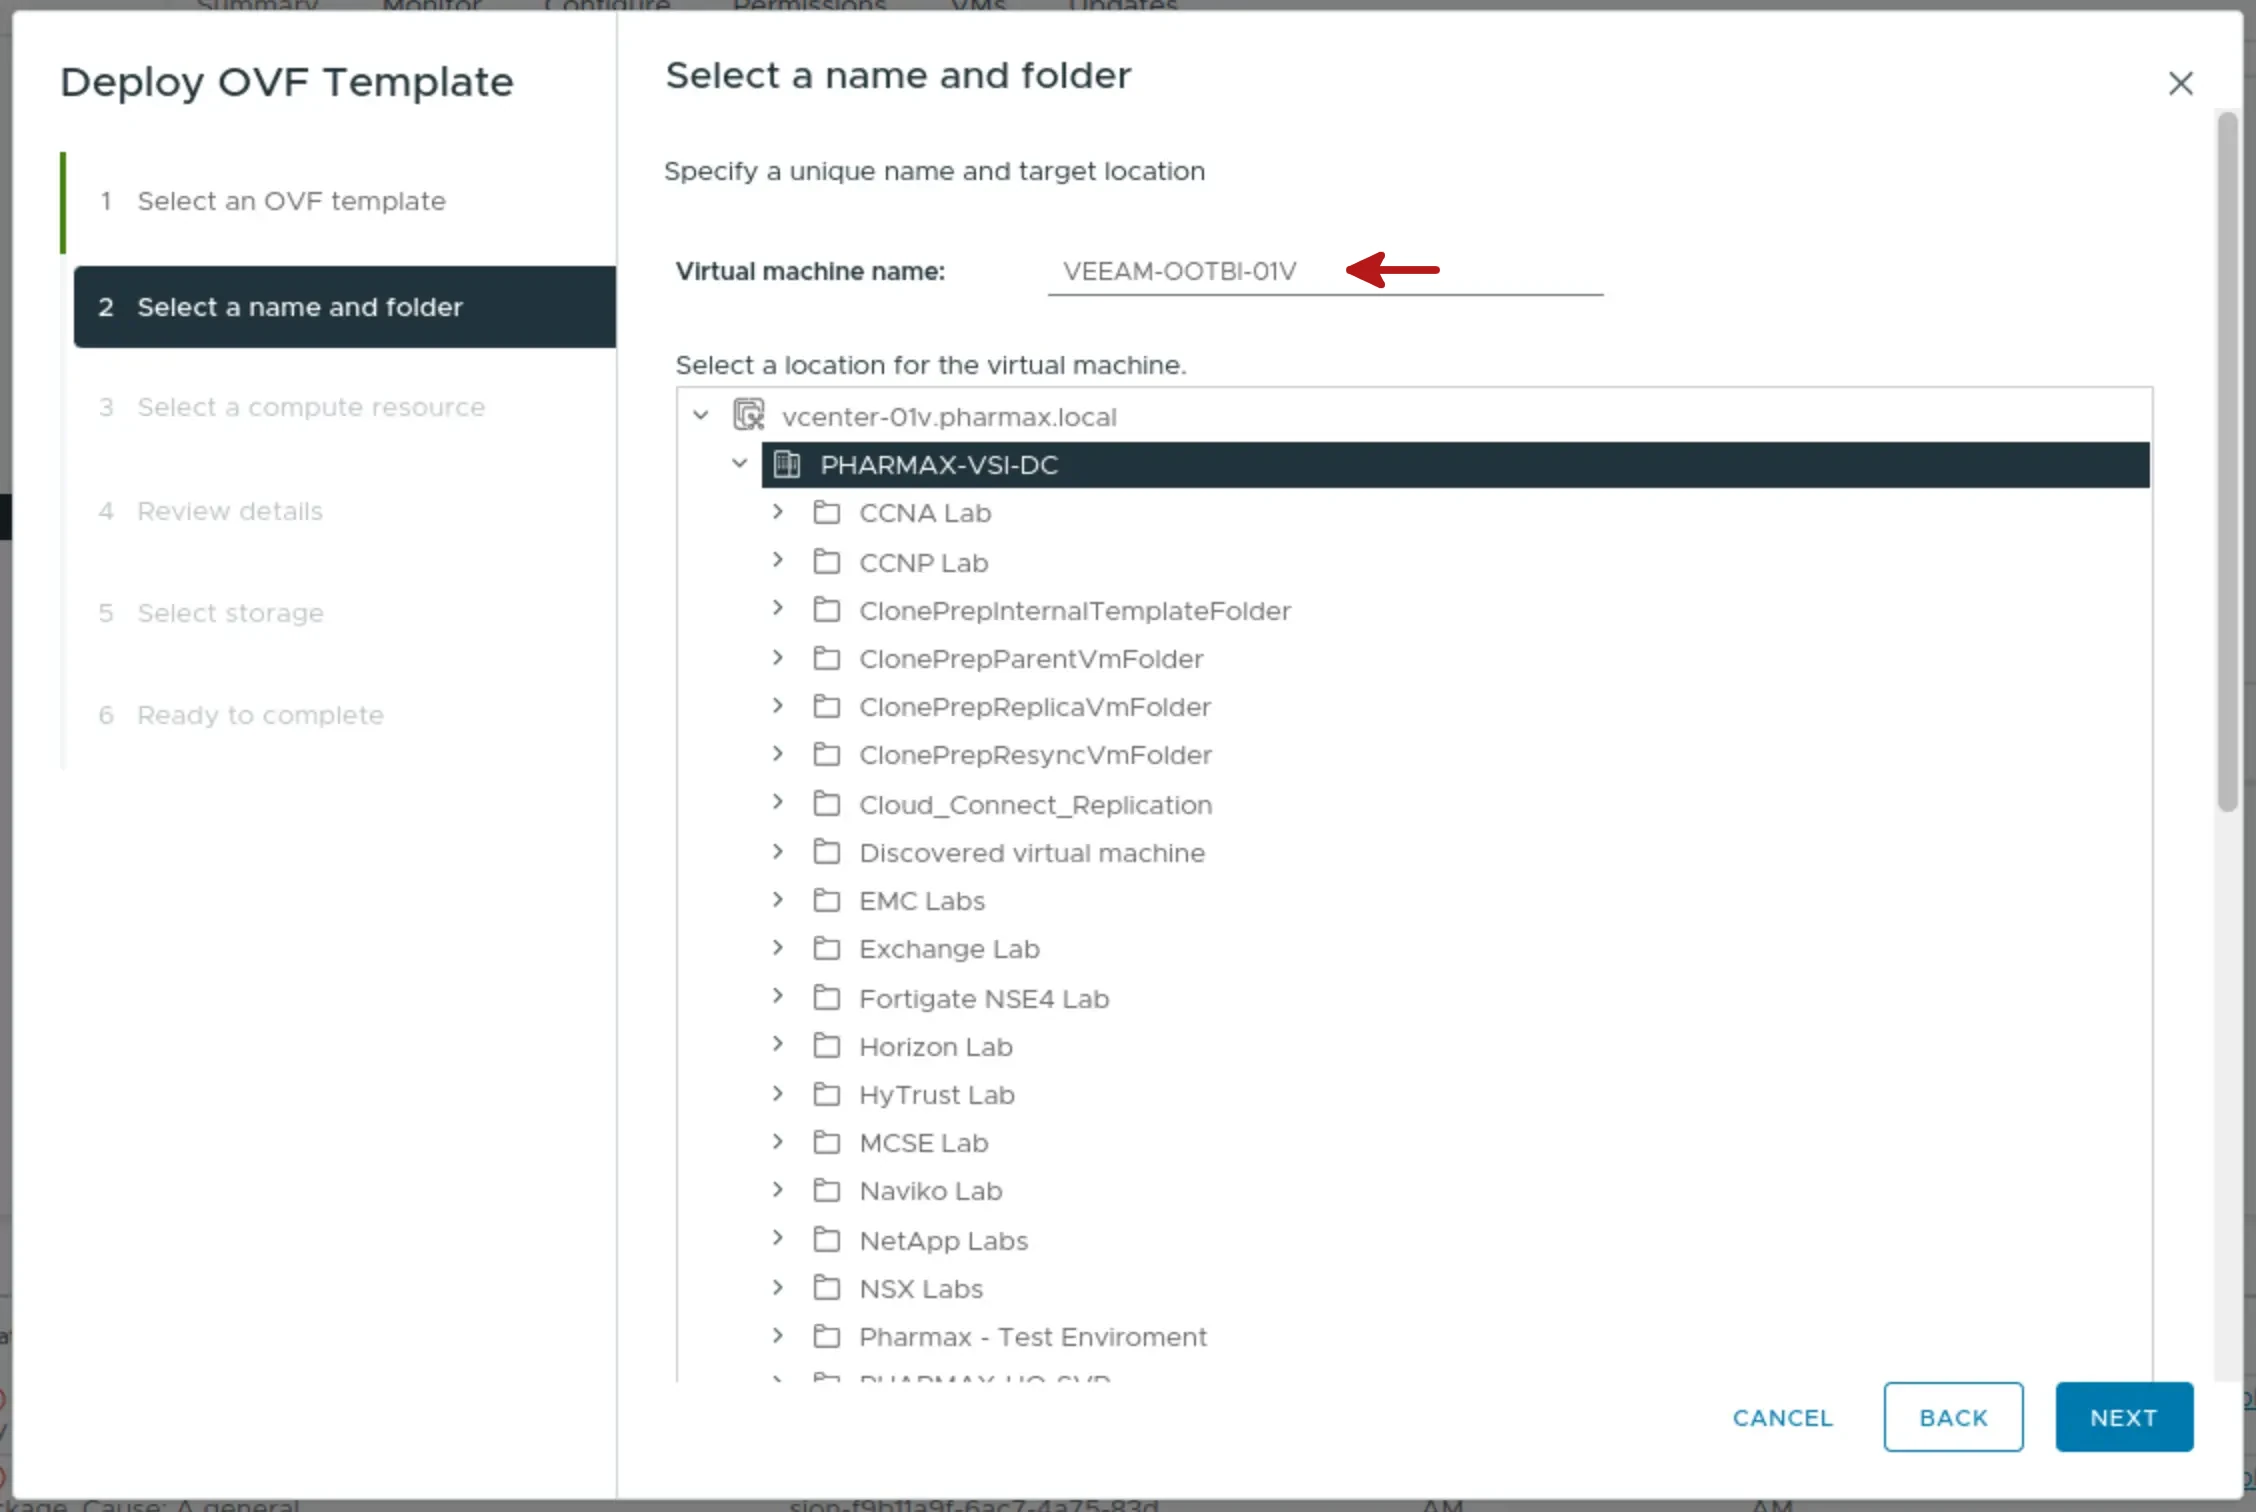
Paso 3: Seleccionar el Nombre de la VM y la carpeta donde se ubicará

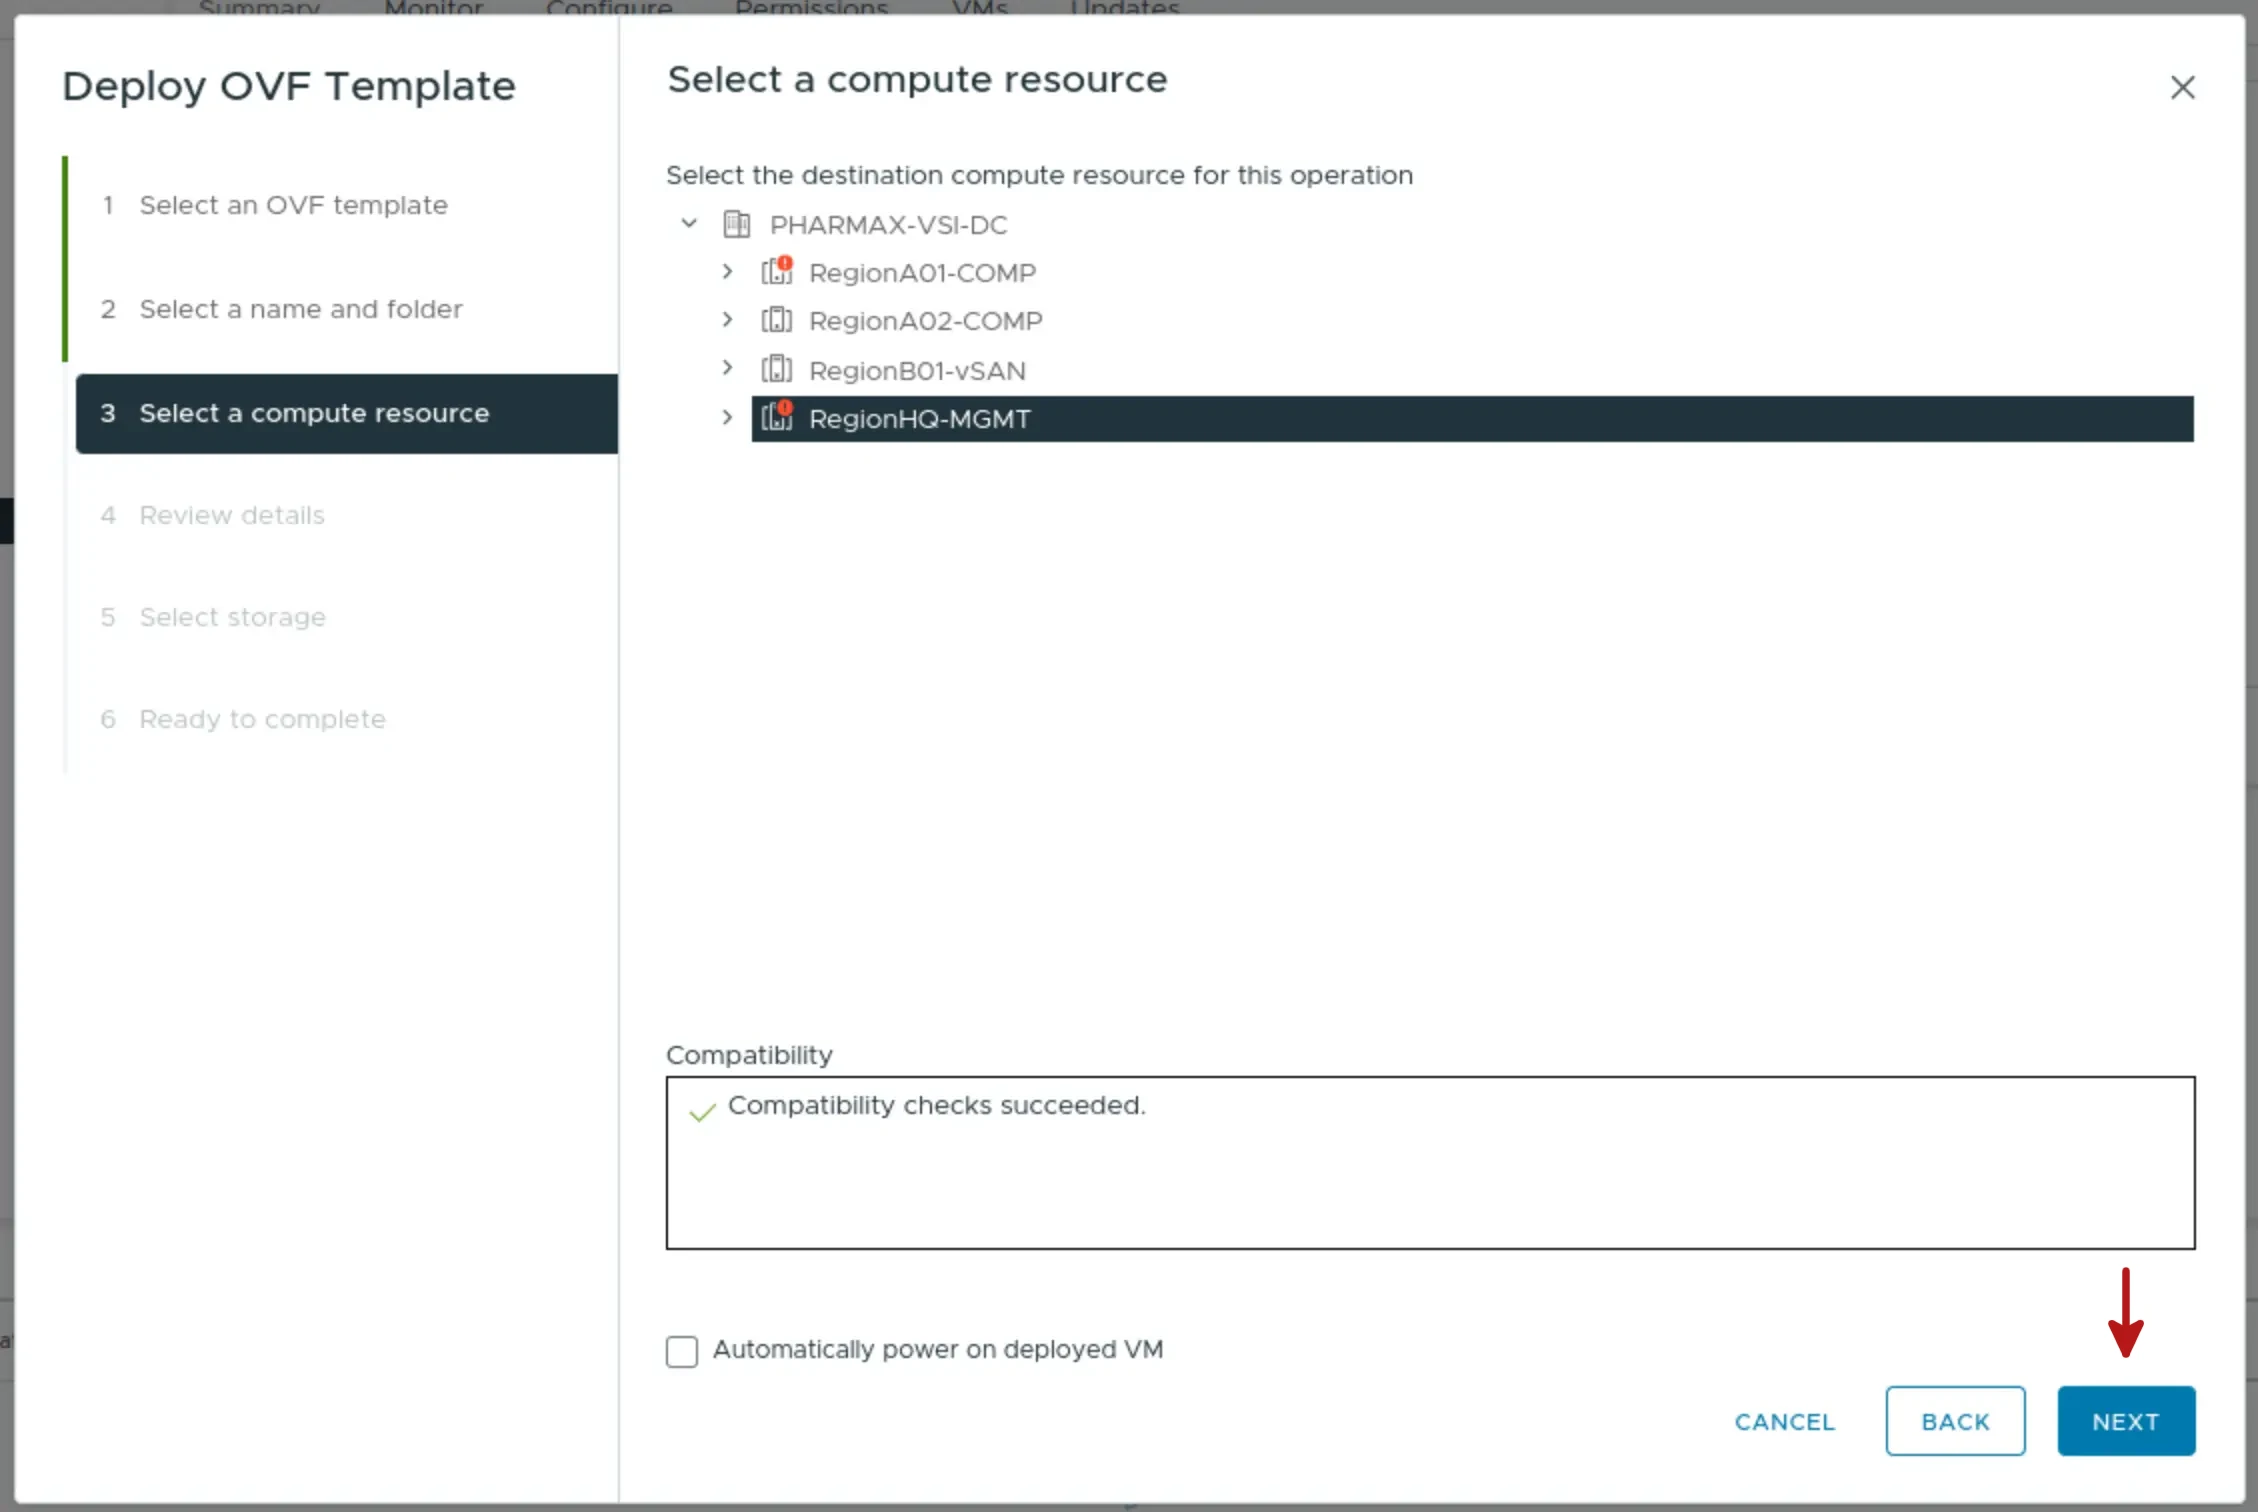
Paso 4: Seleccionar el DataCenter
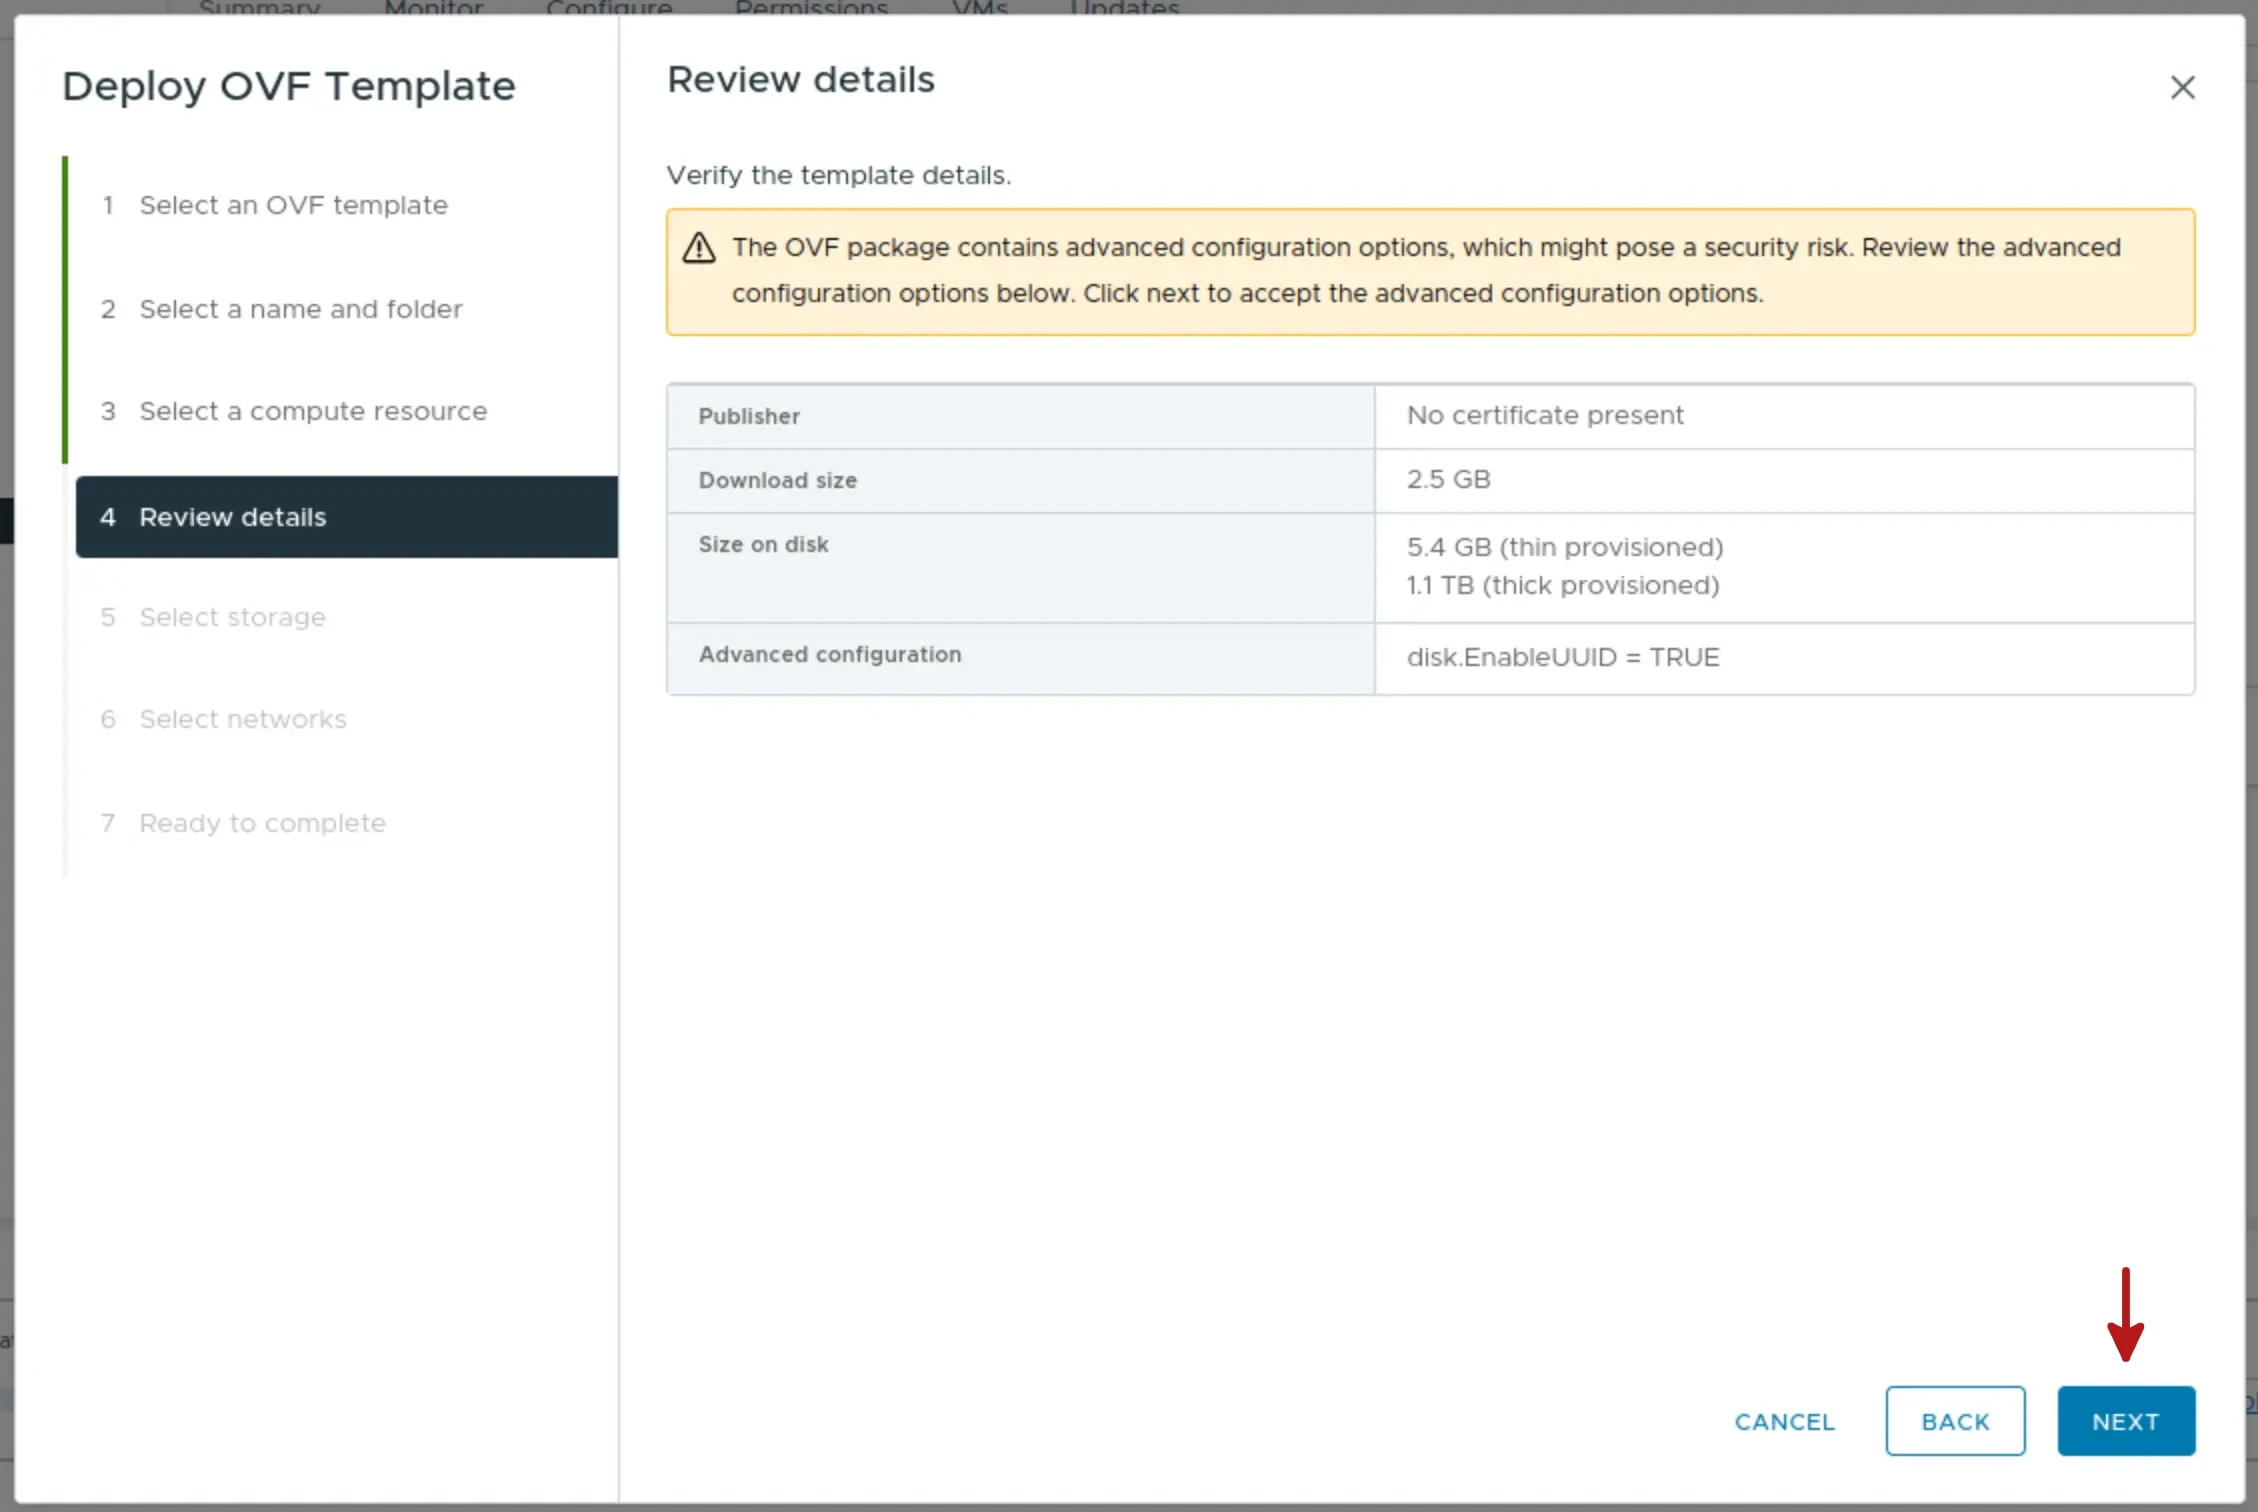
Paso 5: Revisar los detalles
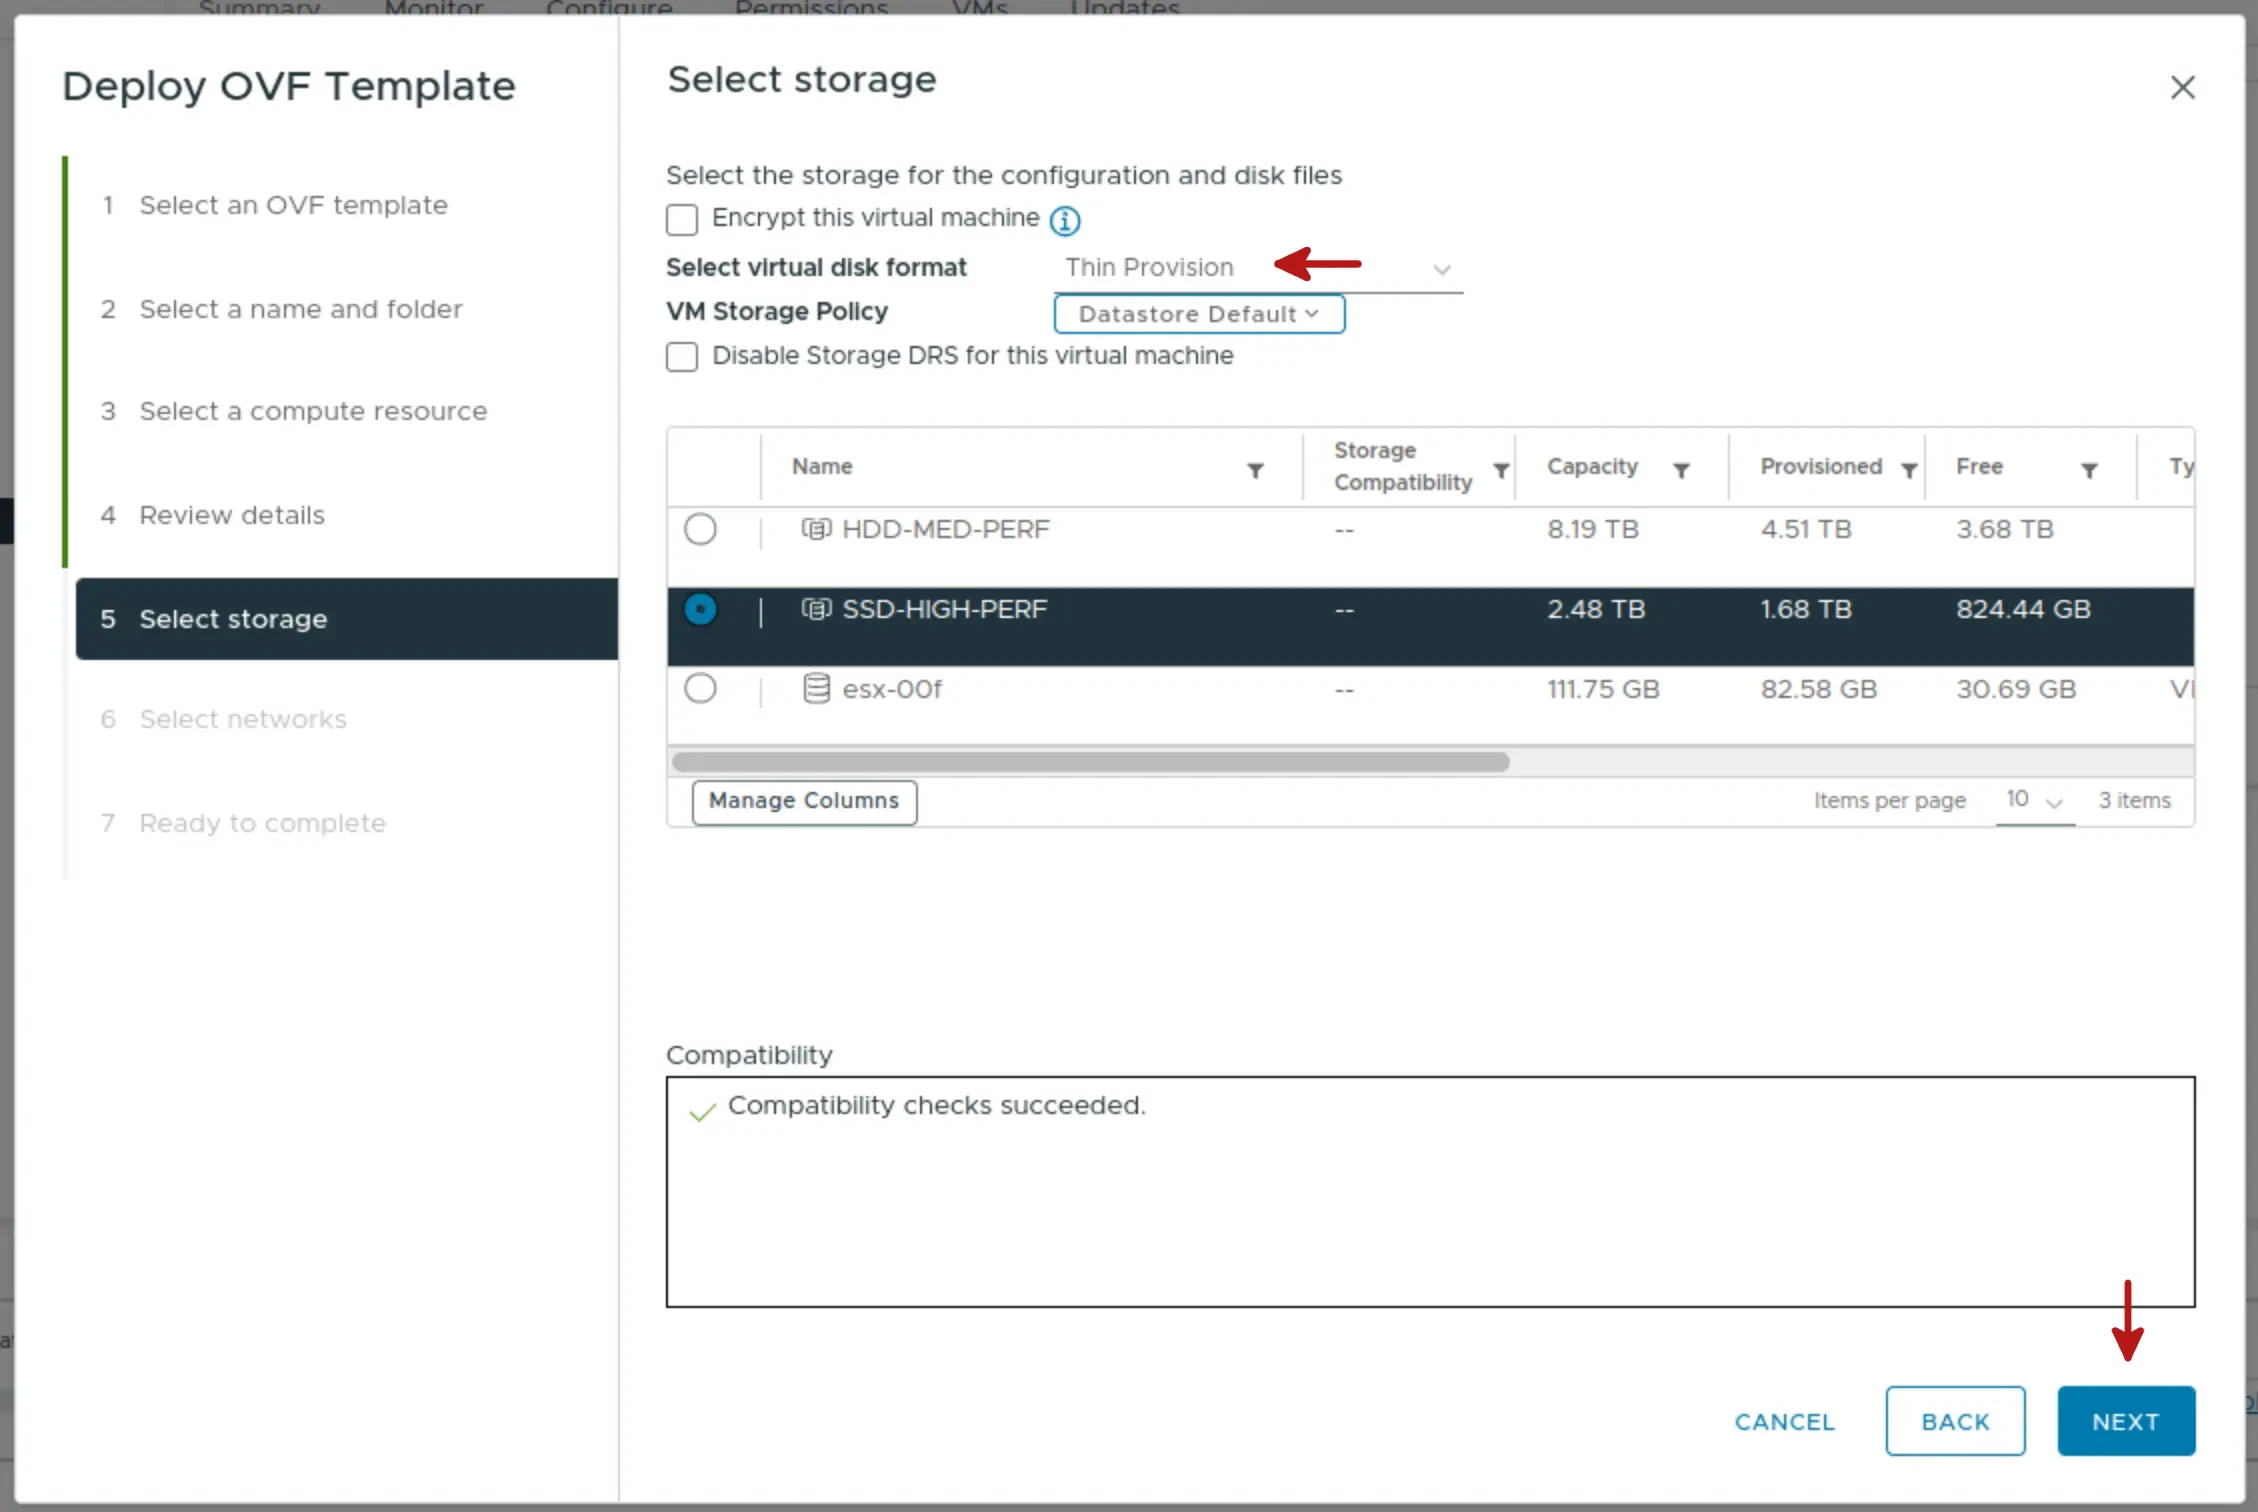
Paso 6: Seleccionar el tipo de disco virtual y el DataStore de almacenamiento
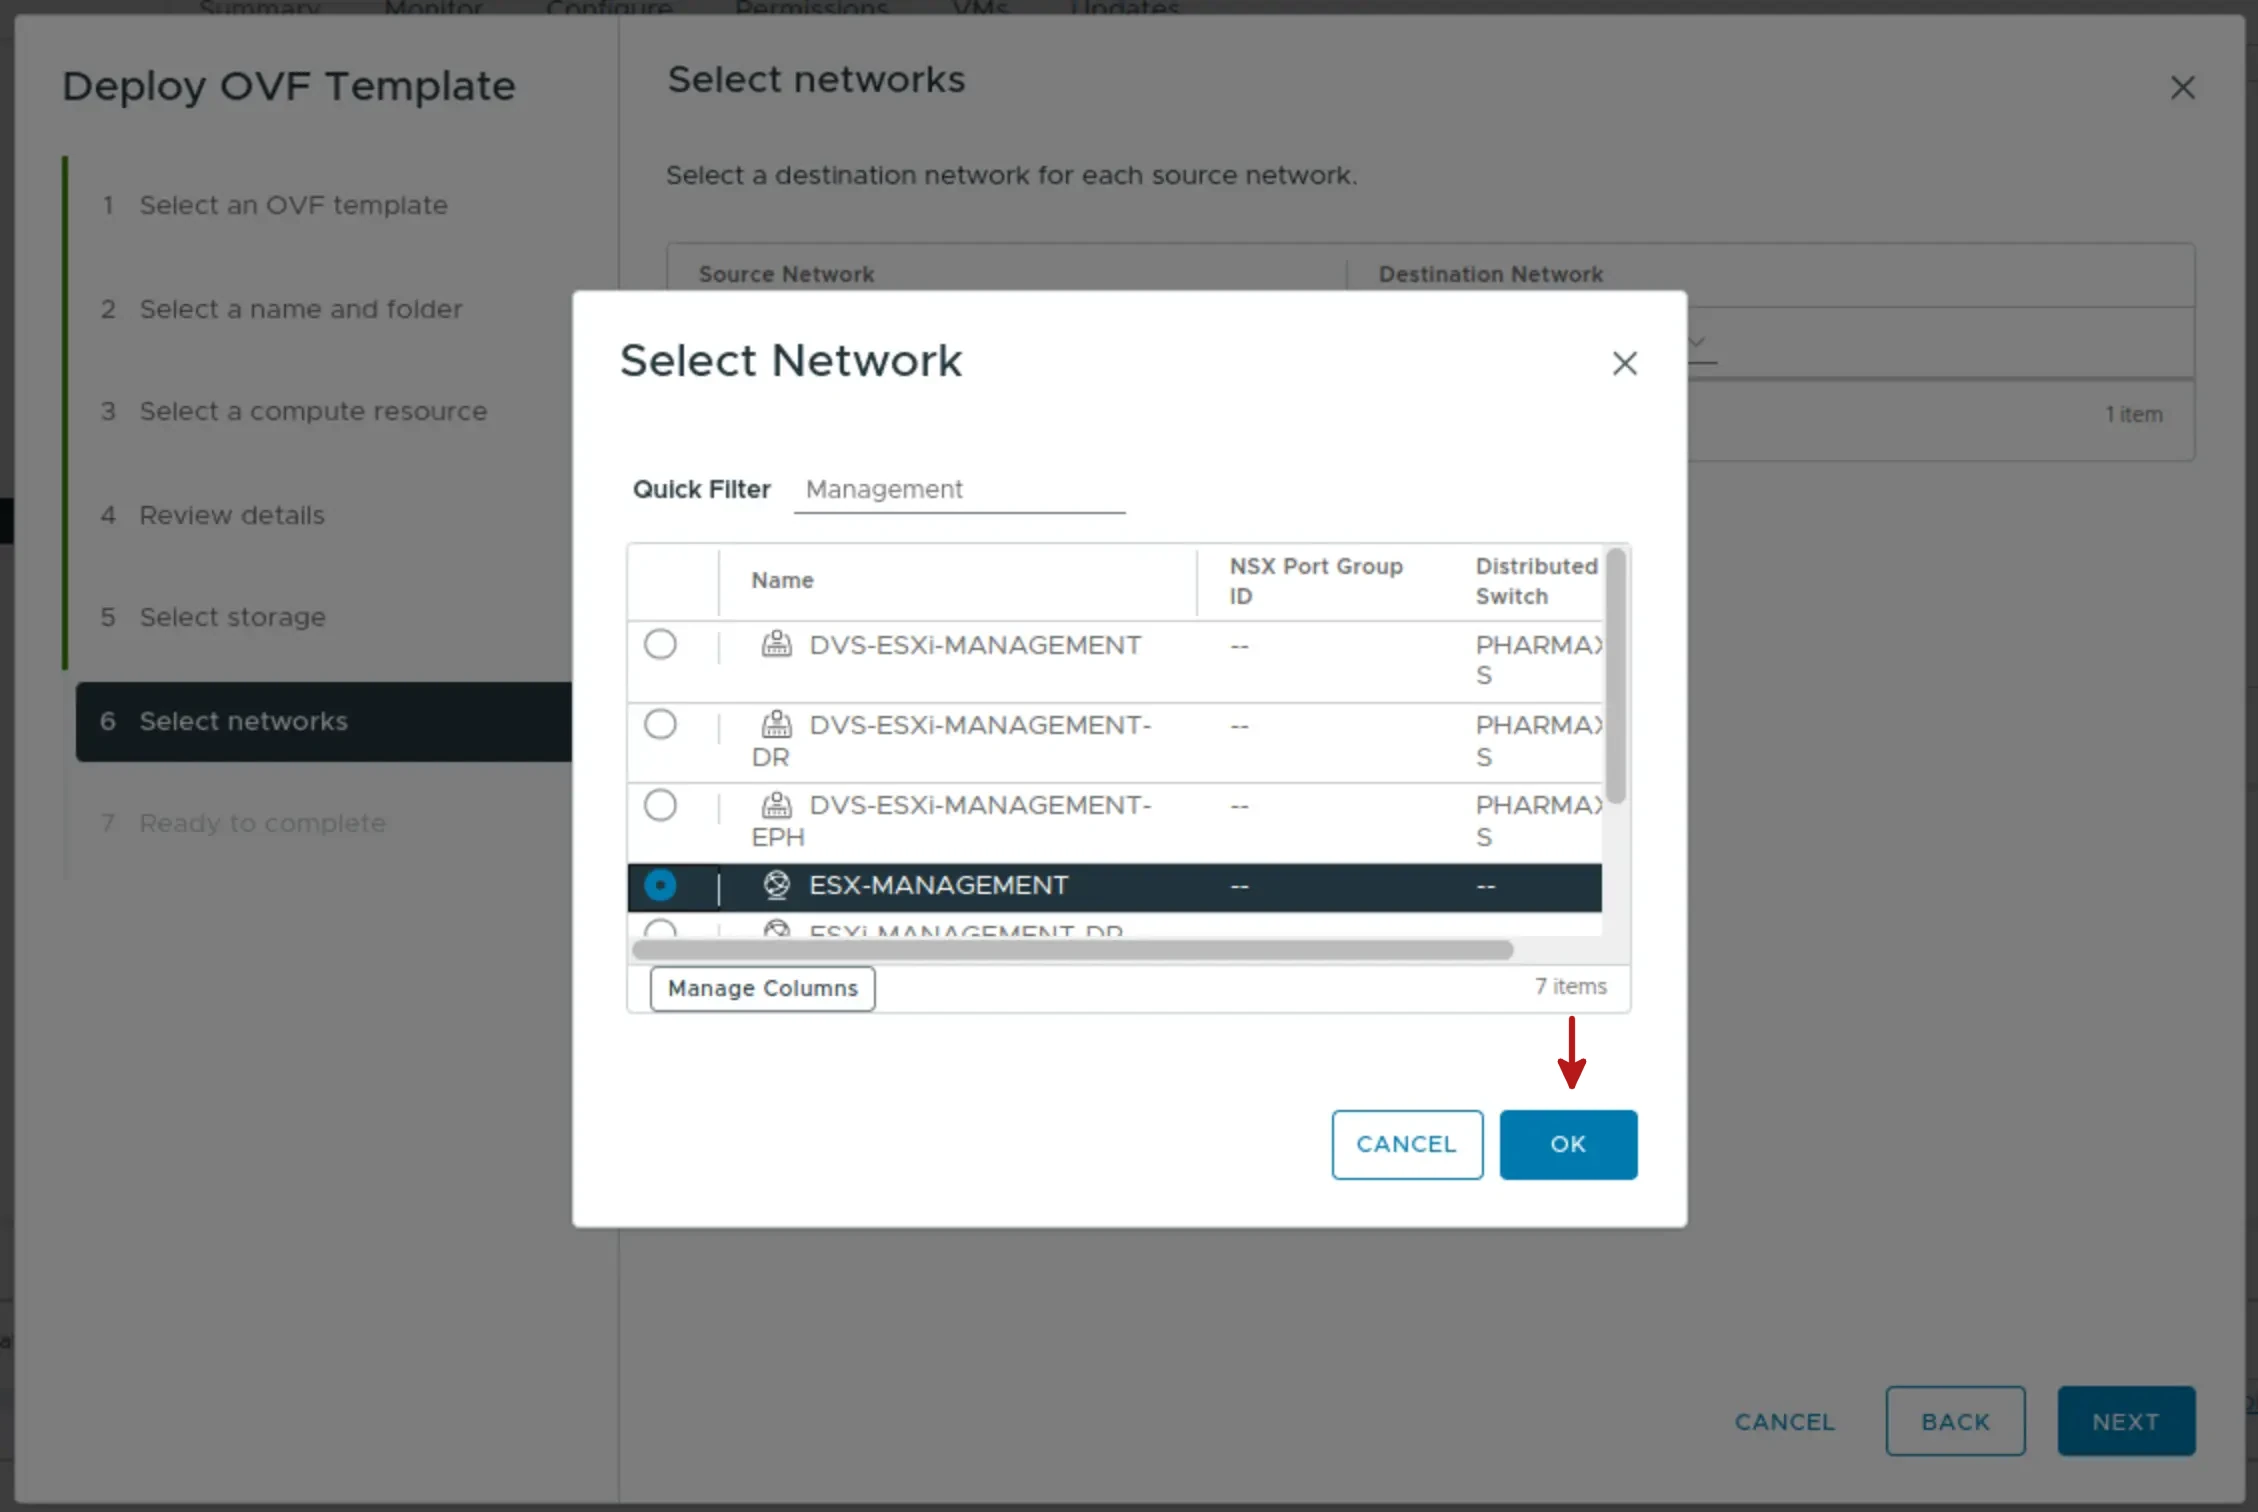
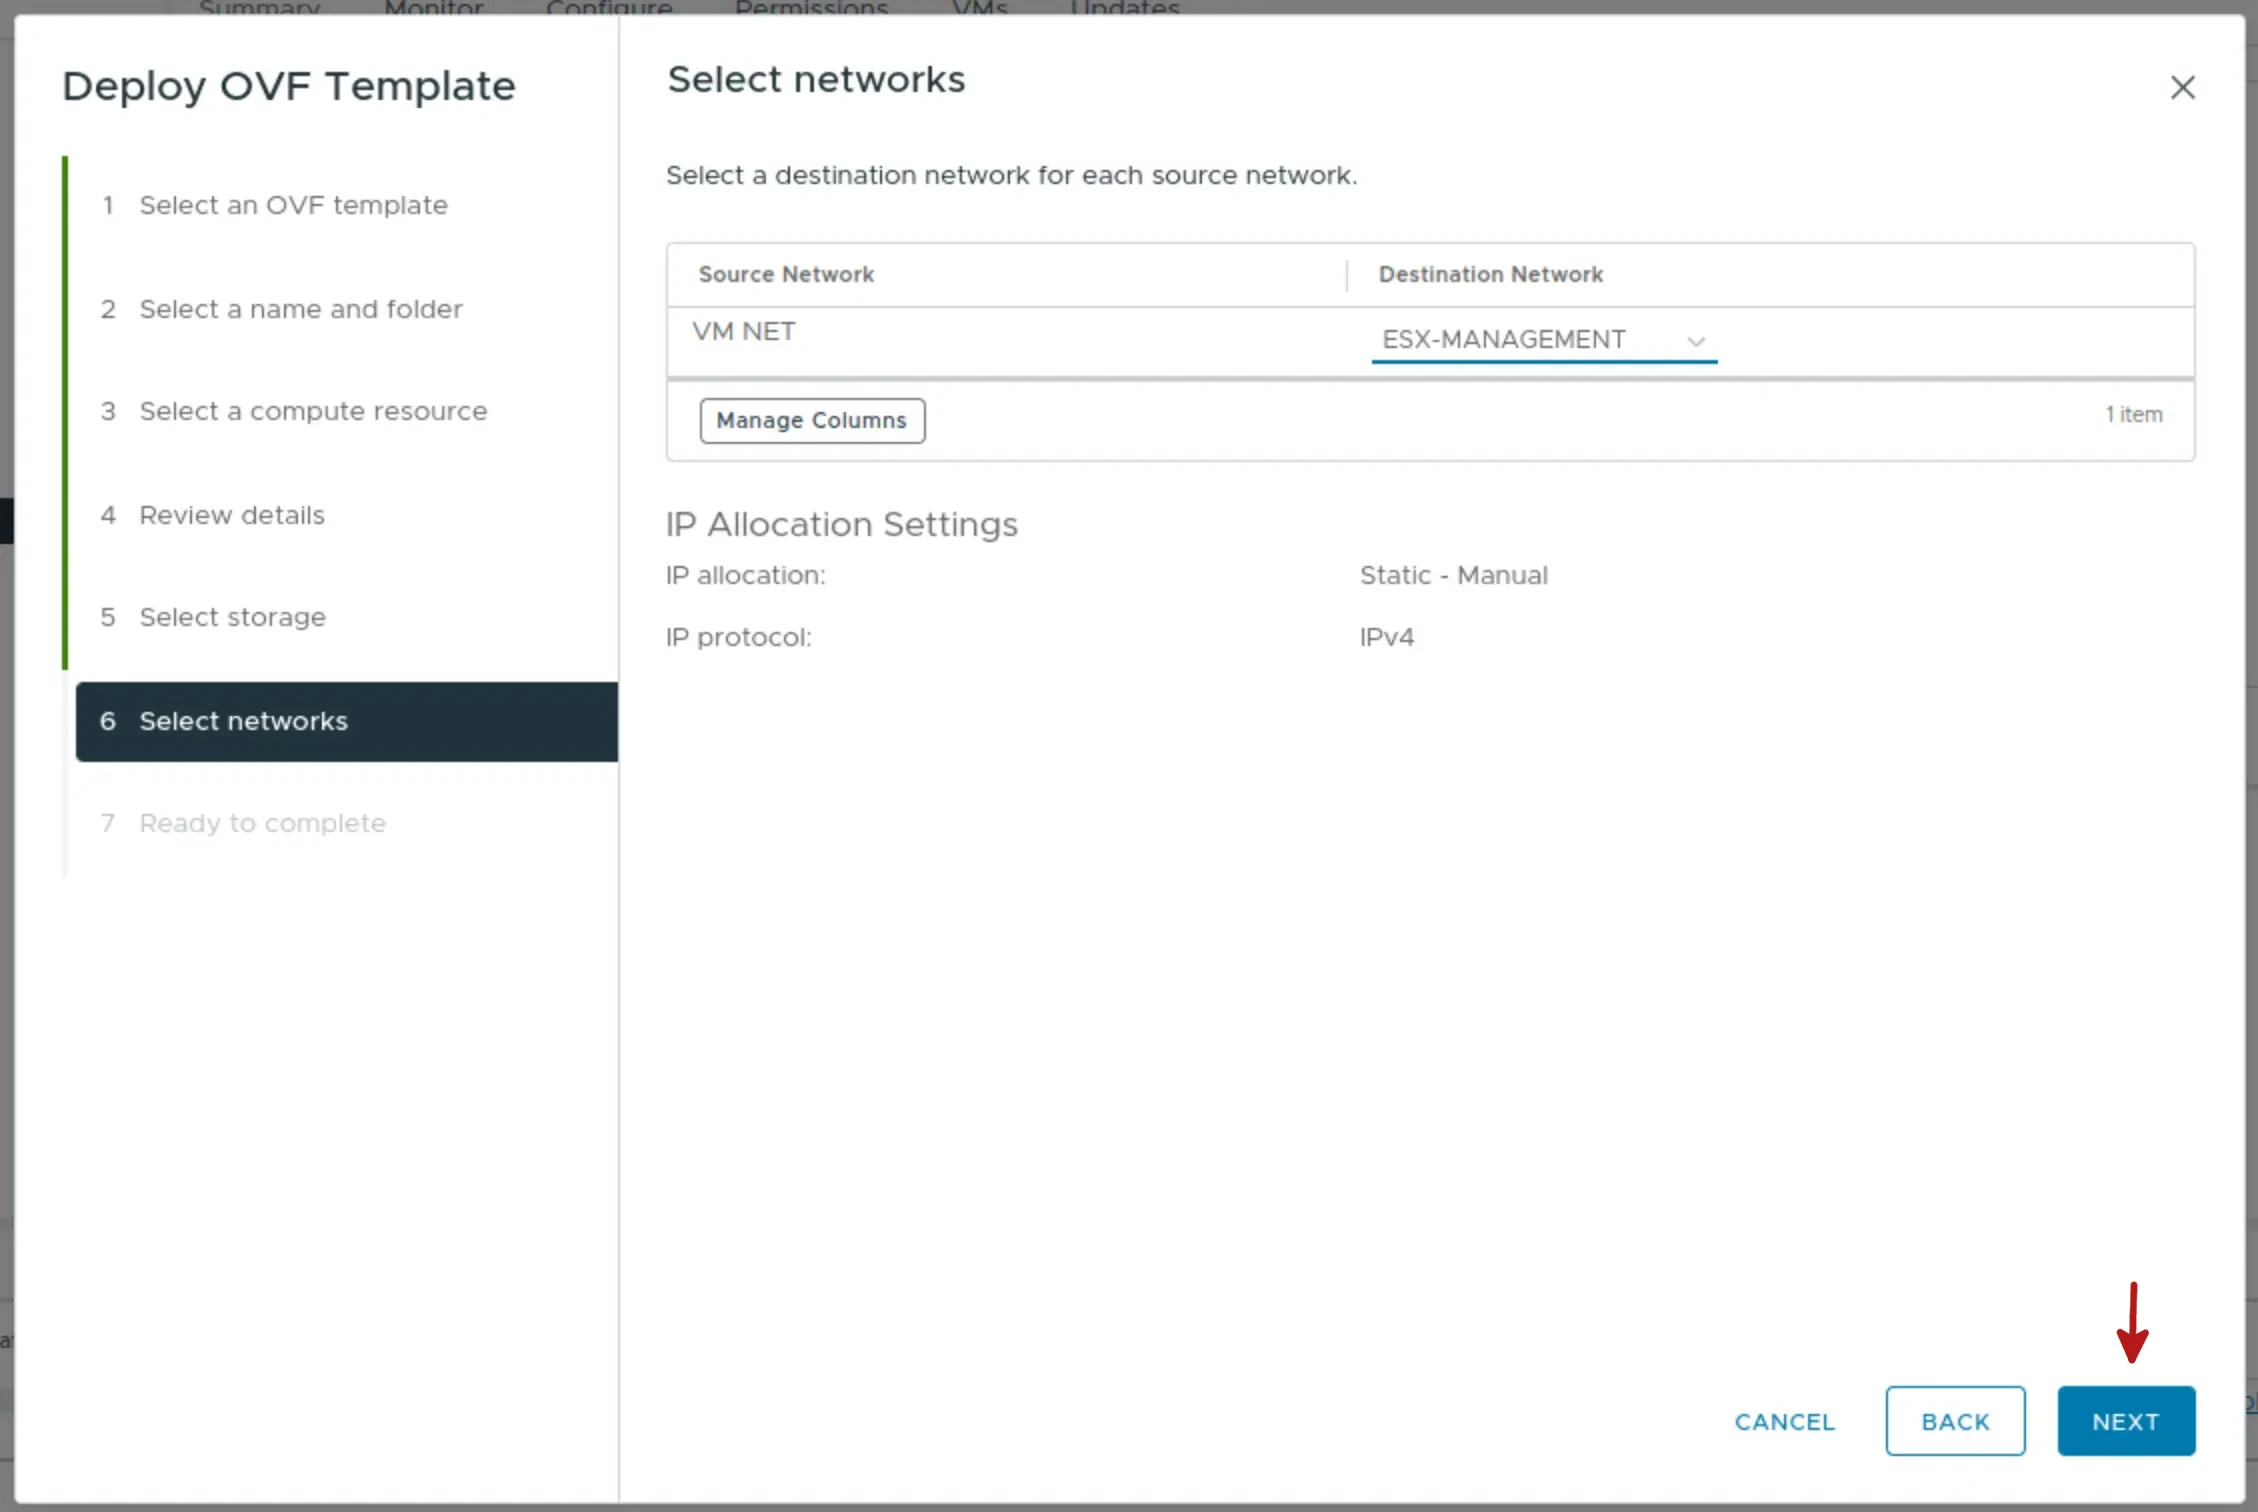
Paso 7: Seleccionar la red donde se conectará la VM
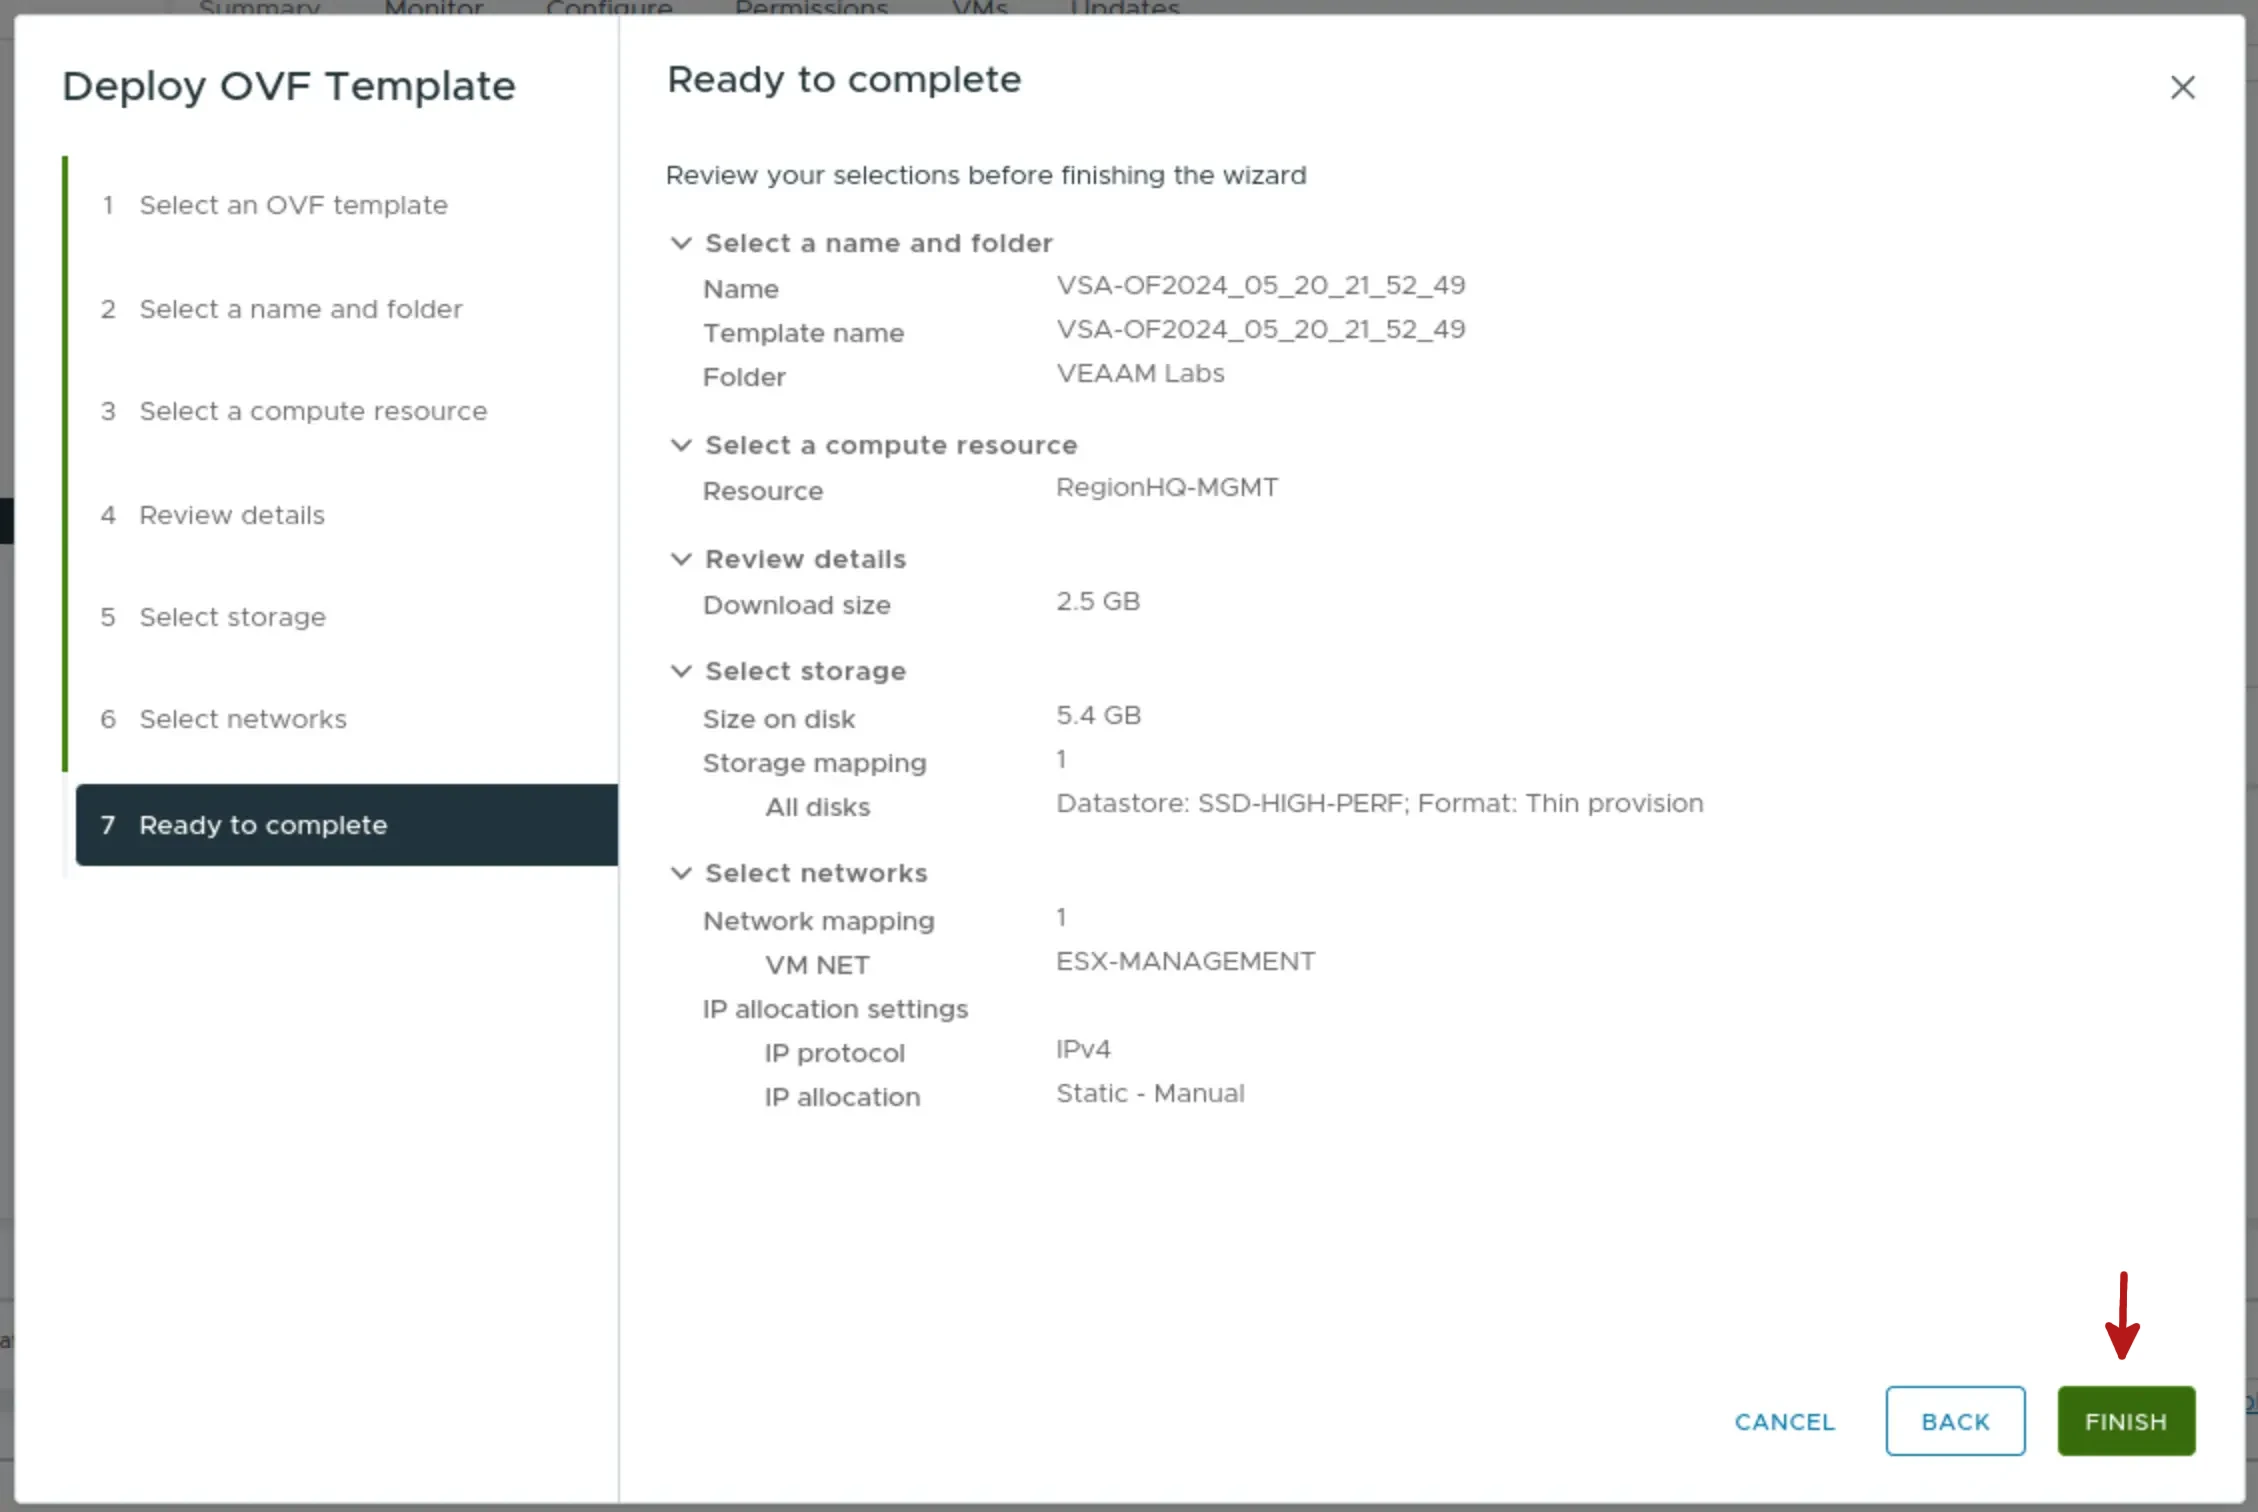
Paso 8: Validar la información y finalizar el proceso
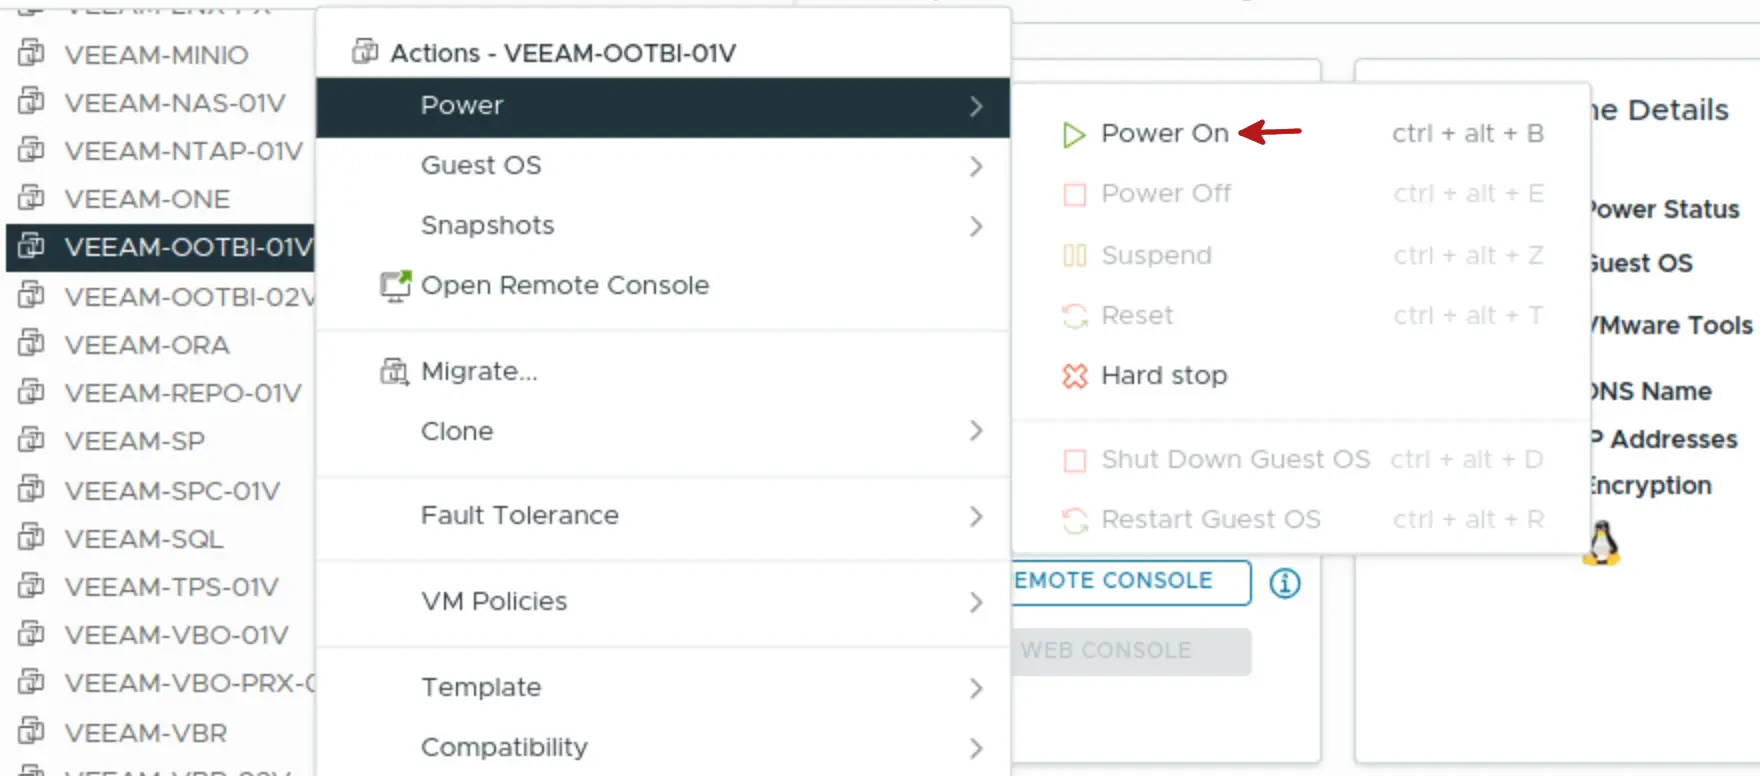
Luego de completar el proceso de la creación de la VM podemos proseguir a encender la VM para realizar la configuración inicial.
Configuración inicial de OOTBI
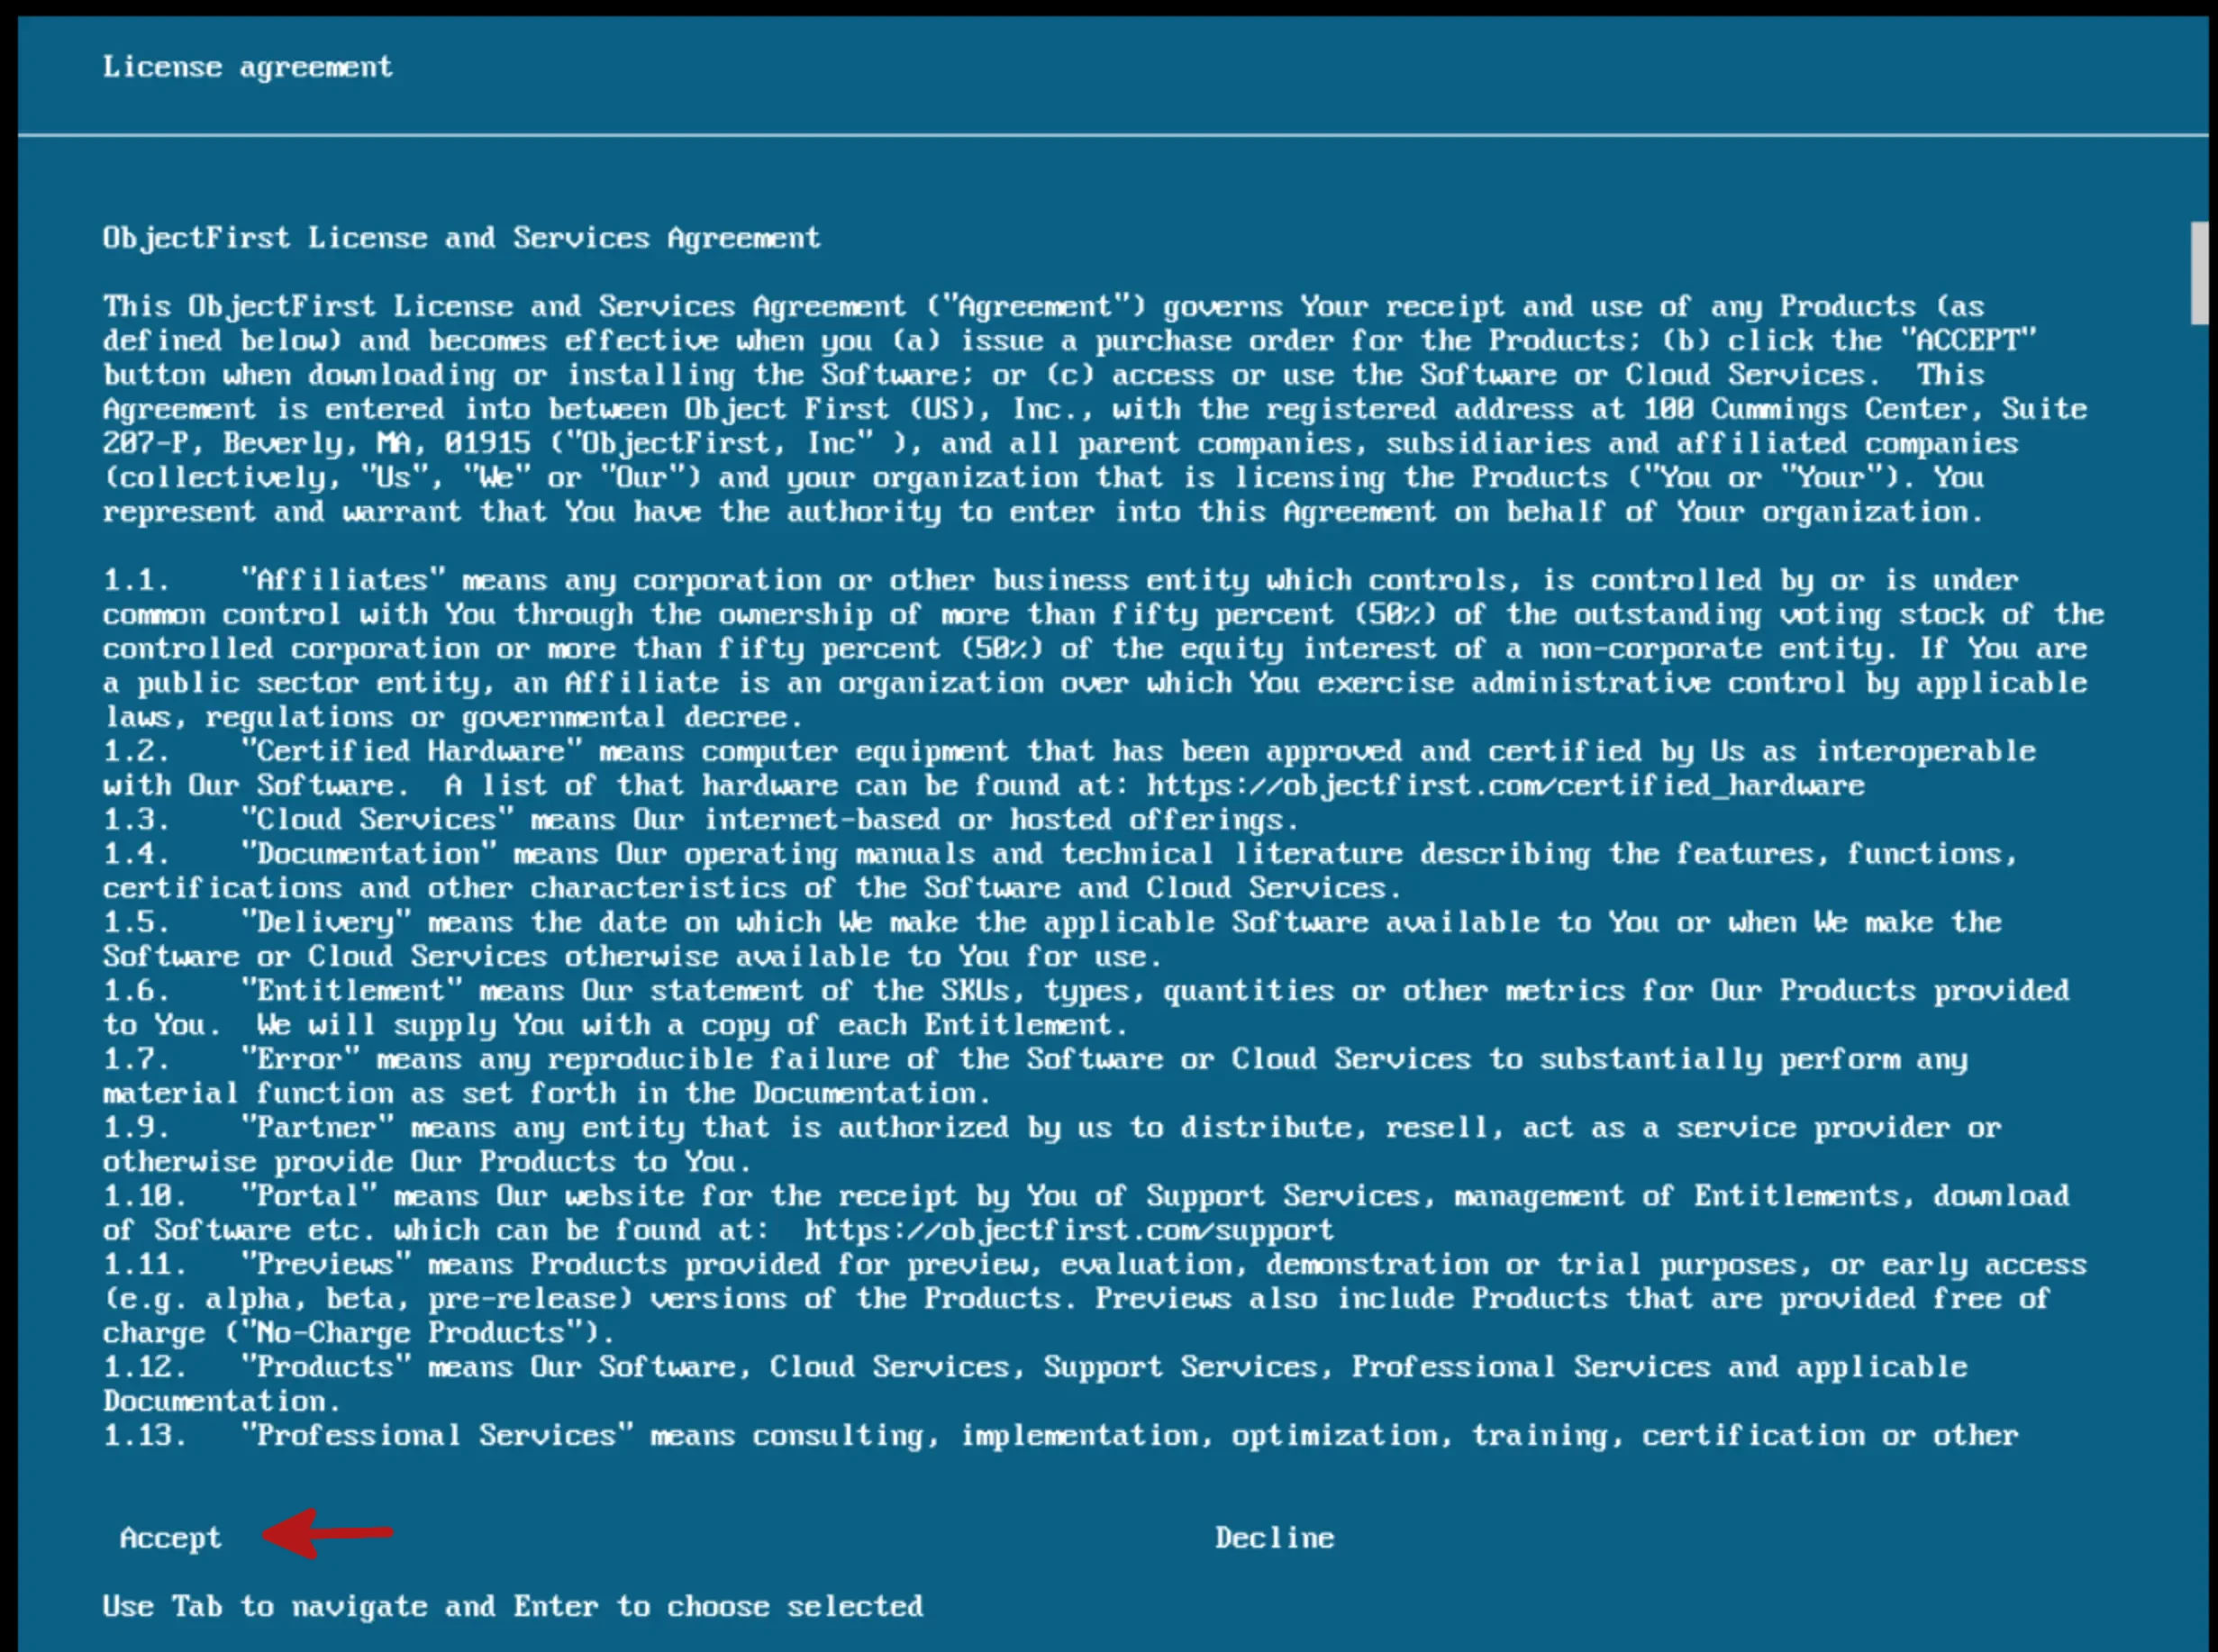
Aquí en esta pantalla se debe de aceptar la licencia para poder continuar…
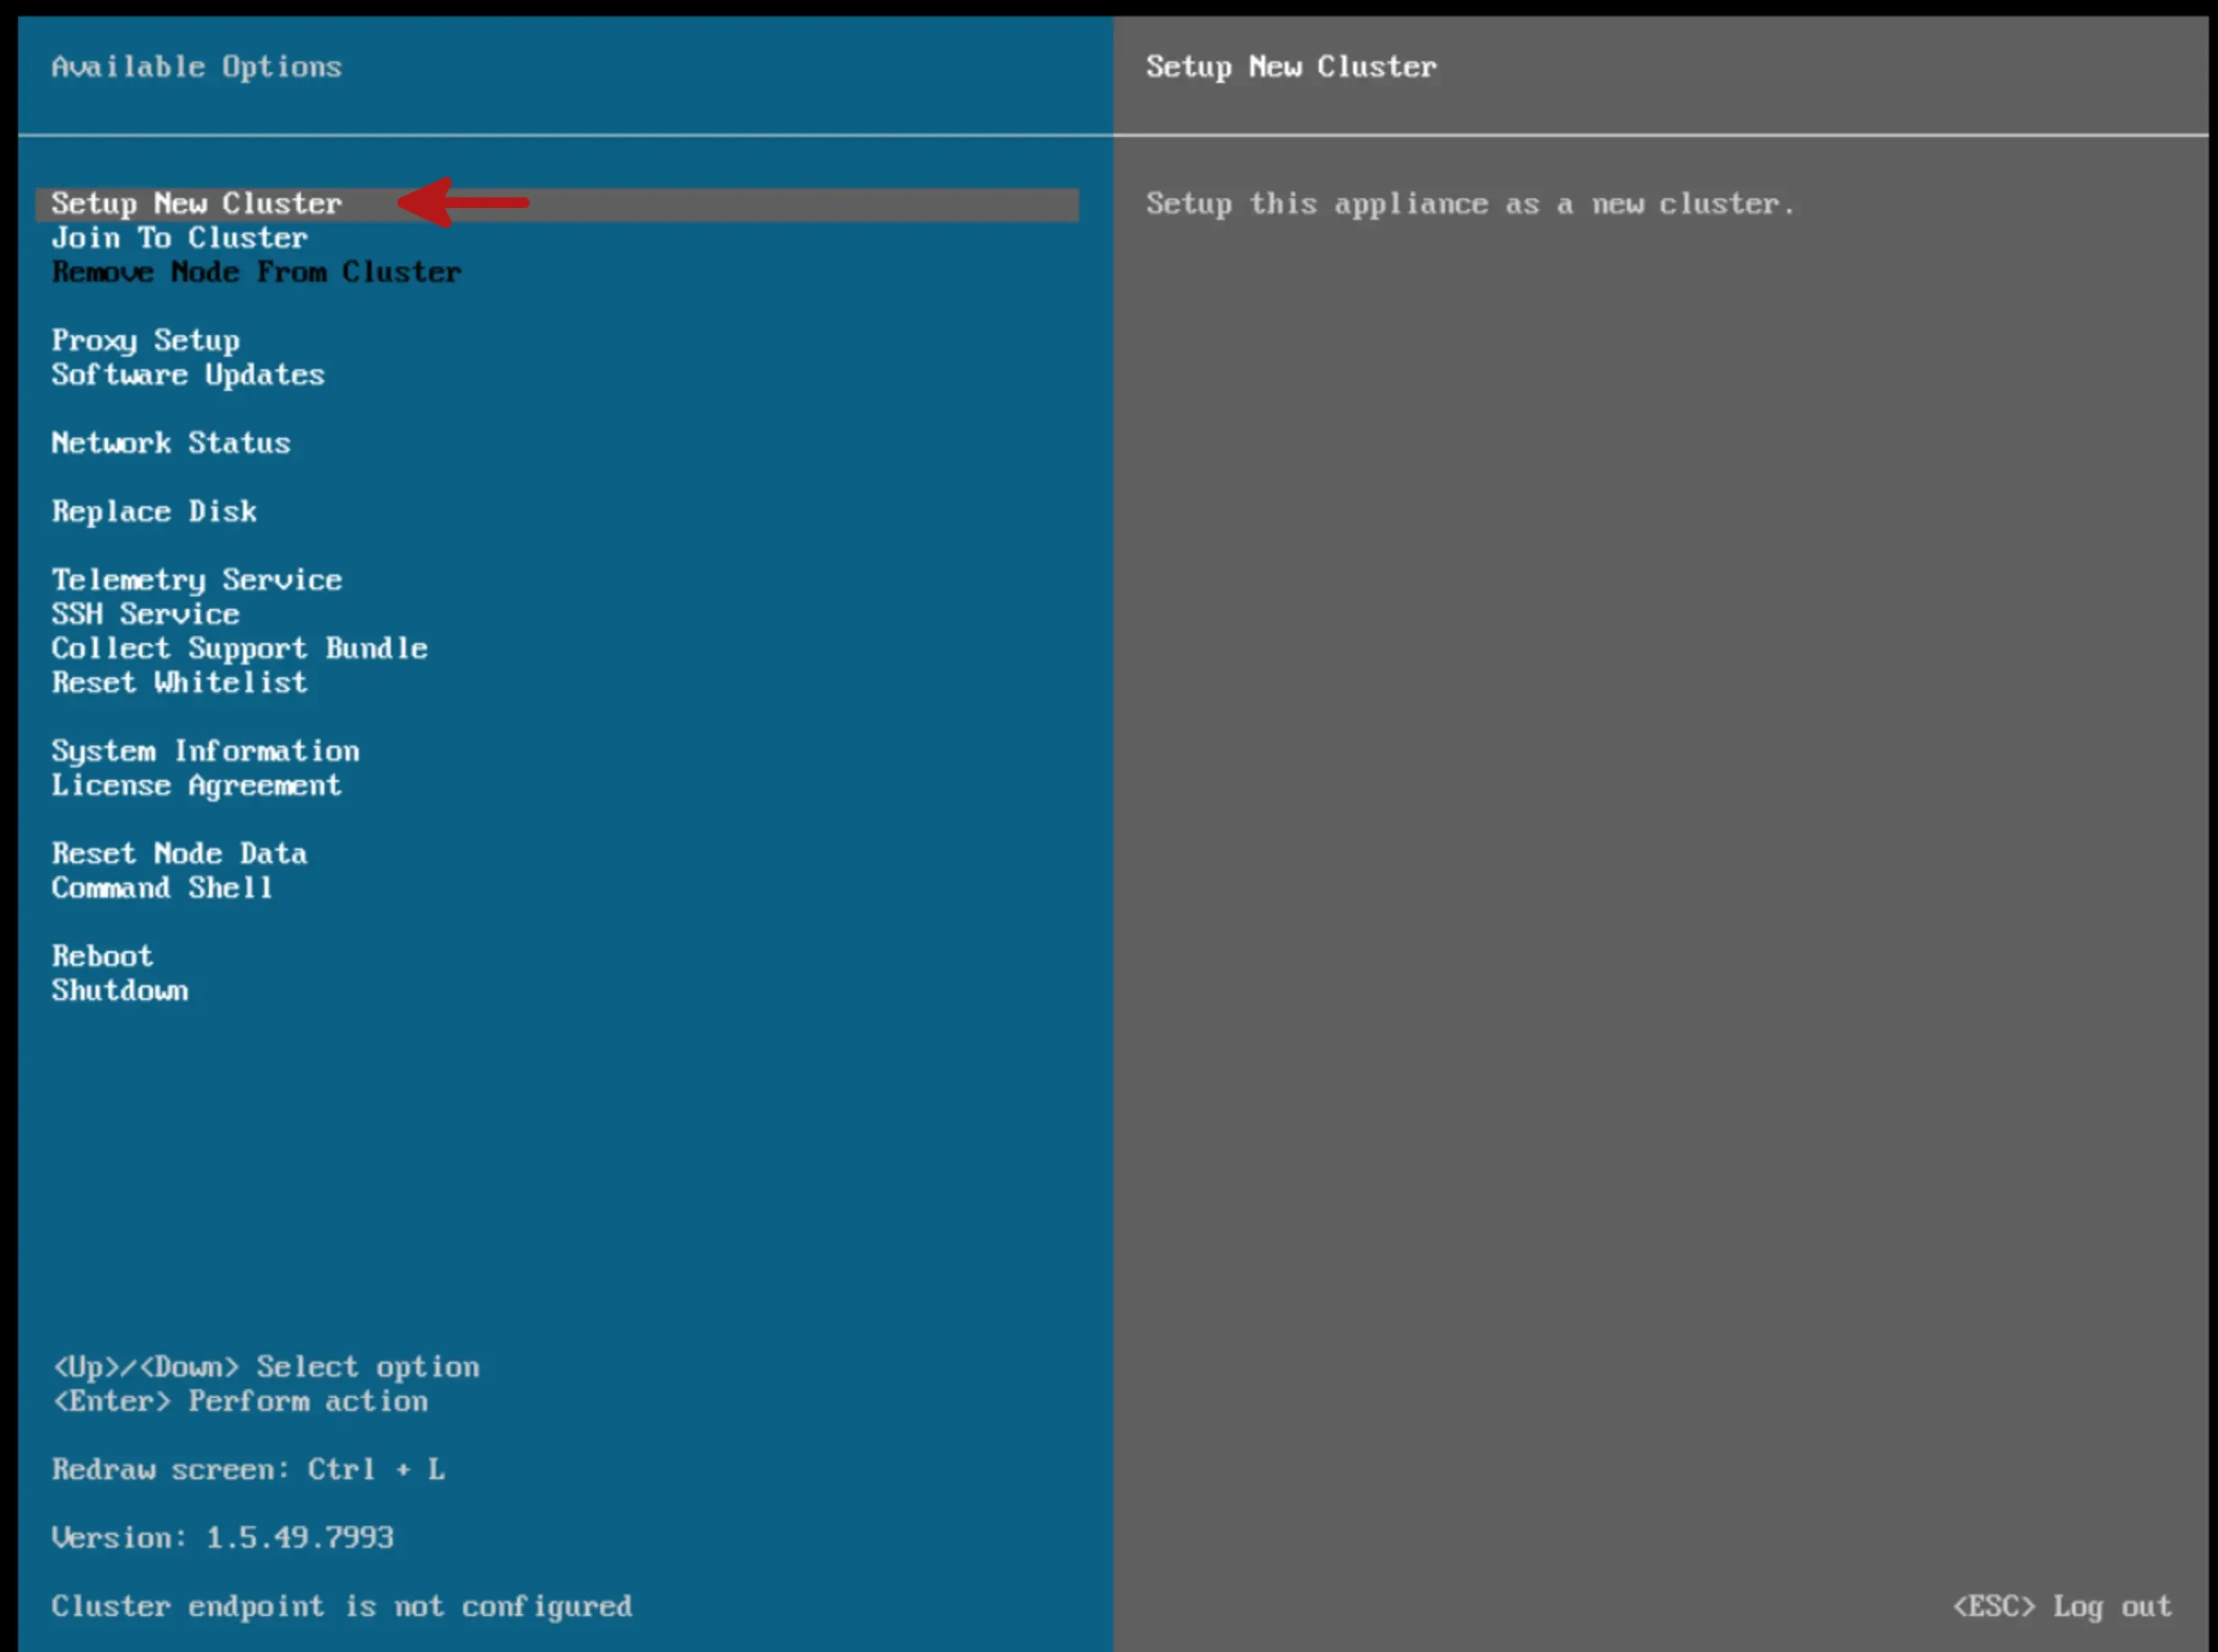
Luego proseguimos a crear un nuevo clúster.
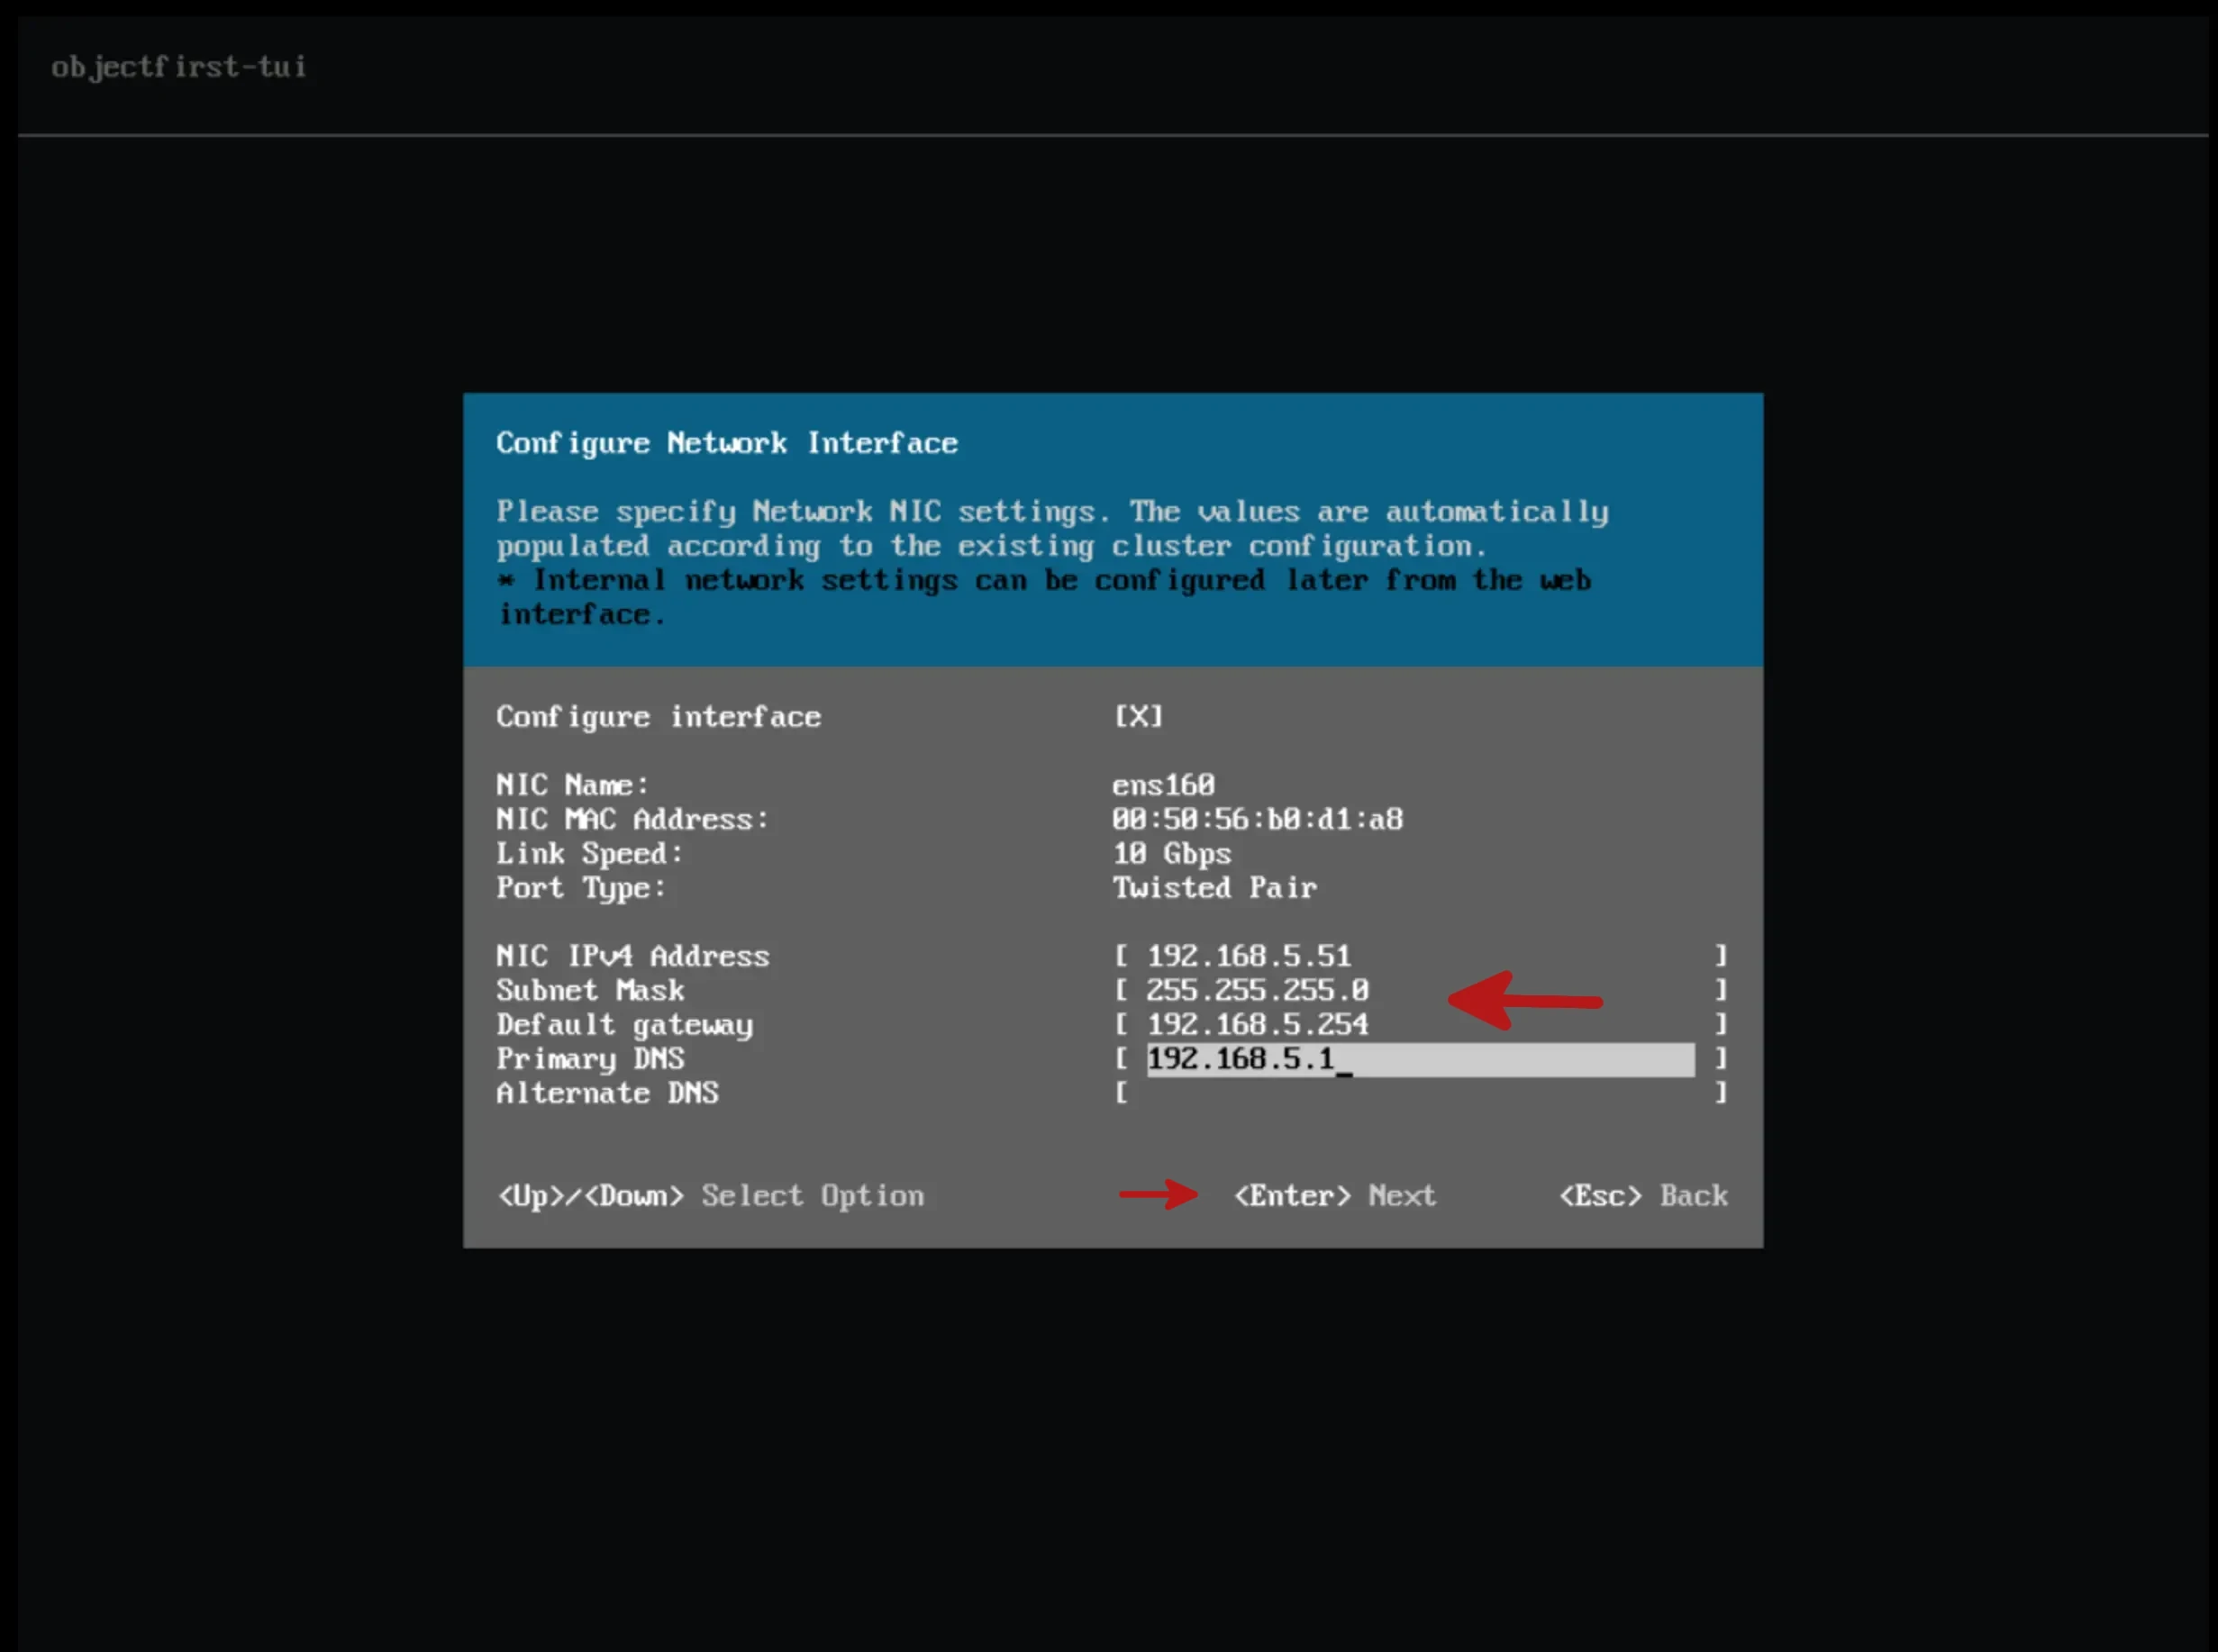
En esta sección configuramos los parámetros para conectar el OOTBI a nuestra red.
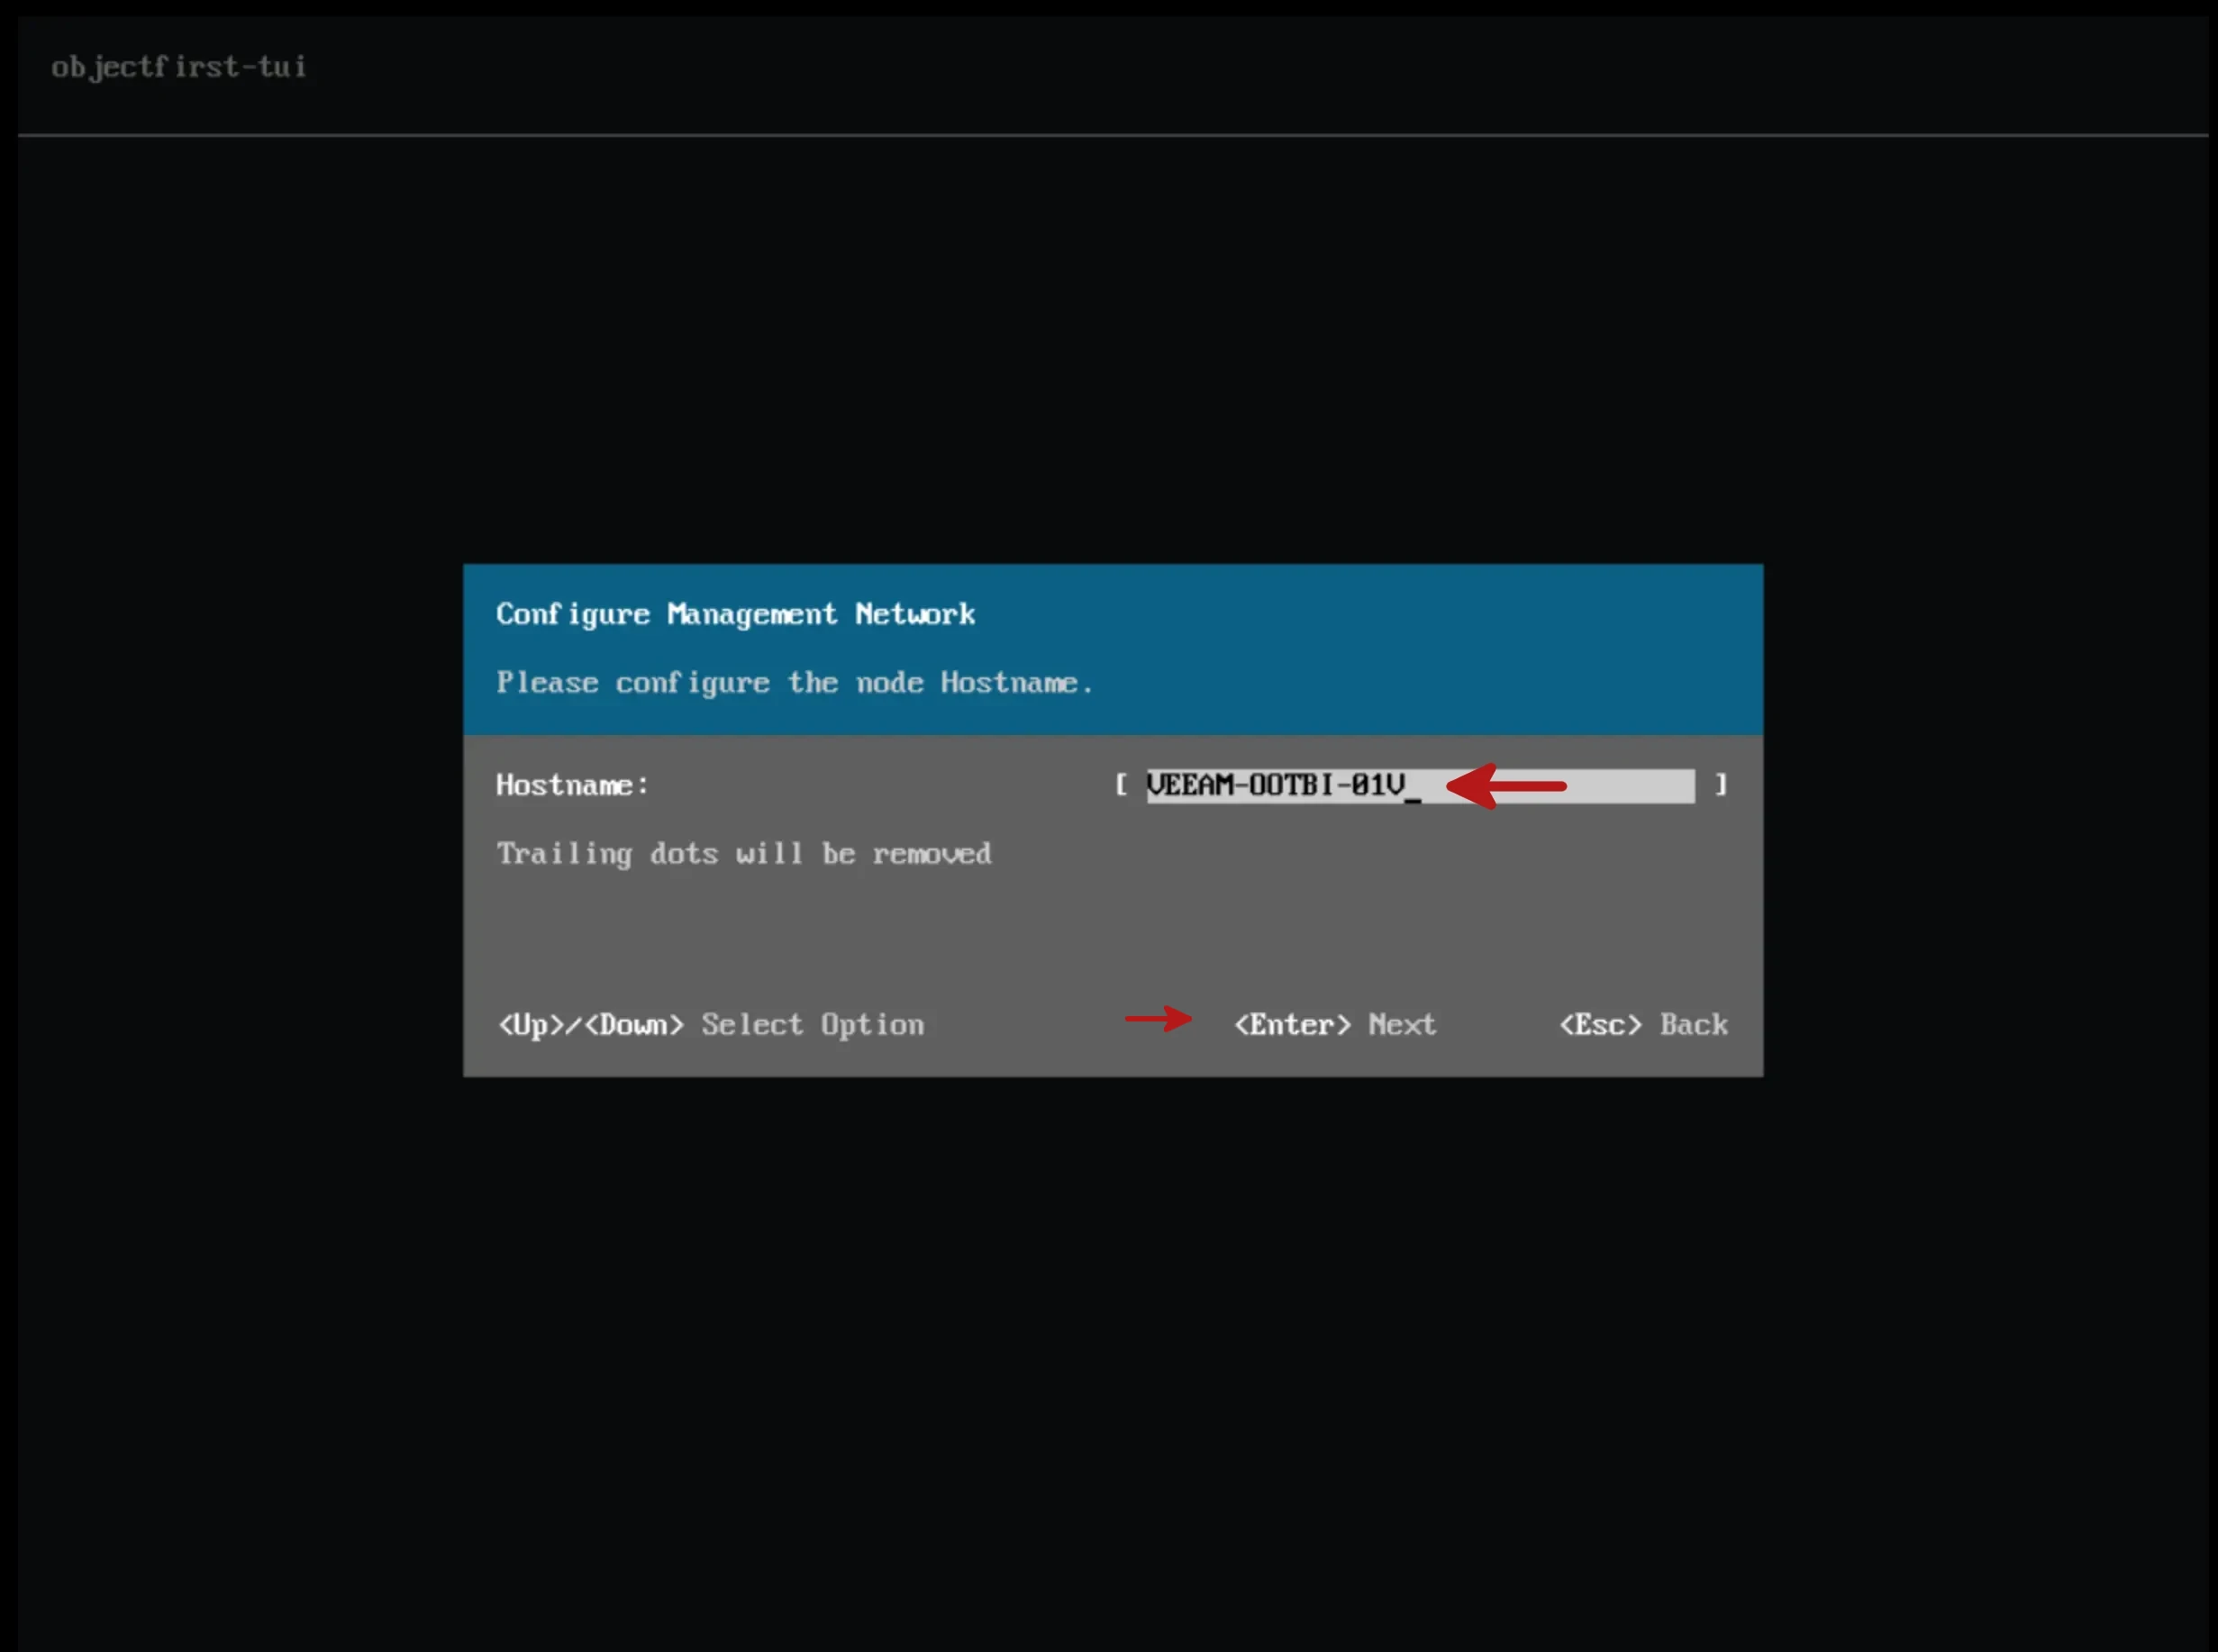
Continuamos con la configuración del HostName de la VM.
En esta pantalla podemos especificar el nombre del clúster y la dirección de IP.
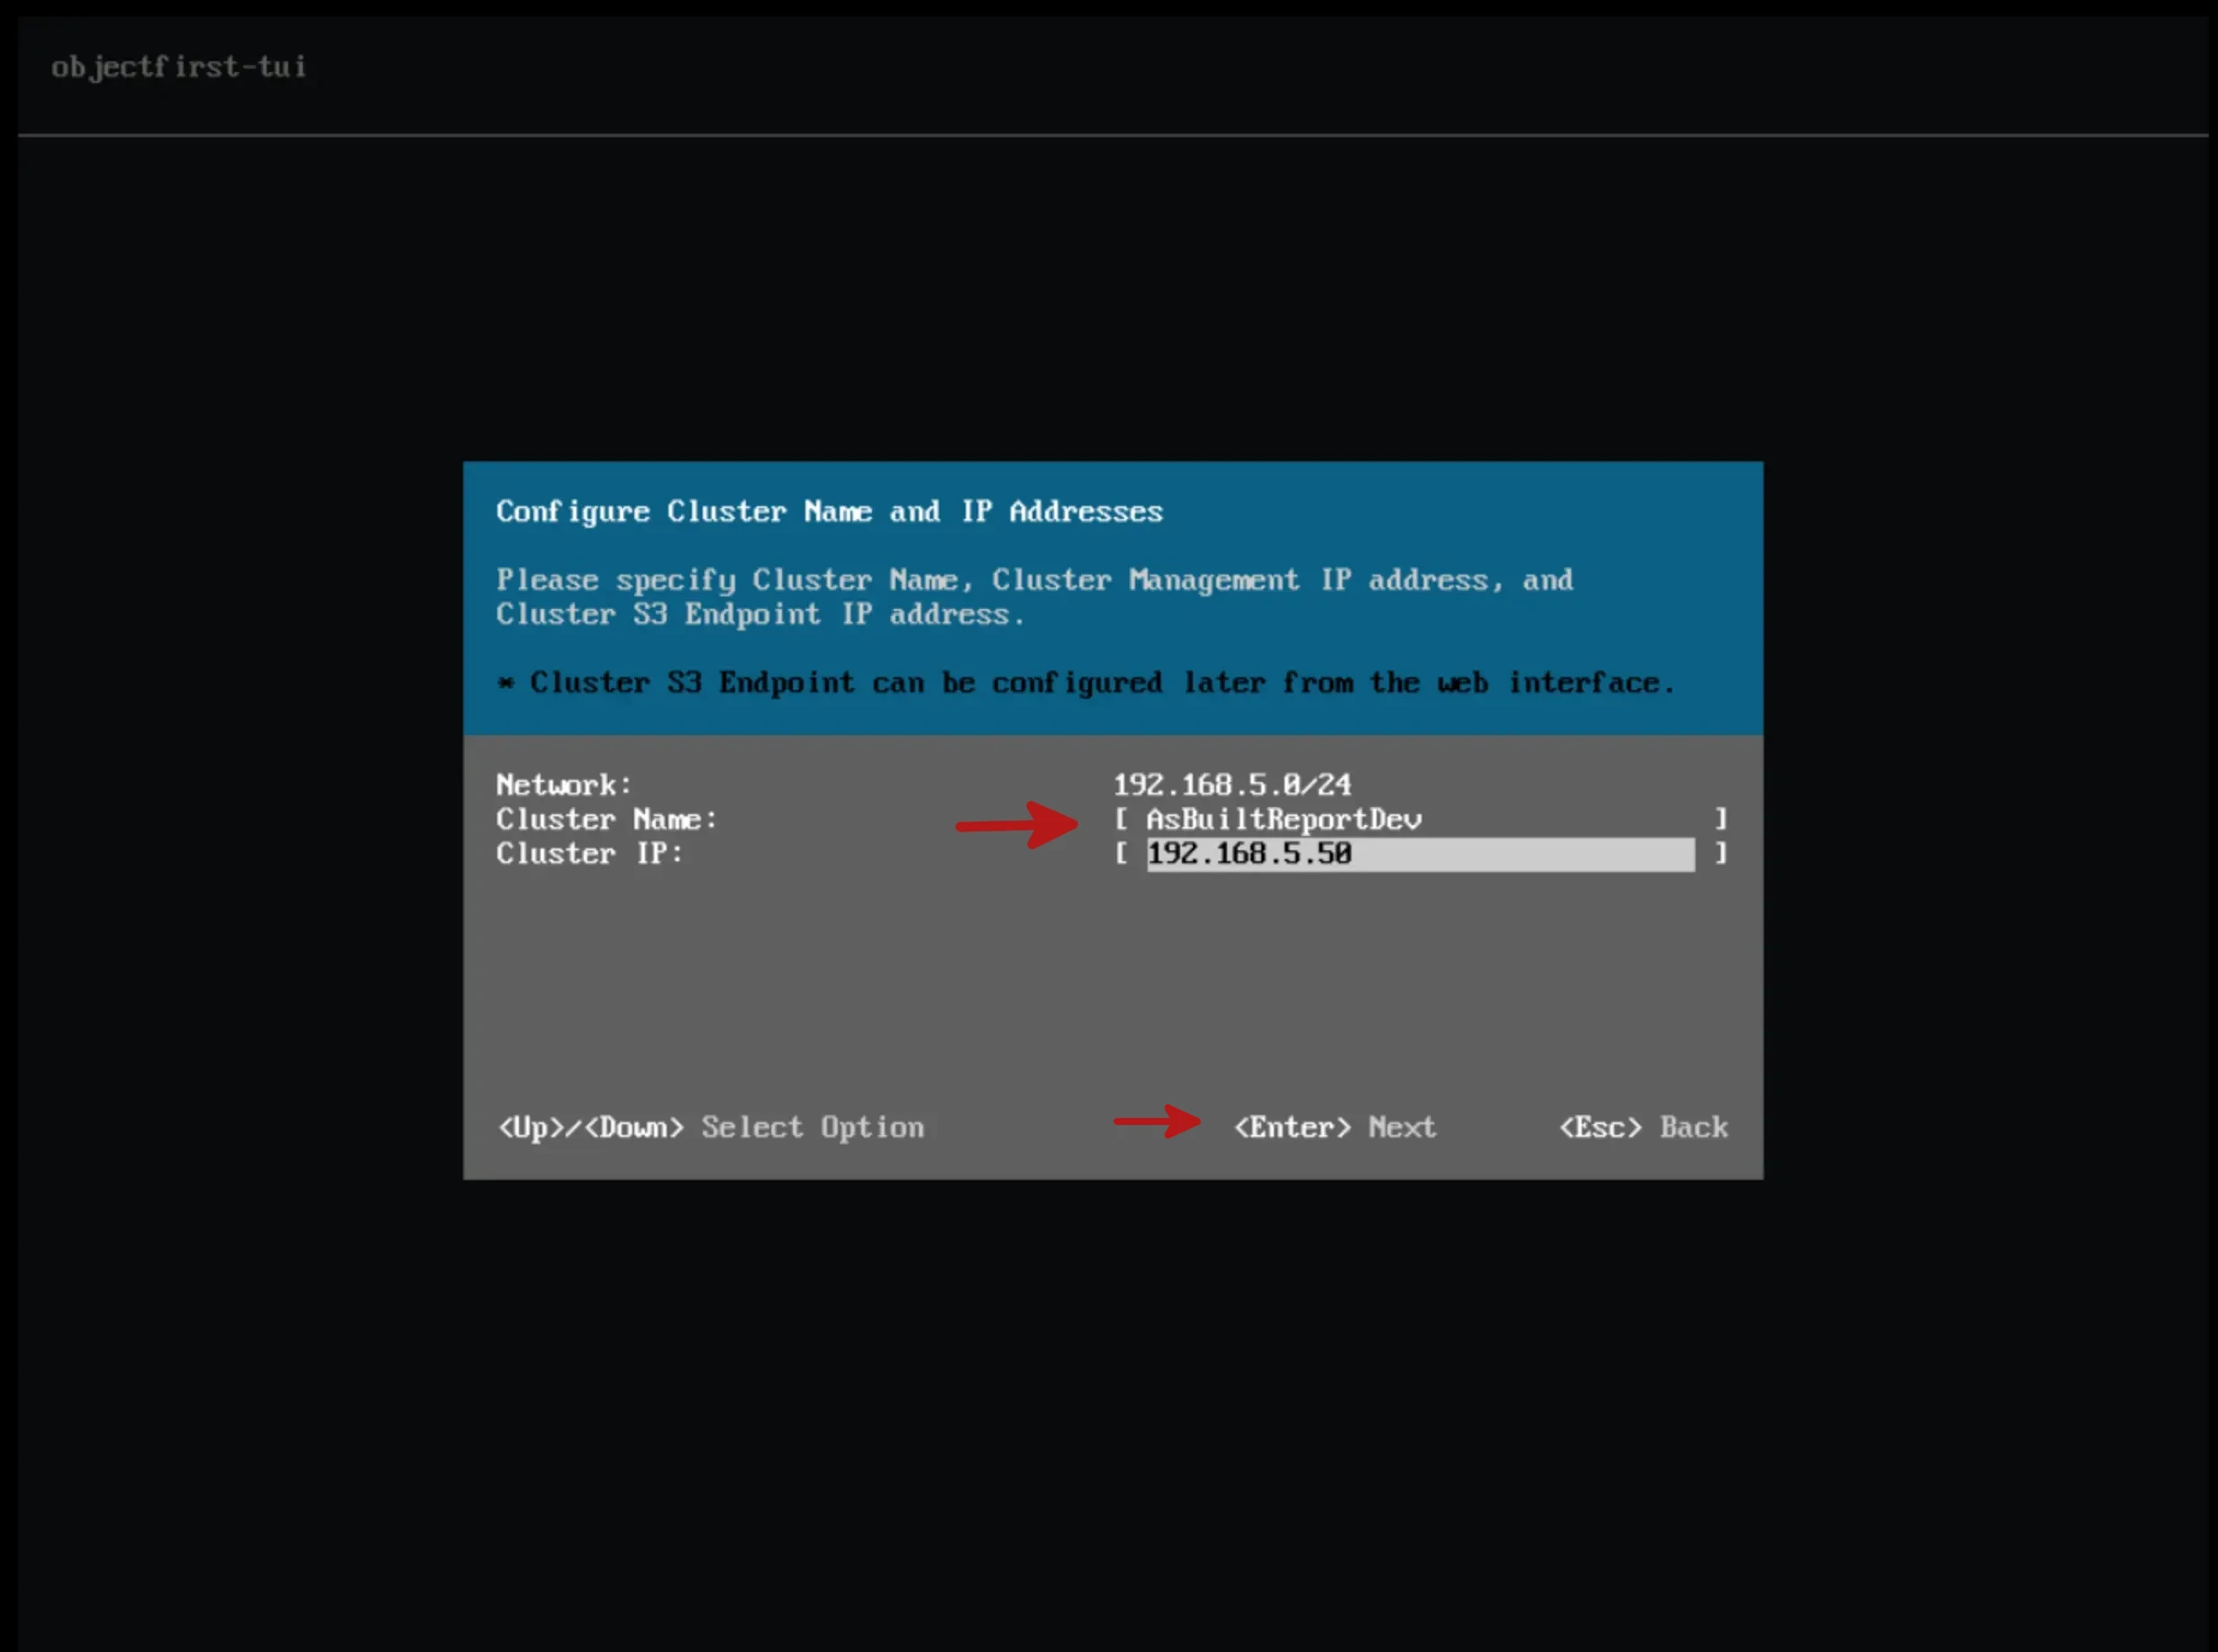
** Nota: Esta dirección de IP debe de ser distinta a la configurada en el nodo que se utiliza para manejar la VM.
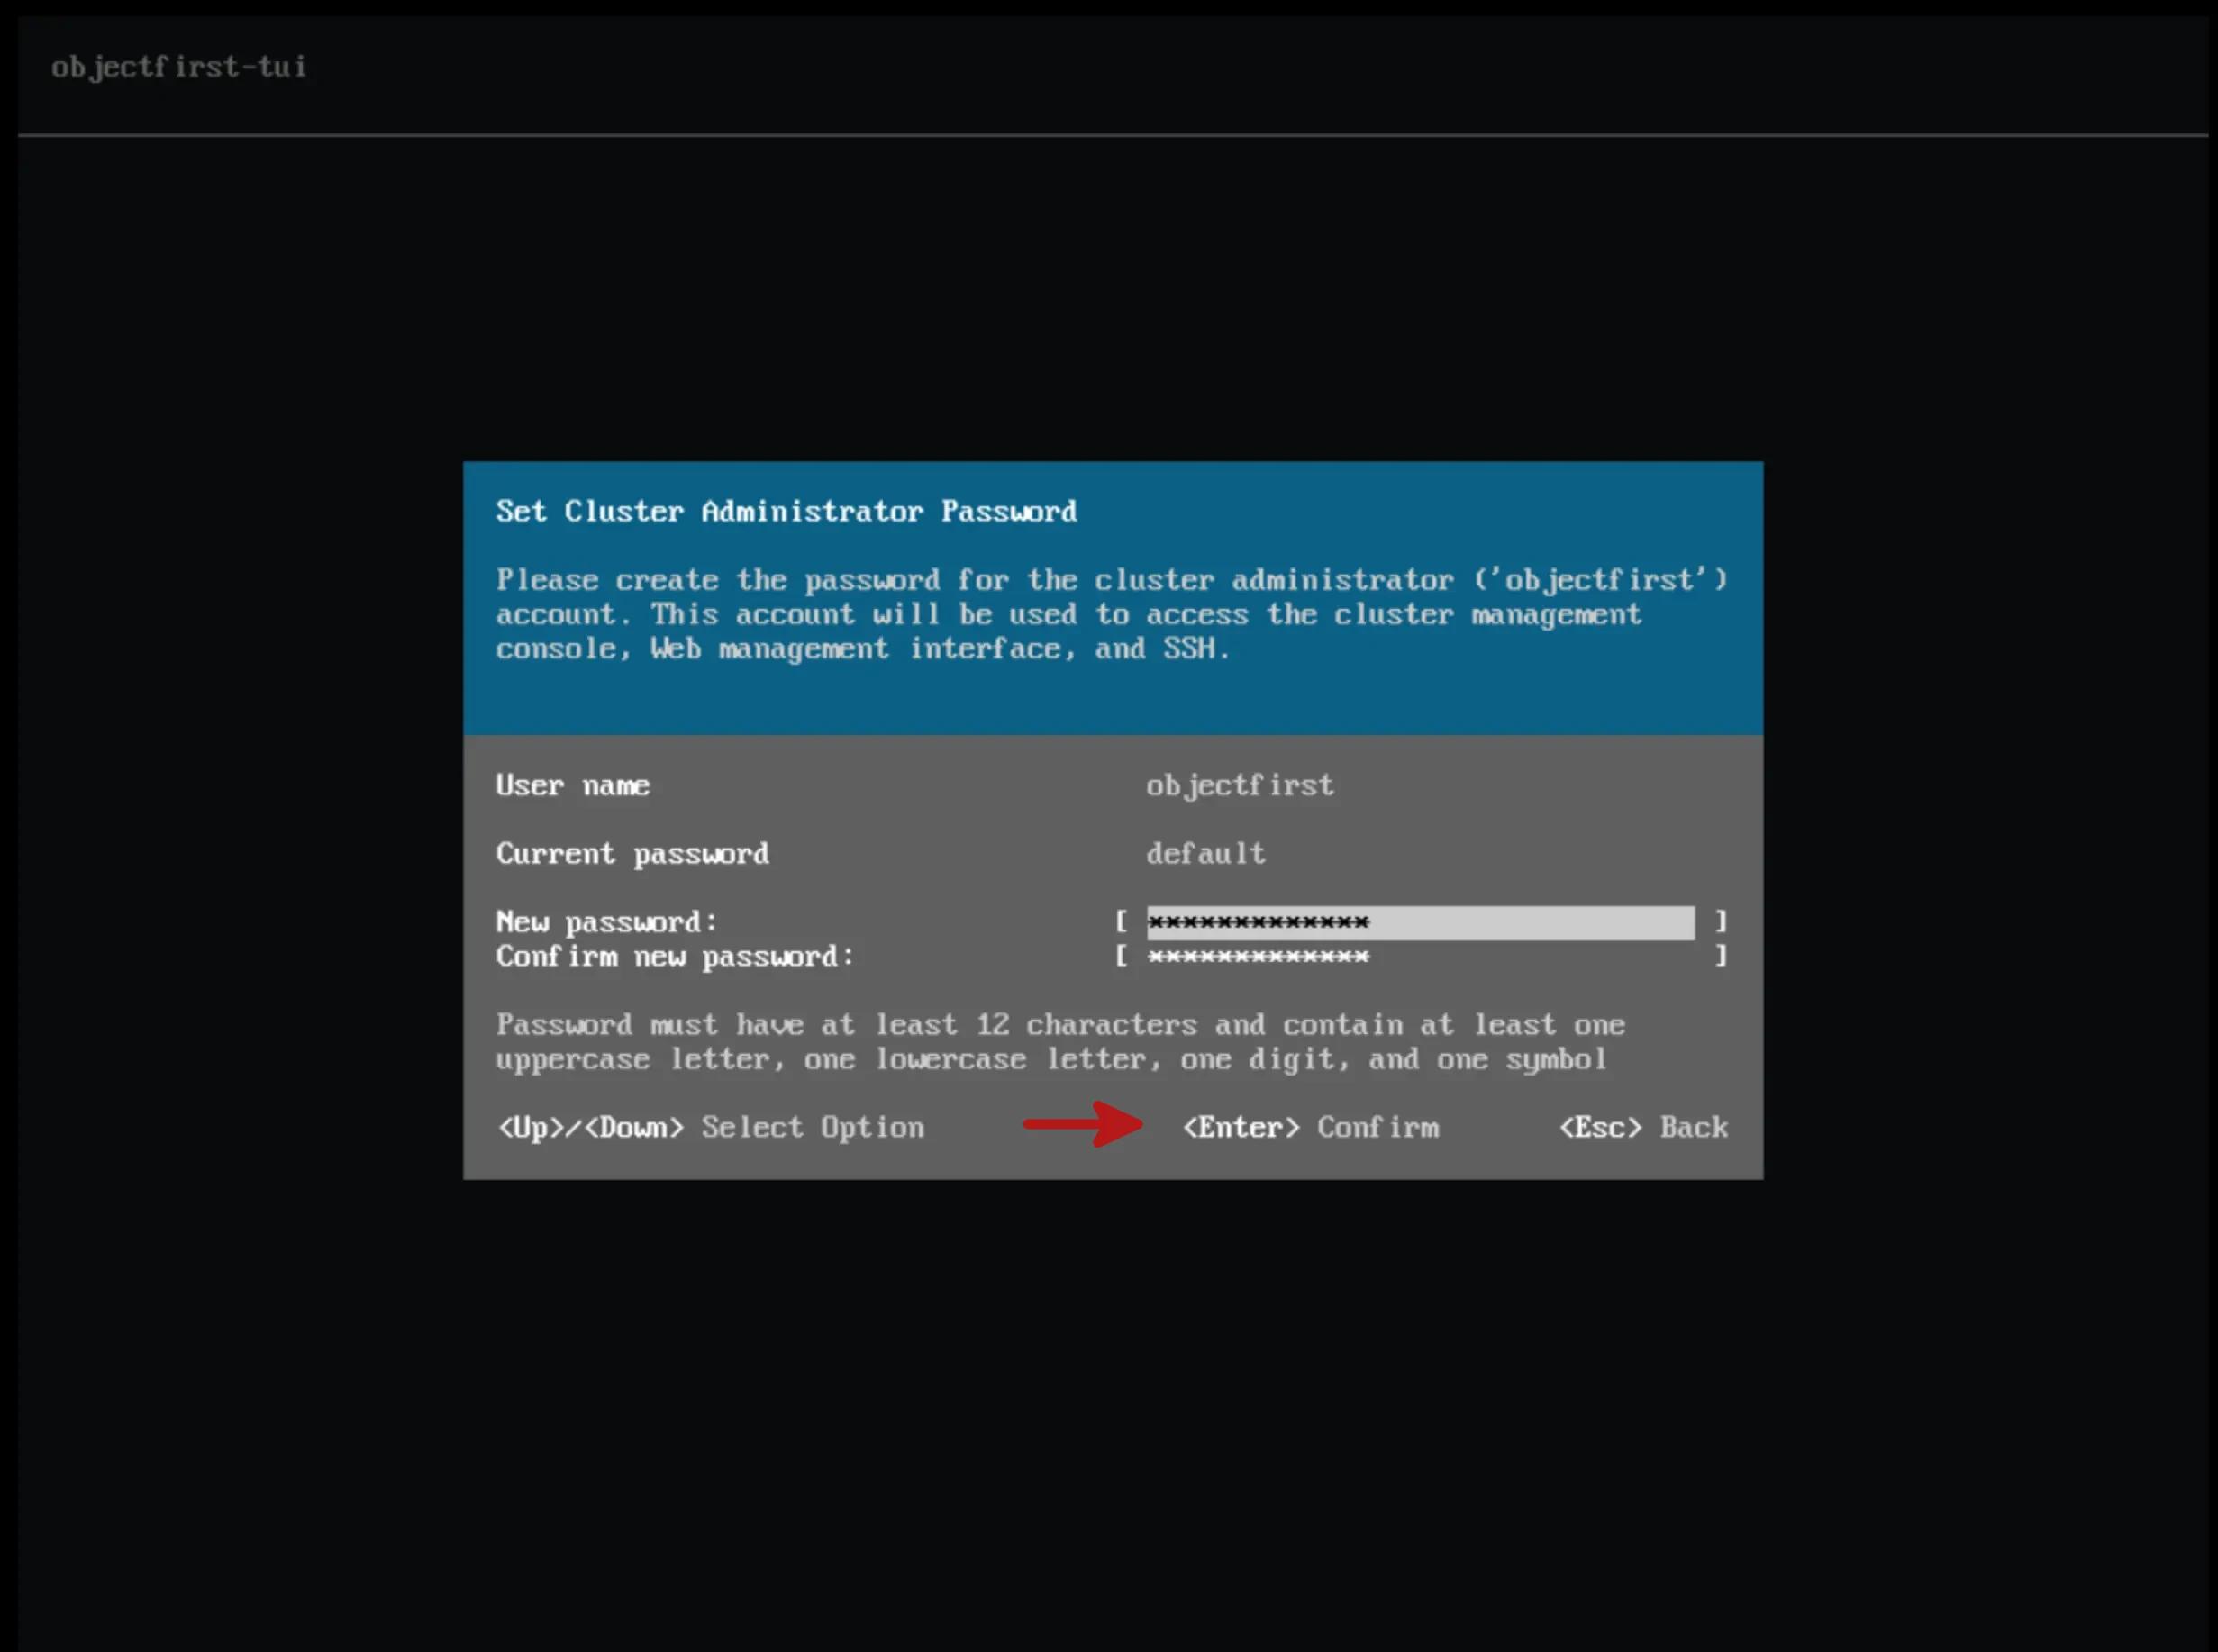
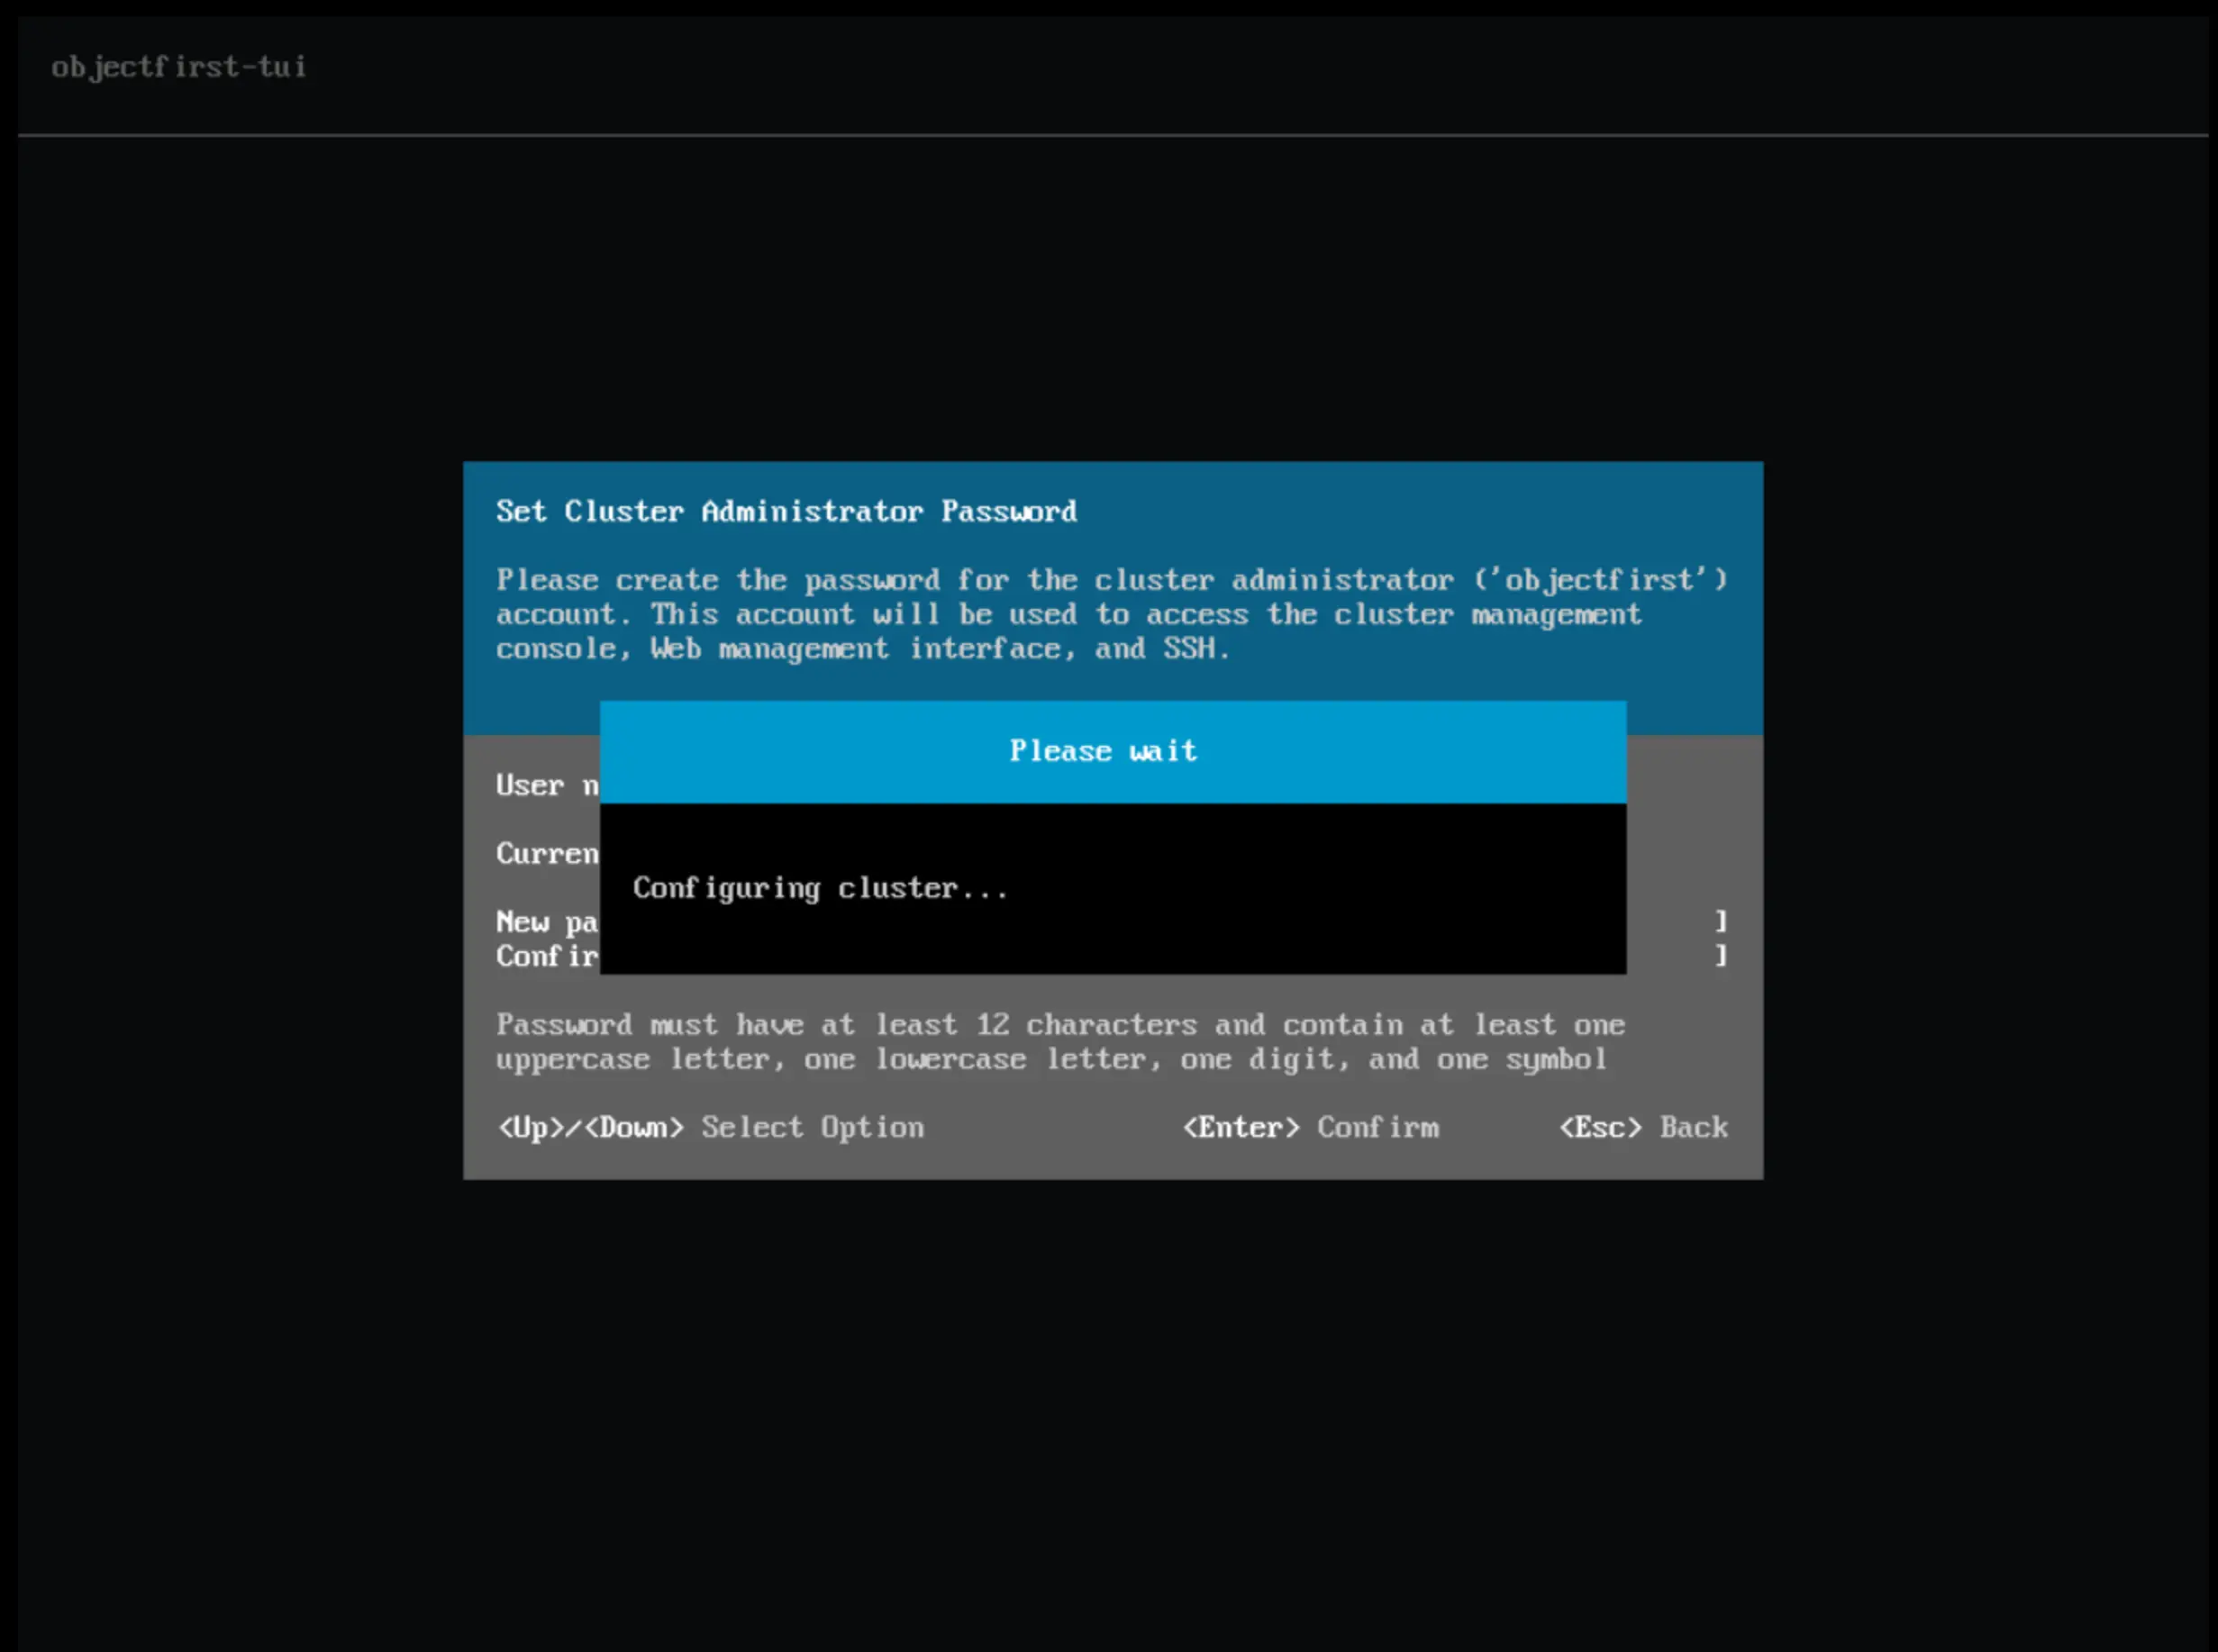
Luego pasamos a especificar la contraseña de la cuenta “default” llamada objectfirst.
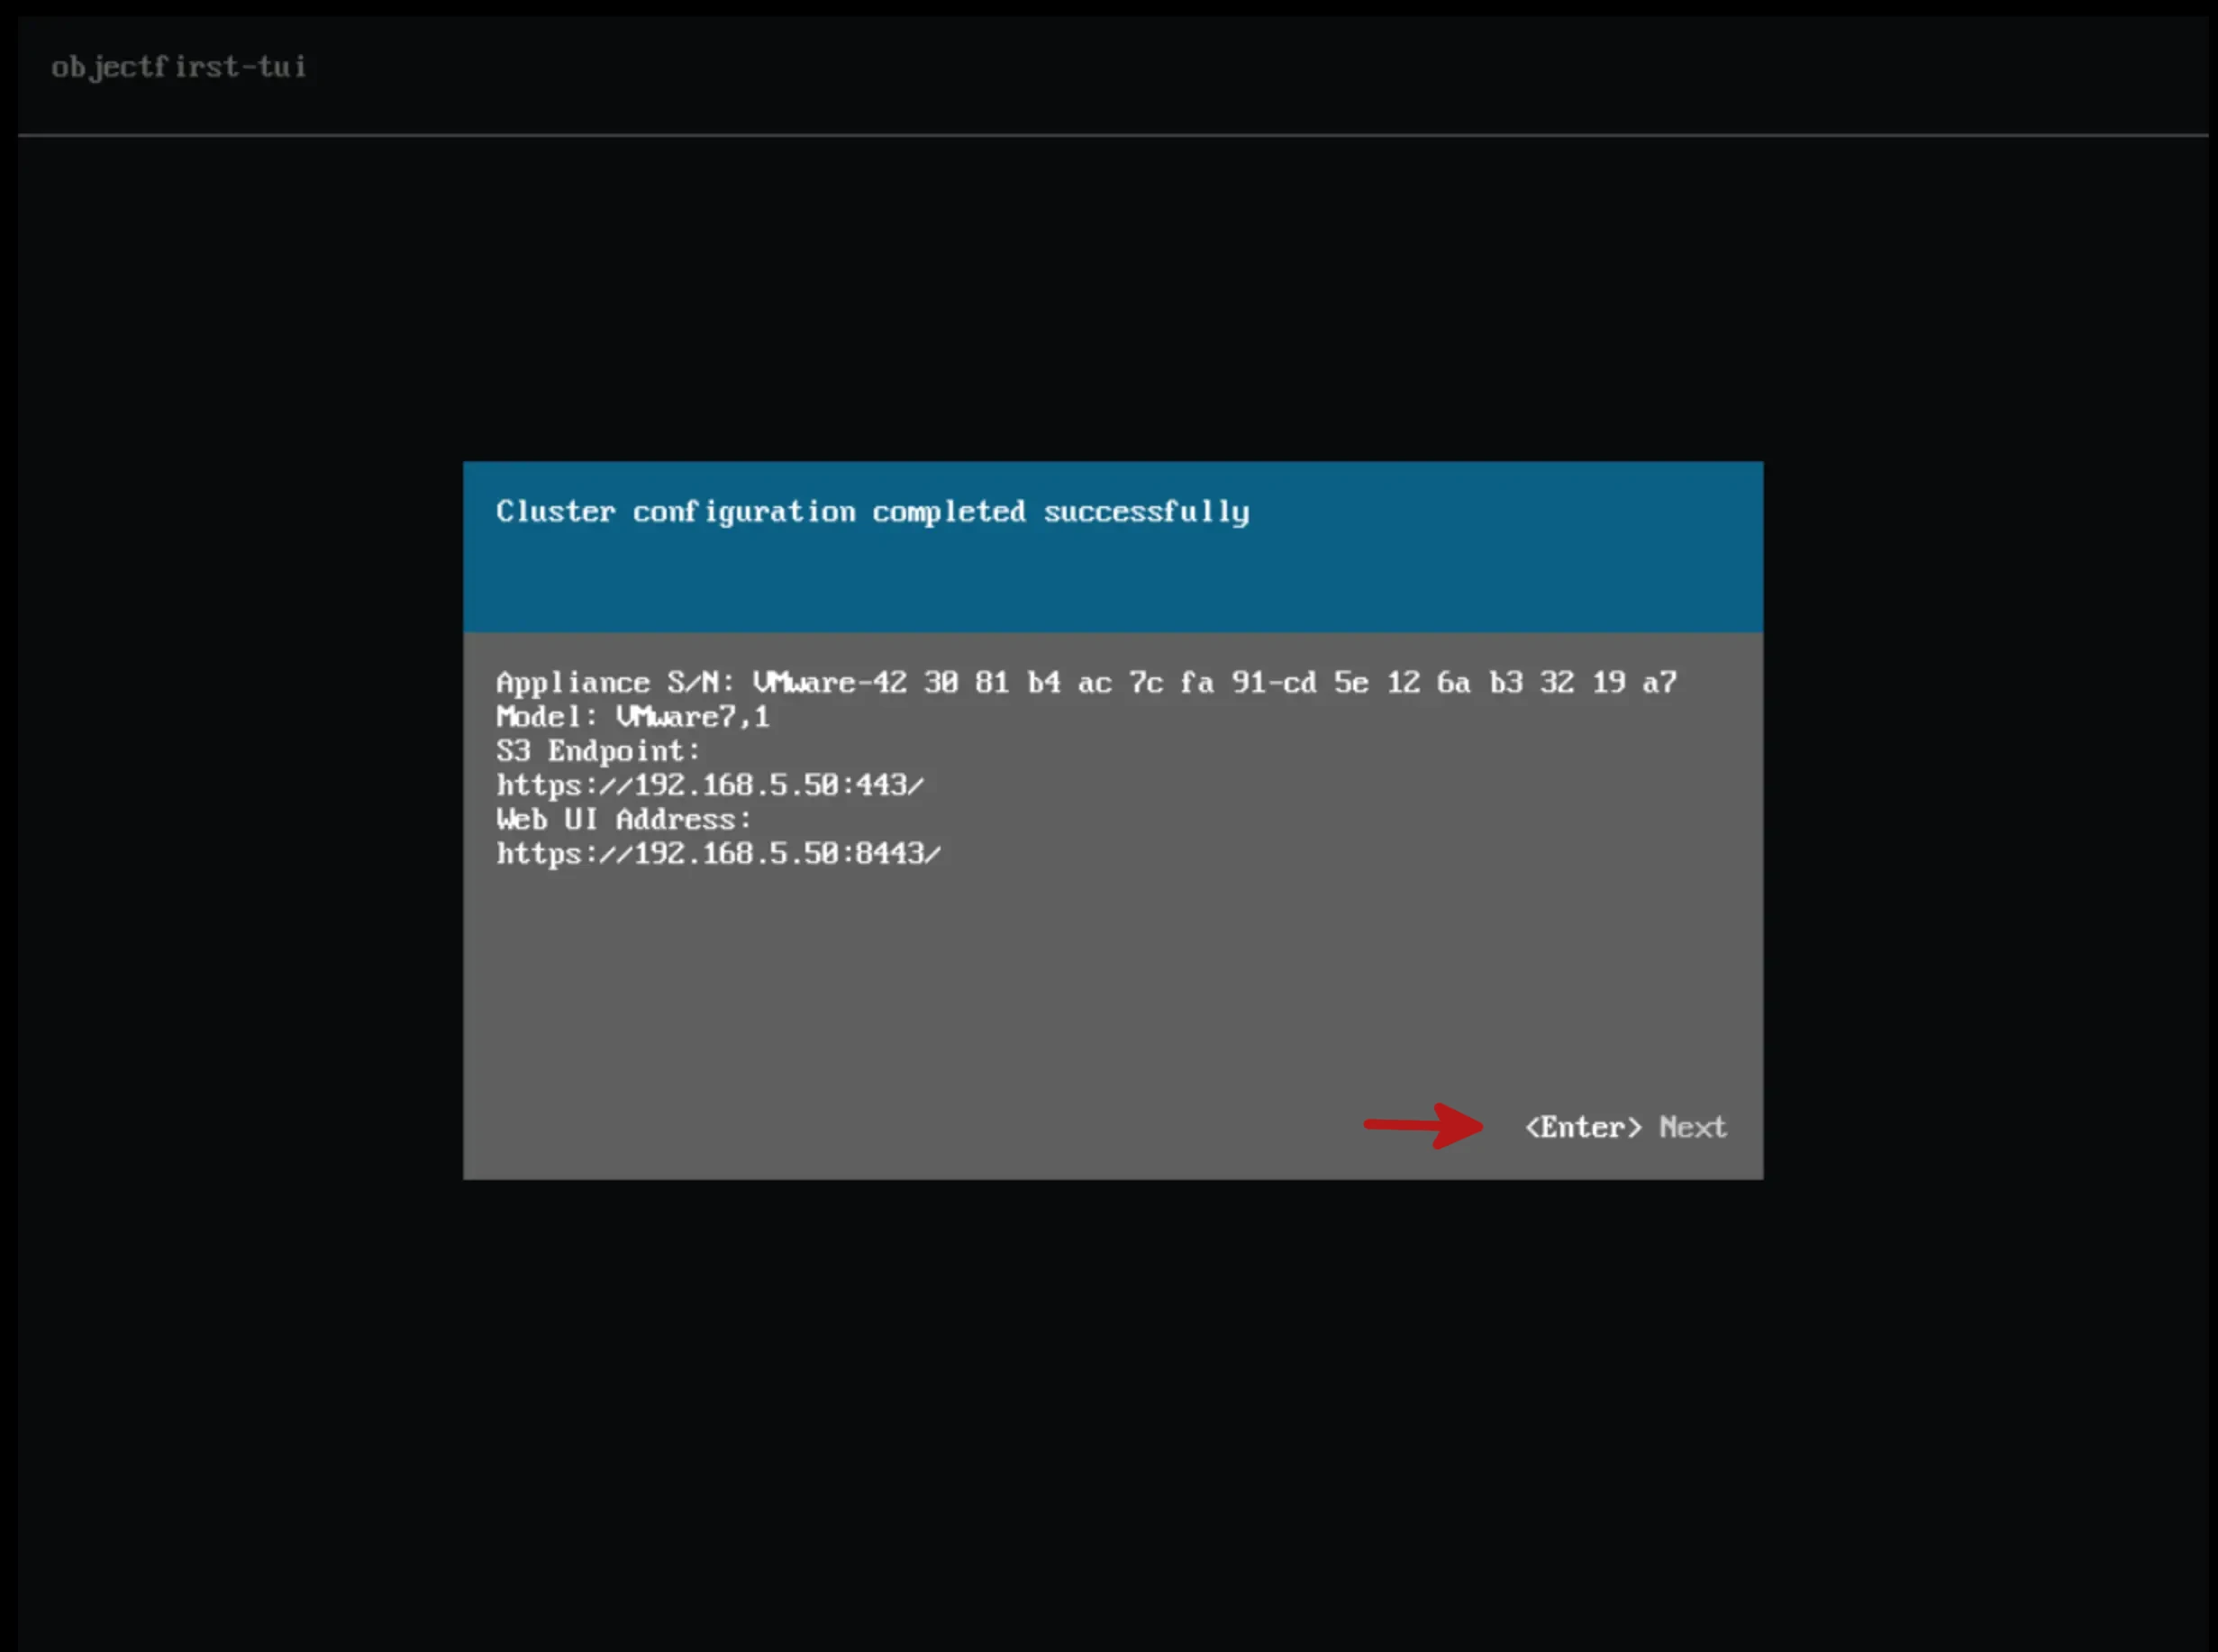
Luego de completar todos estos pasos al final el nuevo clúster será configurado con los parámetros que establecimos.
Finalmente, el clúster se creó con éxito! Yay.
En esta próxima pantalla te permite escoger si deseas habilitar la opción de Telemetría.
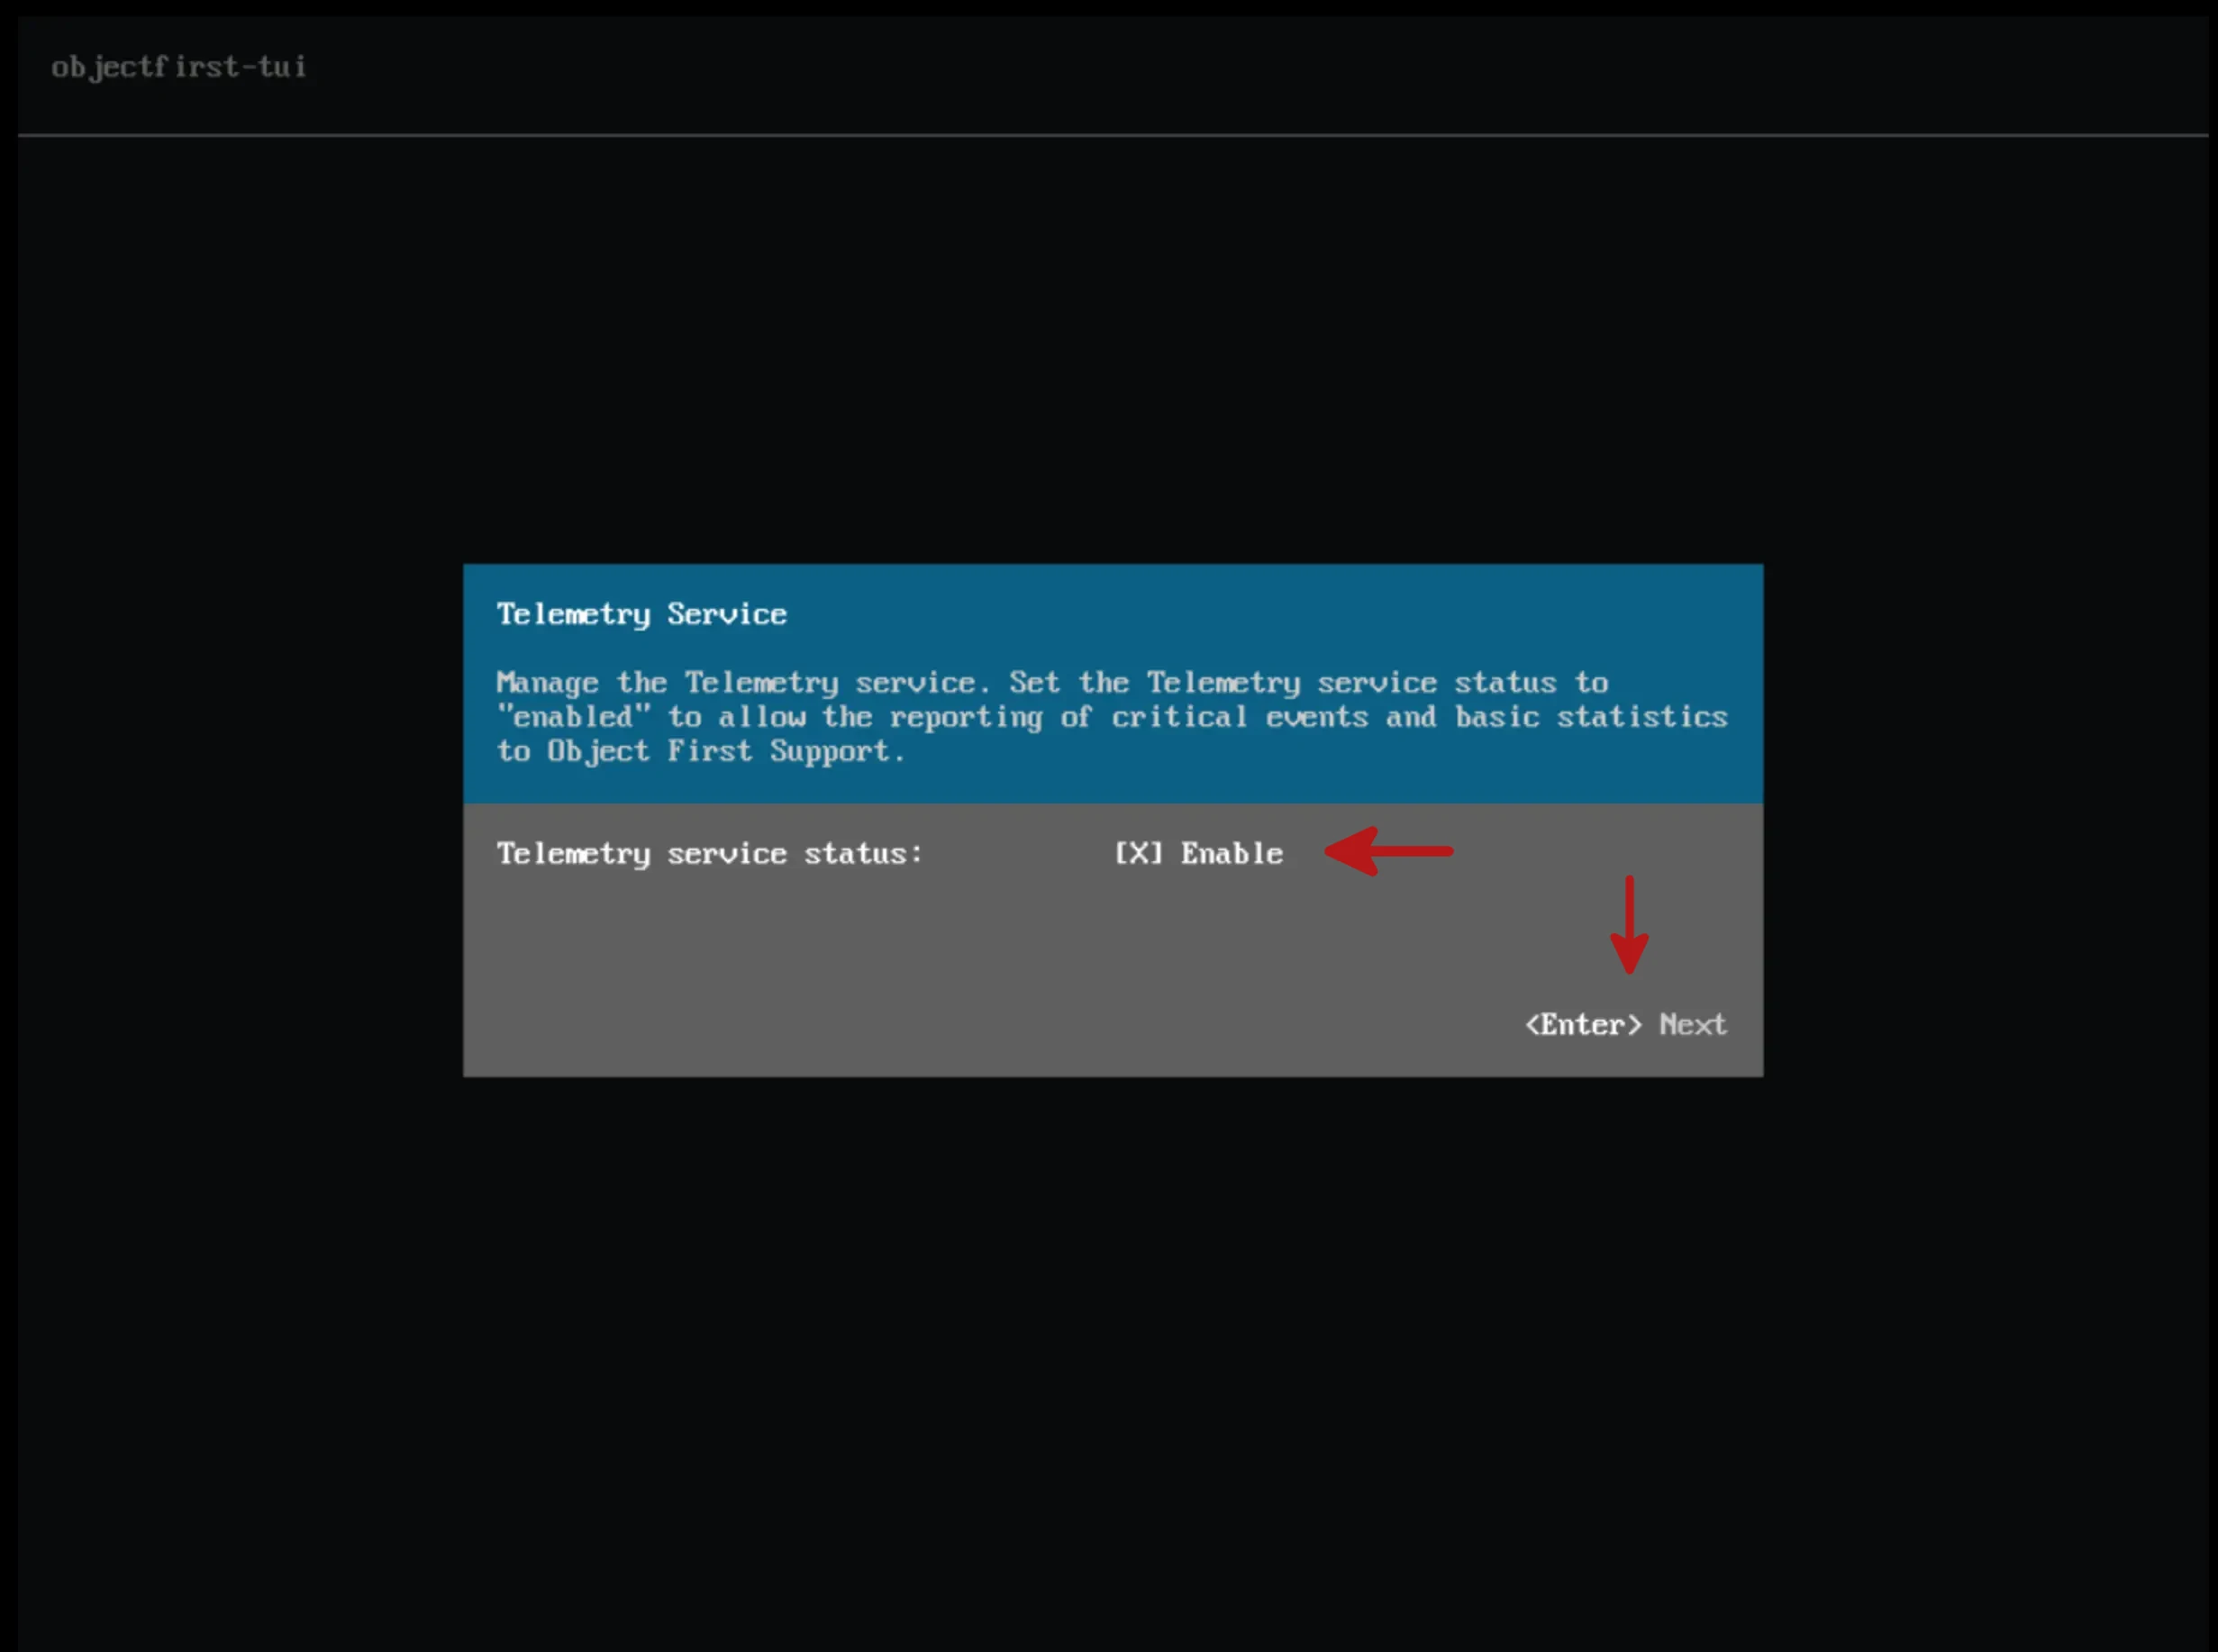
** Nota: Estos parámetros pueden ser configurados posteriormente a través del portal Web.
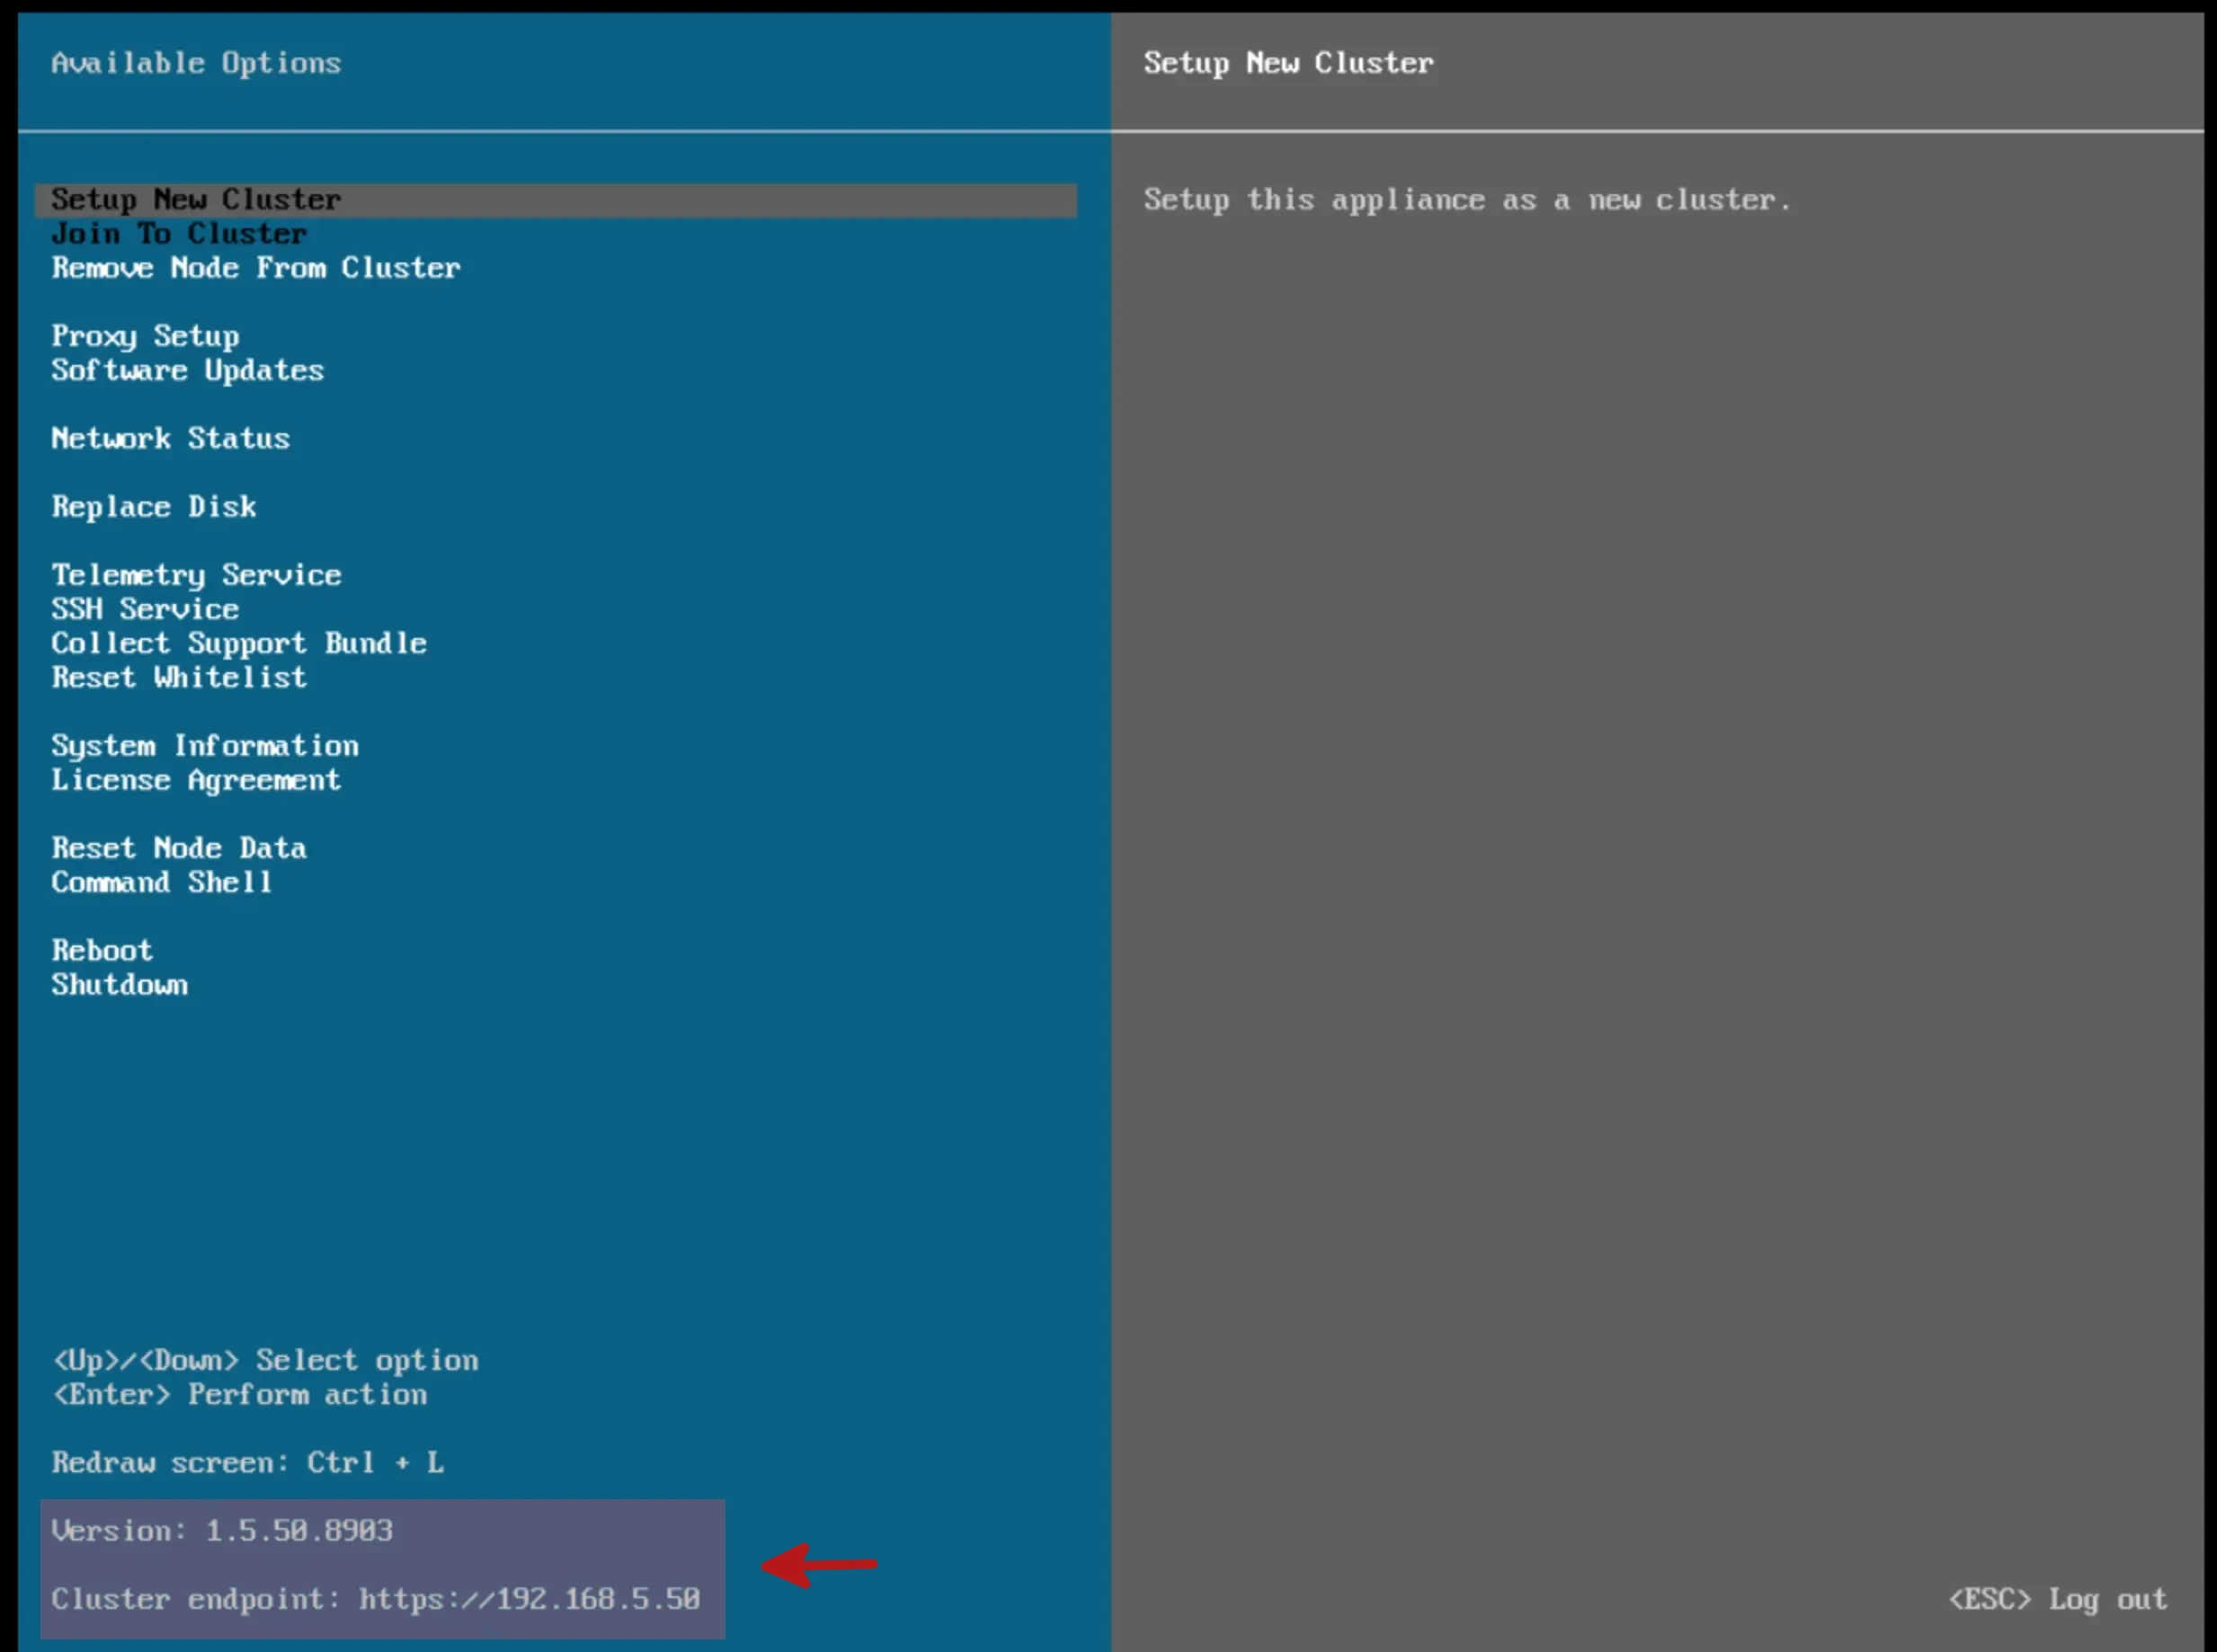
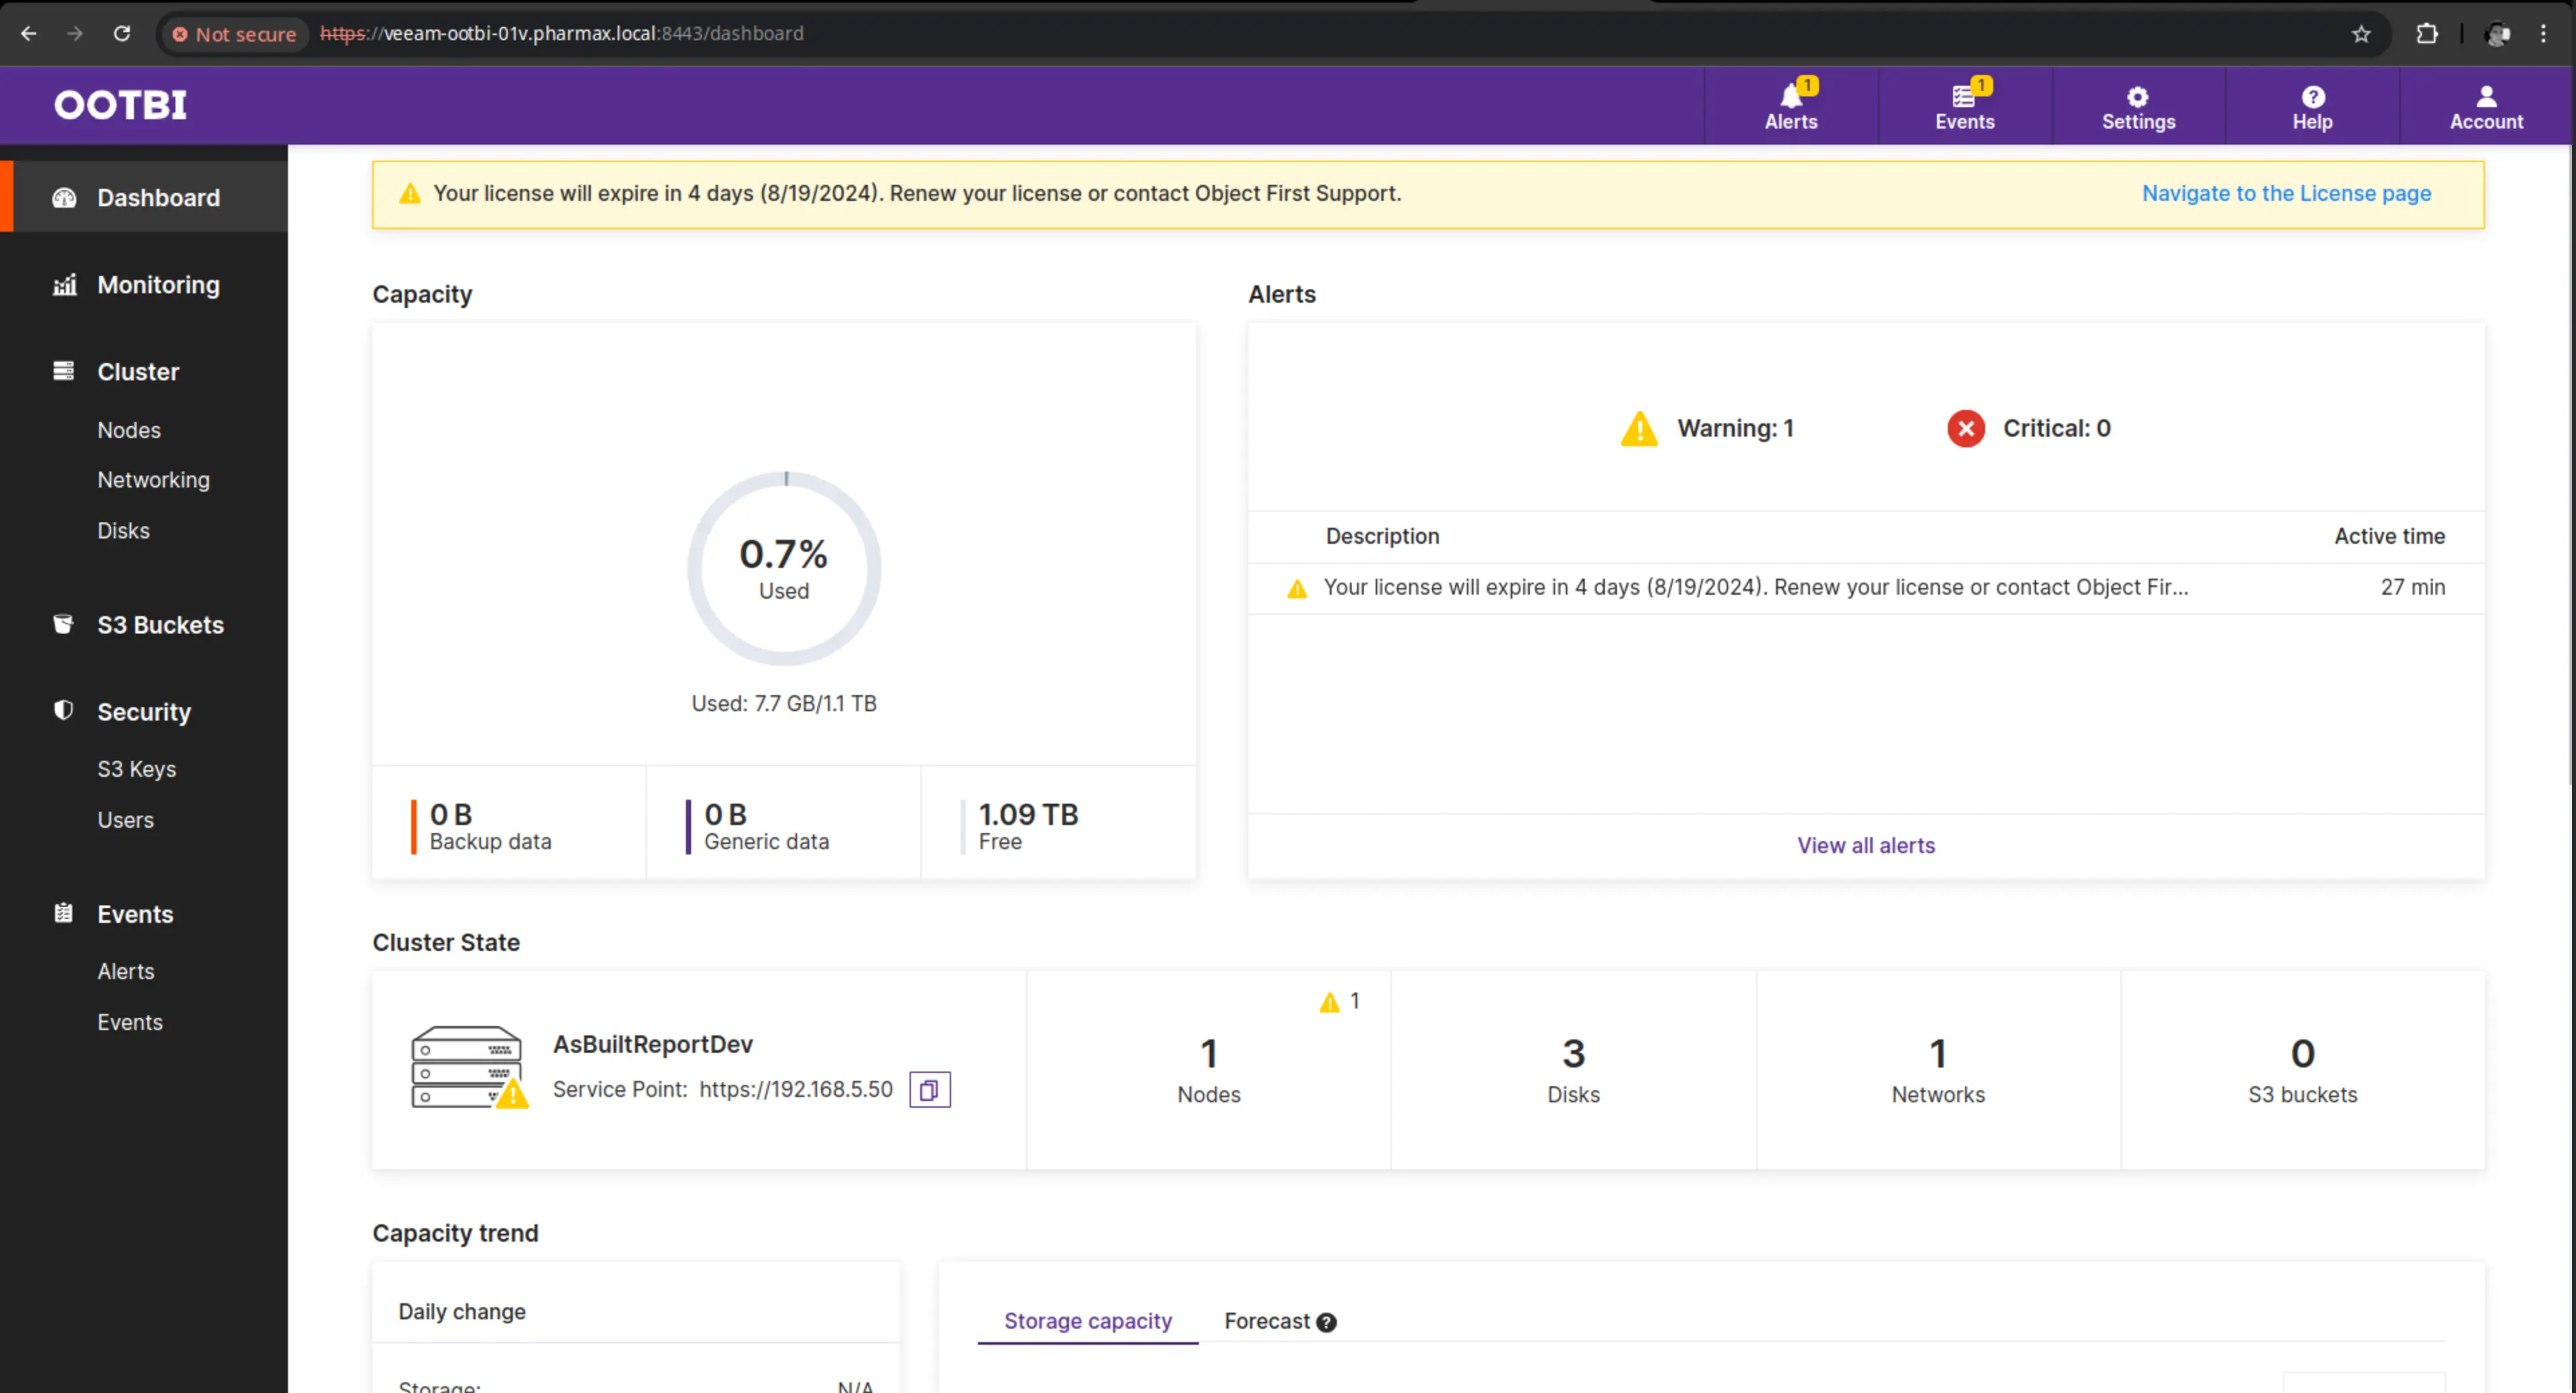
En esta pantalla podemos ver la versión y la dirección de IP de la VM. Con esta información podemos acceder el Portal Web de manejo de OOTBI.
Para finalizar les muestro como acceder el portal de Manejo de Object First OOTBI. Para acceder el portal es necesario utilizar el usuario objectfirst y la contraseña que establecimos en la configuración del clúster.
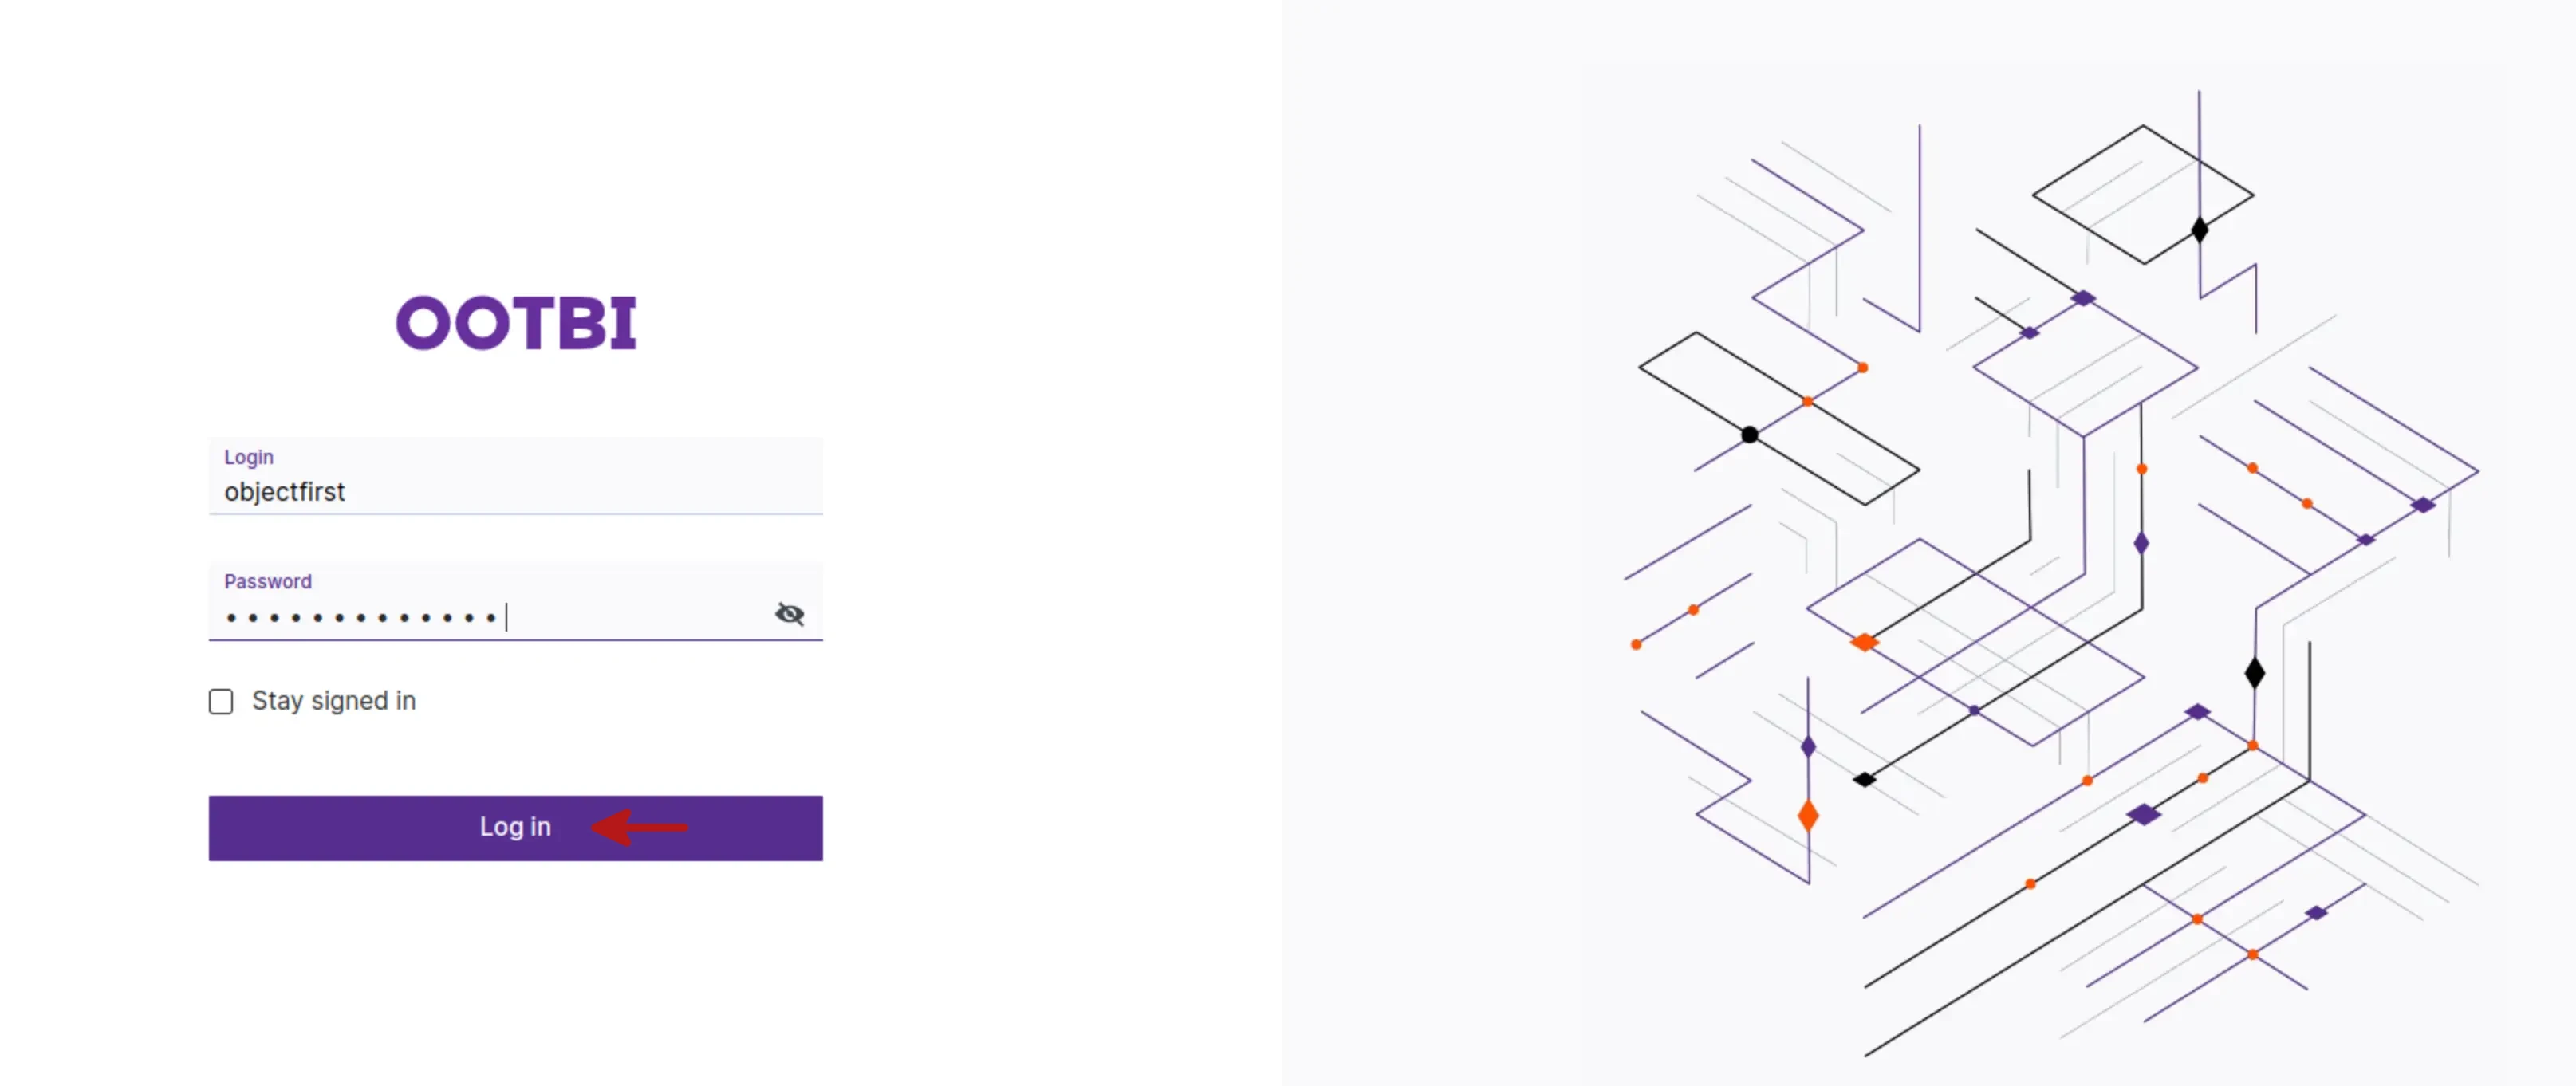
A continuación el portal de Manejo!
Resumen
En este laboratorio instalamos y configuramos el appliance virtual de Object First OOTBI que permite a los administradores de Veeam utilizar este dispositivo como repositorio tipo S3. Espero que este laboratorio les haya gustado. Si tienes dudas o alguna pregunta sobre este laboratorio, déjalo en los comentarios.
¡Hasta la Próxima!

